Leopard 1s


 03-29-2023, 08:06 AM
#52

Thread Starter

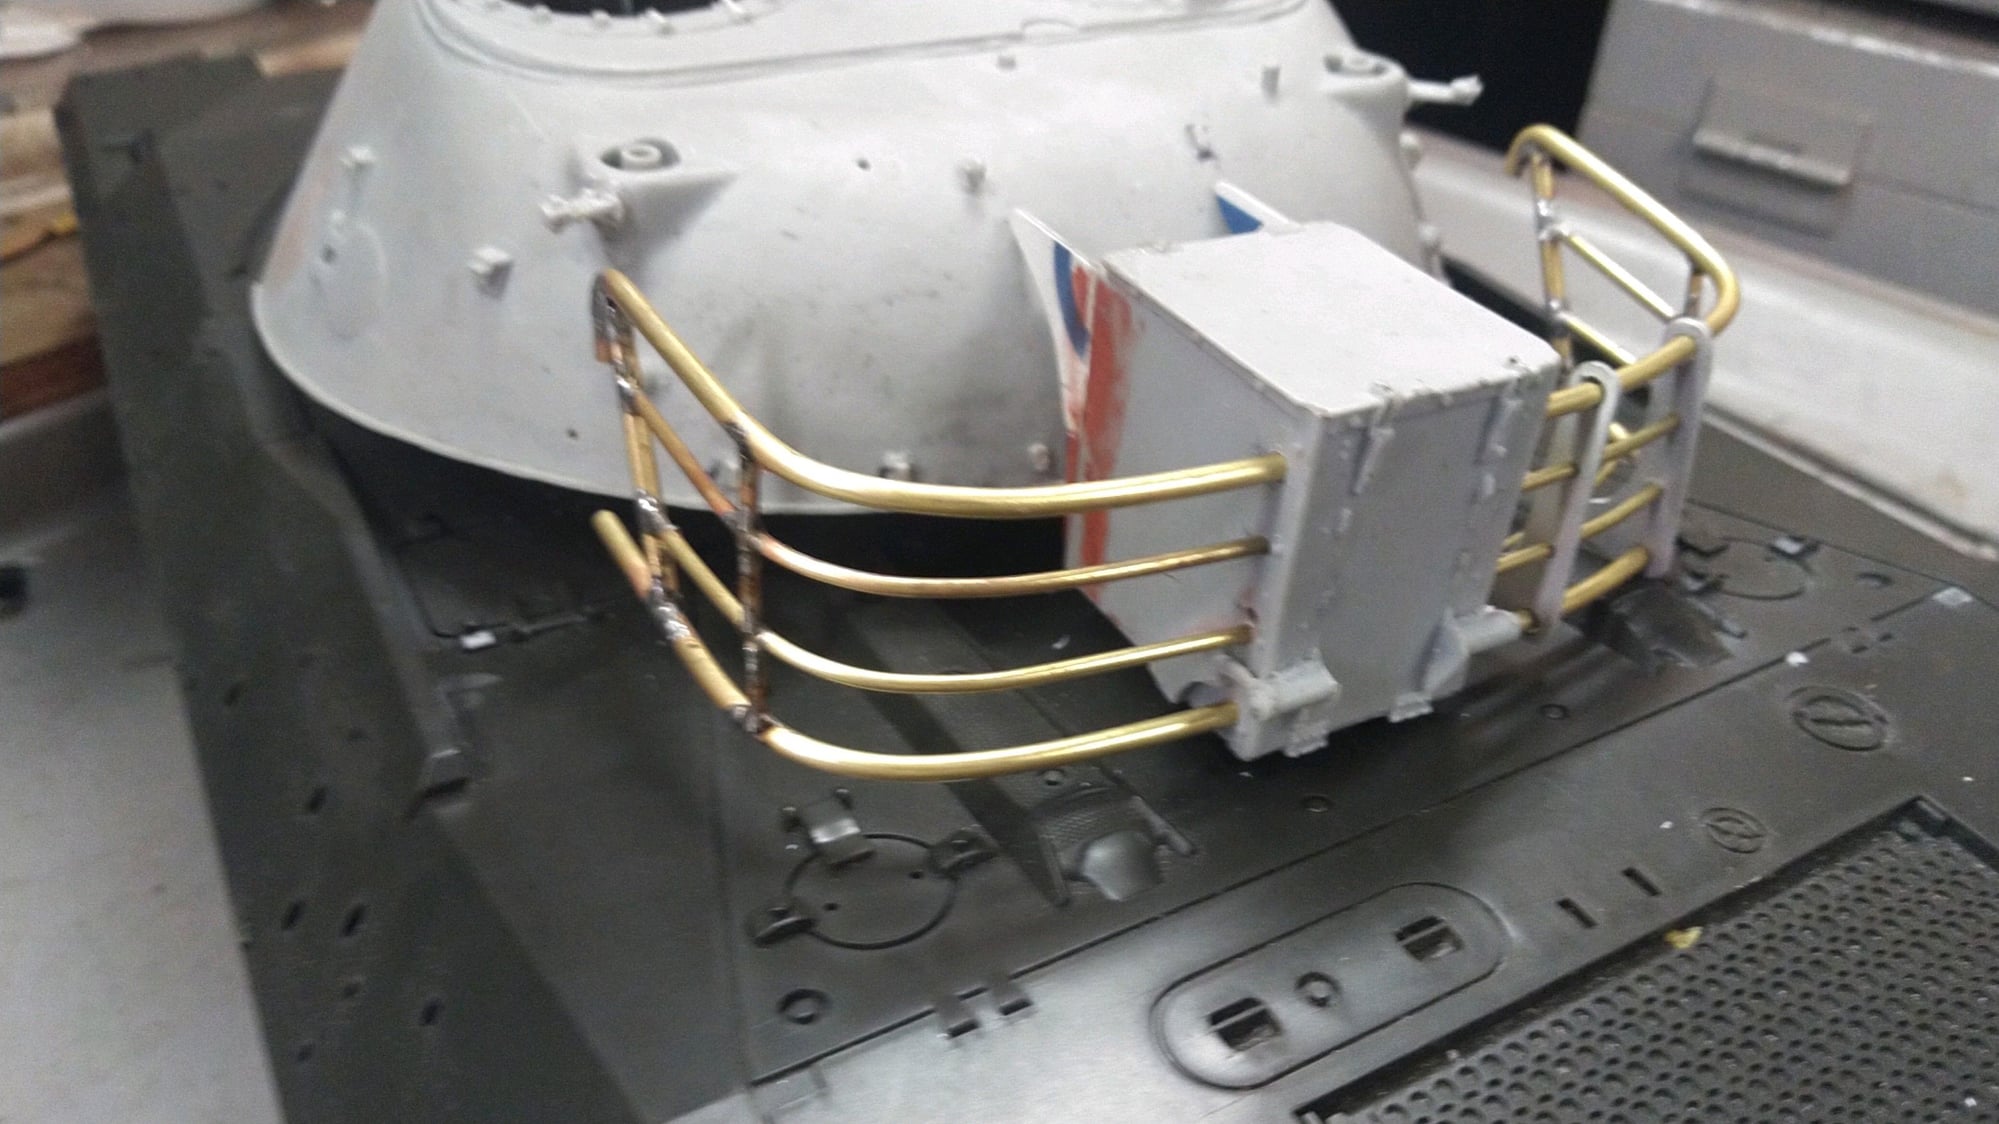
Nearly getting there with the basket assembly. I got this far and after a few burned fingers I was done lol.
I hate this kind of work. Like I said I tried to avoid building the basket this way but my desired model requires an open frame early basket and I just couldnt make the plastic cast one look nice after grinding the heck out of it so....
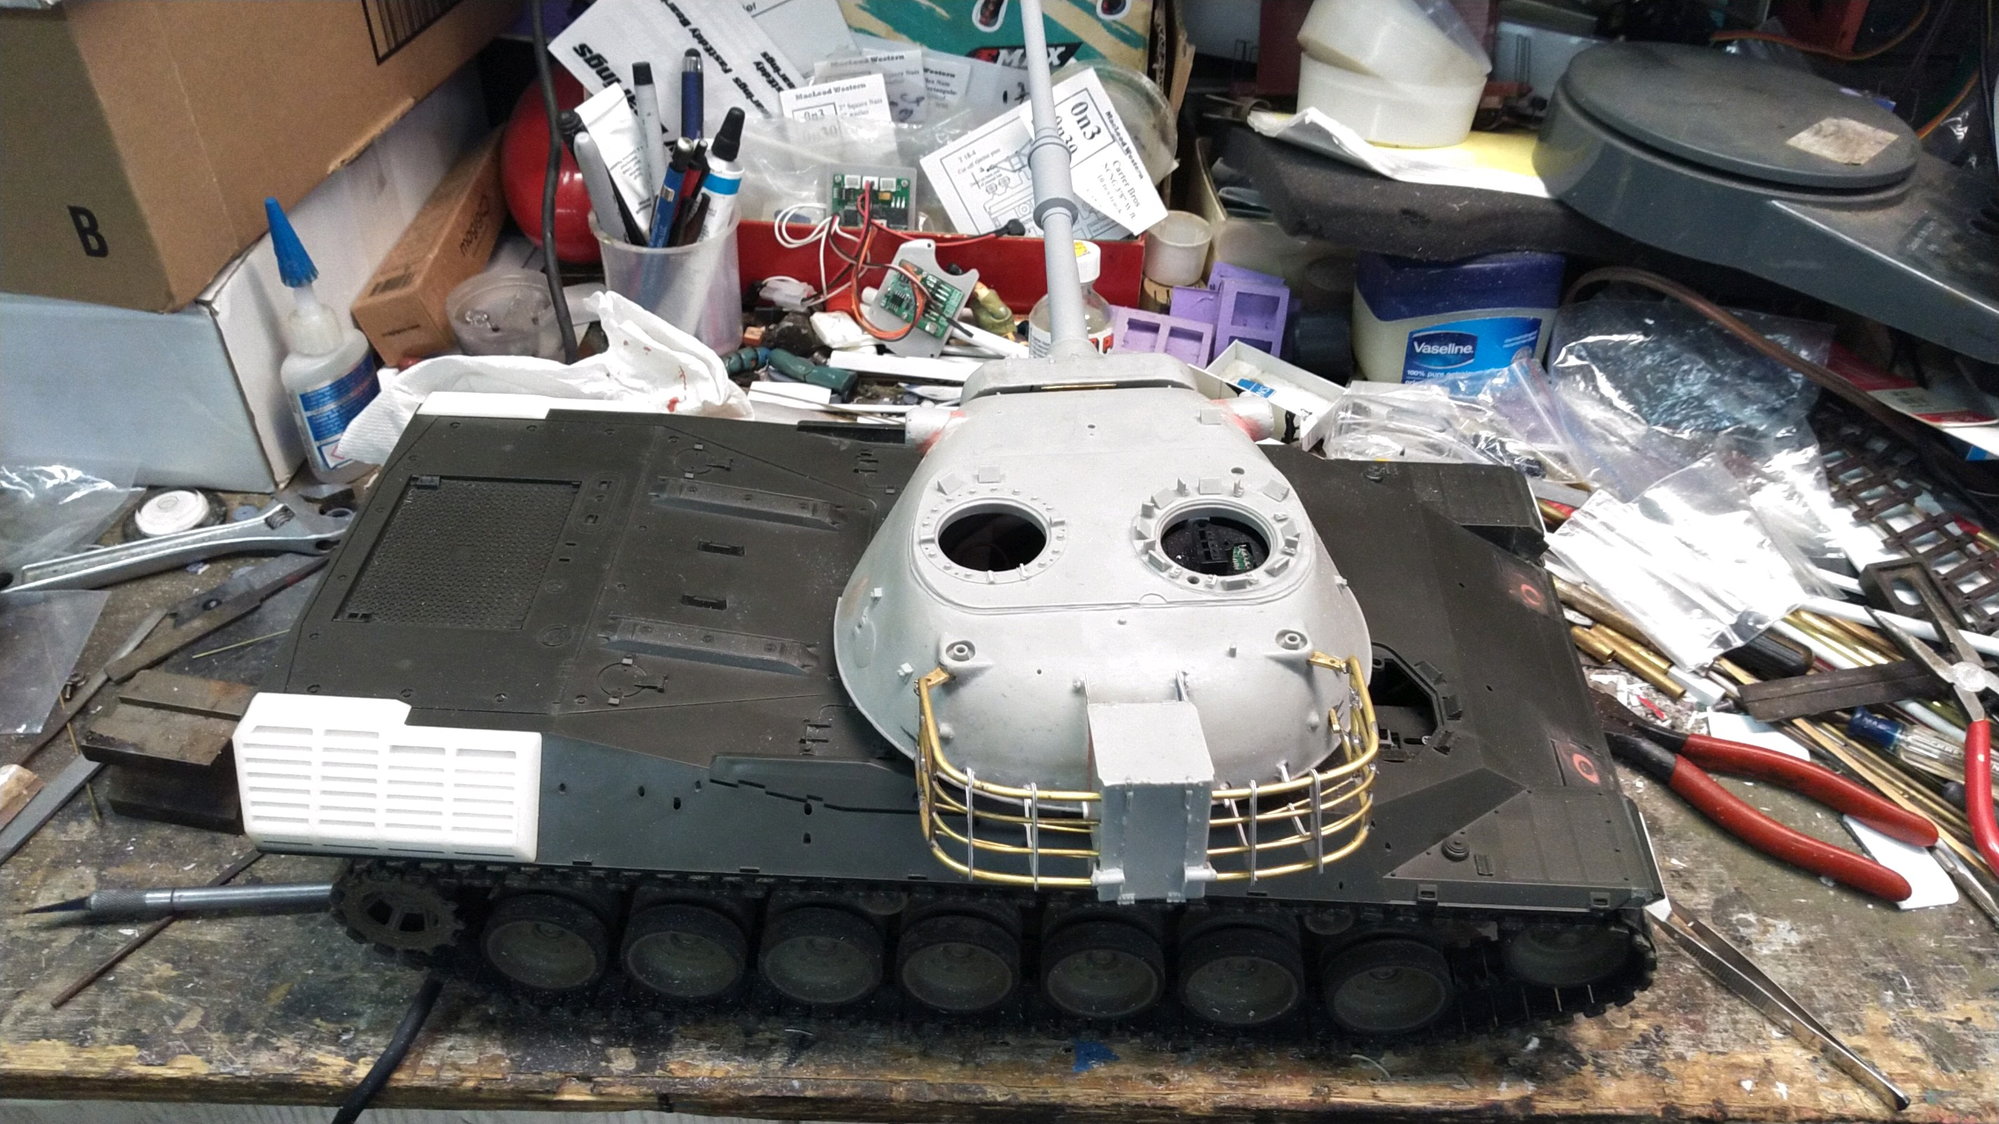
Once I get the basket actually finished I have to make brass mounting points. Im going to replace the plastic mounting point brackets with brass, so that will be lots of fun no doubt.
I hate this kind of work. Like I said I tried to avoid building the basket this way but my desired model requires an open frame early basket and I just couldnt make the plastic cast one look nice after grinding the heck out of it so....
Once I get the basket actually finished I have to make brass mounting points. Im going to replace the plastic mounting point brackets with brass, so that will be lots of fun no doubt.
The following users liked this post:
RiskyR (03-30-2023)
04-03-2023, 06:11 AM
#53
Thread Starter
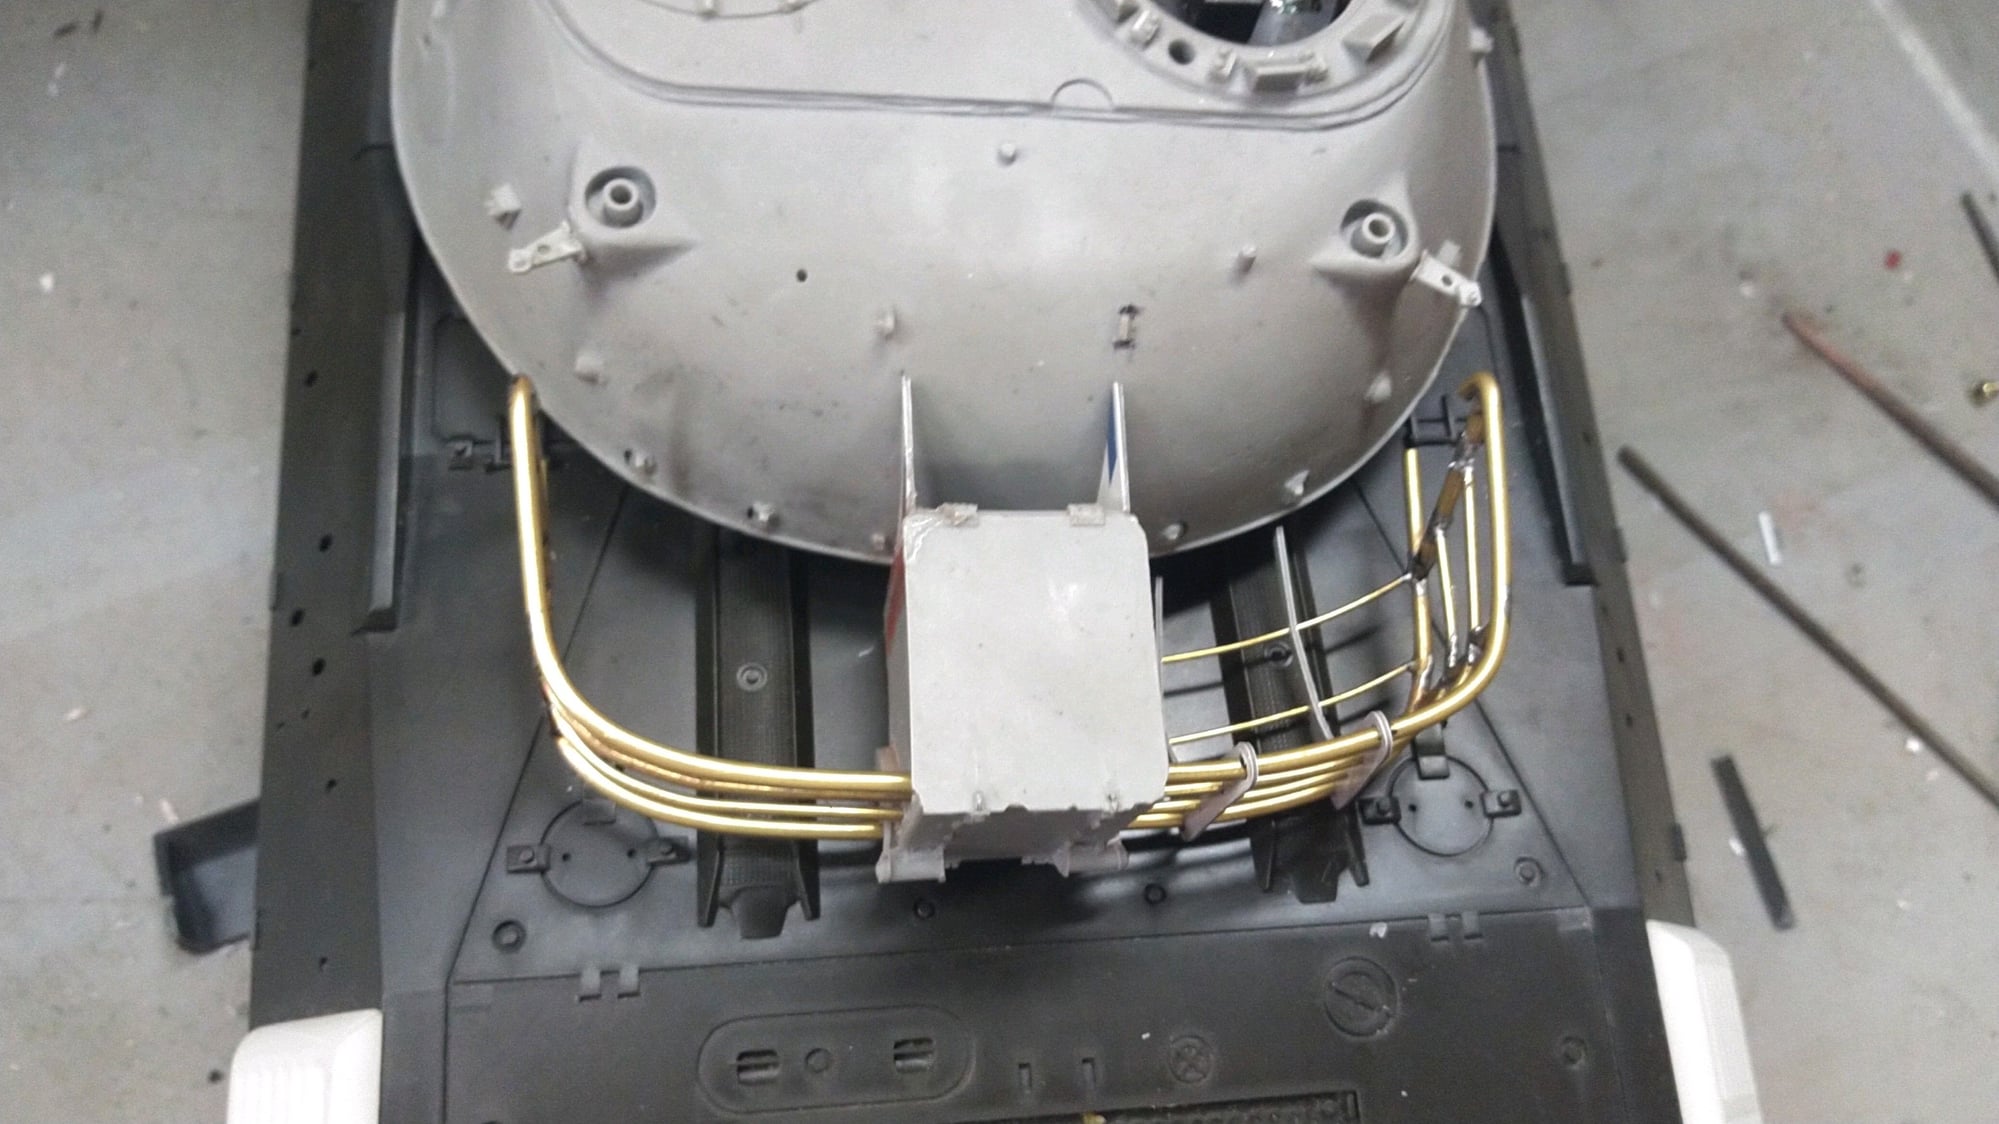
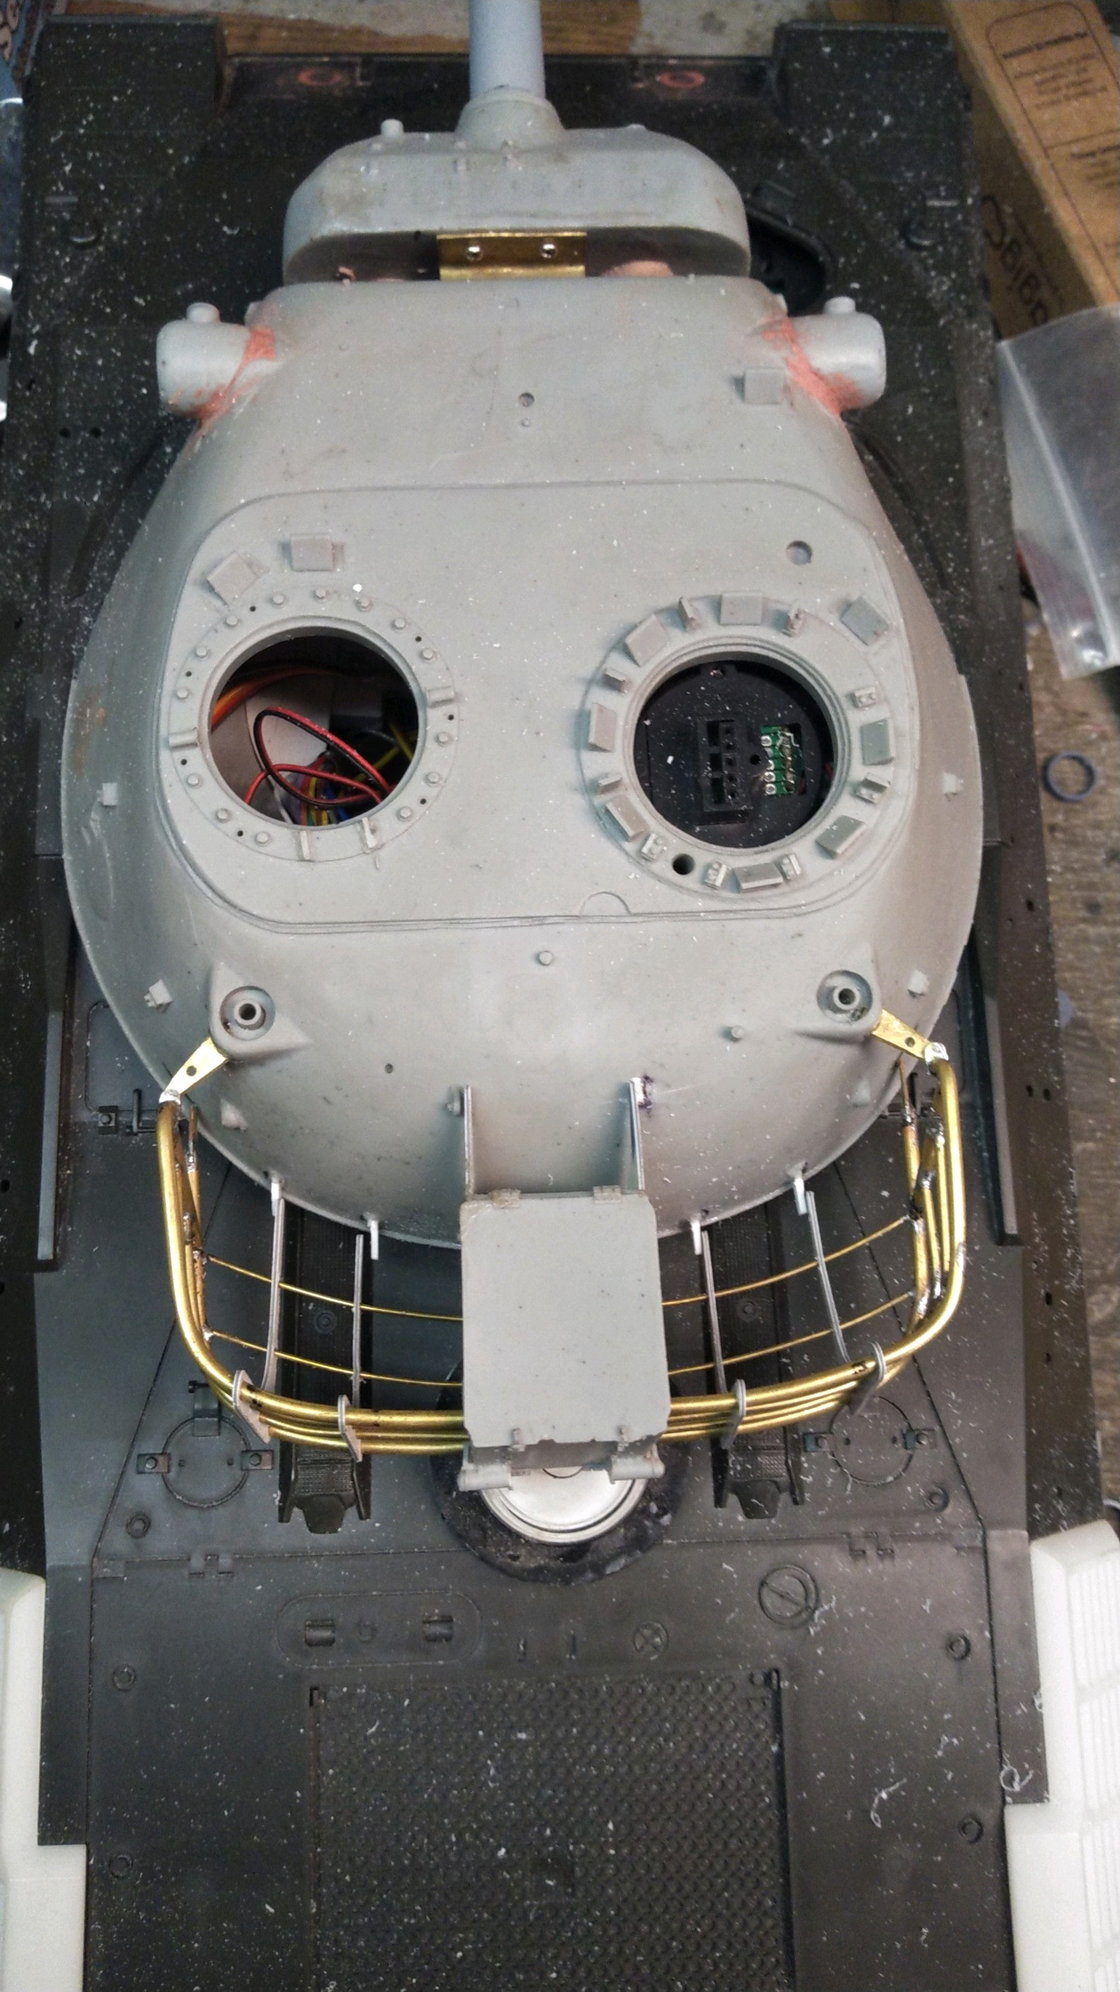
I have gotten the turret basket nearly completed and the top mounting brackets installed on the tank. I made brass brackets for strength rather than try to glue the basket to the urethane ones in the kit.
04-12-2023, 05:52 AM
#54
Thread Starter
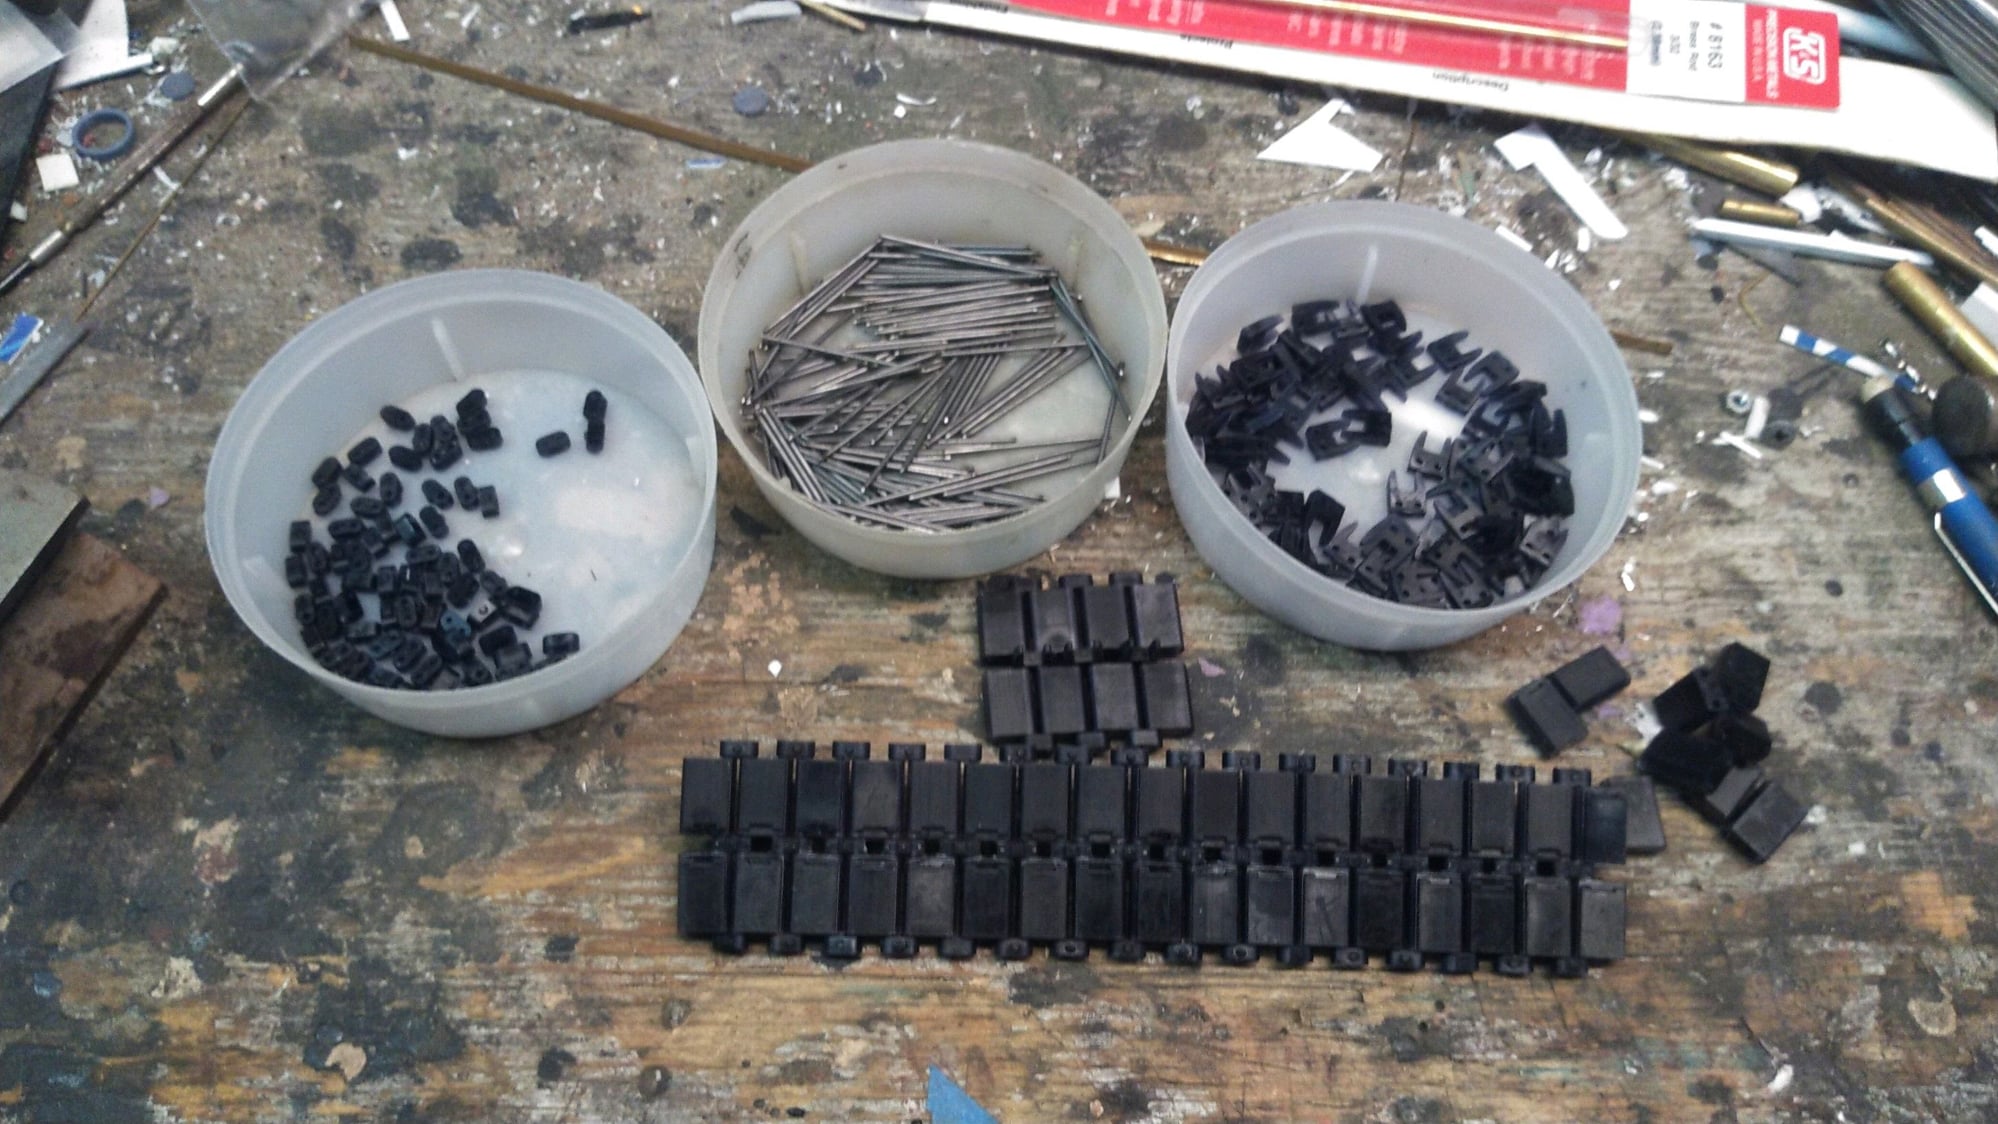
I got my new tamiya T84 track pad replacement set in from JVM3Dconcepts. Wow this stuff is amazing. I found him on Instagram. Hes making all kind of costuming parts and stuff and model and gaming and tank stuff too.
I have had 3d line printed black pads for about two years now on a sherman from some mates in the UK but it required running an early clutch drive sprocket because of the pad geometry.
These new T84 pads that JVM3dconcepts is making are black engineering resin. They are perfect fit for tamiya track and come with pershing style center guides as well as end connectors if you want them. The ECs are one time use according to the developer. If you use loose a tamiya metal one you can precisely tap on a JVM3dconcepts one and it will stay as long as you never take it off. If you do take it off it will never stay on again even with glue. Its something to do with how the EC holes stretch to grip the pin and retain it but it only works once.
I did not need the ECs in my kit as I re crimped all my metal ones after I broke down my tamiya pershing track. I made a vice grip a while back with a tab on the jaws that mimics the compressed part of the tamiya metal EC to recrimp them. Then tap them on with a hammer. If you dont recrimp tamiya metal ones they will fall off and get lost when you drive.
The following users liked this post:
Koenigstiger (04-12-2023)
04-12-2023, 11:14 AM
#55
I got my new tamiya T84 track pad replacement set in from JVM3Dconcepts. Wow this stuff is amazing. I found him on Instagram. Hes making all kind of costuming parts and stuff and model and gaming and tank stuff too.
I have had 3d line printed black pads for about two years now on a sherman from some mates in the UK but it required running an early clutch drive sprocket because of the pad geometry.
These new T84 pads that JVM3dconcepts is making are black engineering resin. They are perfect fit for tamiya track and come with pershing style center guides as well as end connectors if you want them. The ECs are one time use according to the developer. If you use loose a tamiya metal one you can precisely tap on a JVM3dconcepts one and it will stay as long as you never take it off. If you do take it off it will never stay on again even with glue. Its something to do with how the EC holes stretch to grip the pin and retain it but it only works once.
I did not need the ECs in my kit as I re crimped all my metal ones after I broke down my tamiya pershing track. I made a vice grip a while back with a tab on the jaws that mimics the compressed part of the tamiya metal EC to recrimp them. Then tap them on with a hammer. If you dont recrimp tamiya metal ones they will fall off and get lost when you drive.
I have had 3d line printed black pads for about two years now on a sherman from some mates in the UK but it required running an early clutch drive sprocket because of the pad geometry.
These new T84 pads that JVM3dconcepts is making are black engineering resin. They are perfect fit for tamiya track and come with pershing style center guides as well as end connectors if you want them. The ECs are one time use according to the developer. If you use loose a tamiya metal one you can precisely tap on a JVM3dconcepts one and it will stay as long as you never take it off. If you do take it off it will never stay on again even with glue. Its something to do with how the EC holes stretch to grip the pin and retain it but it only works once.
I did not need the ECs in my kit as I re crimped all my metal ones after I broke down my tamiya pershing track. I made a vice grip a while back with a tab on the jaws that mimics the compressed part of the tamiya metal EC to recrimp them. Then tap them on with a hammer. If you dont recrimp tamiya metal ones they will fall off and get lost when you drive.
04-13-2023, 08:09 AM
#56
Junior Member
Join Date: Mar 2023
Posts: 8
Likes: 0
Received 0 Likes
on
0 Posts
04-14-2023, 06:25 AM
#57
Thread Starter
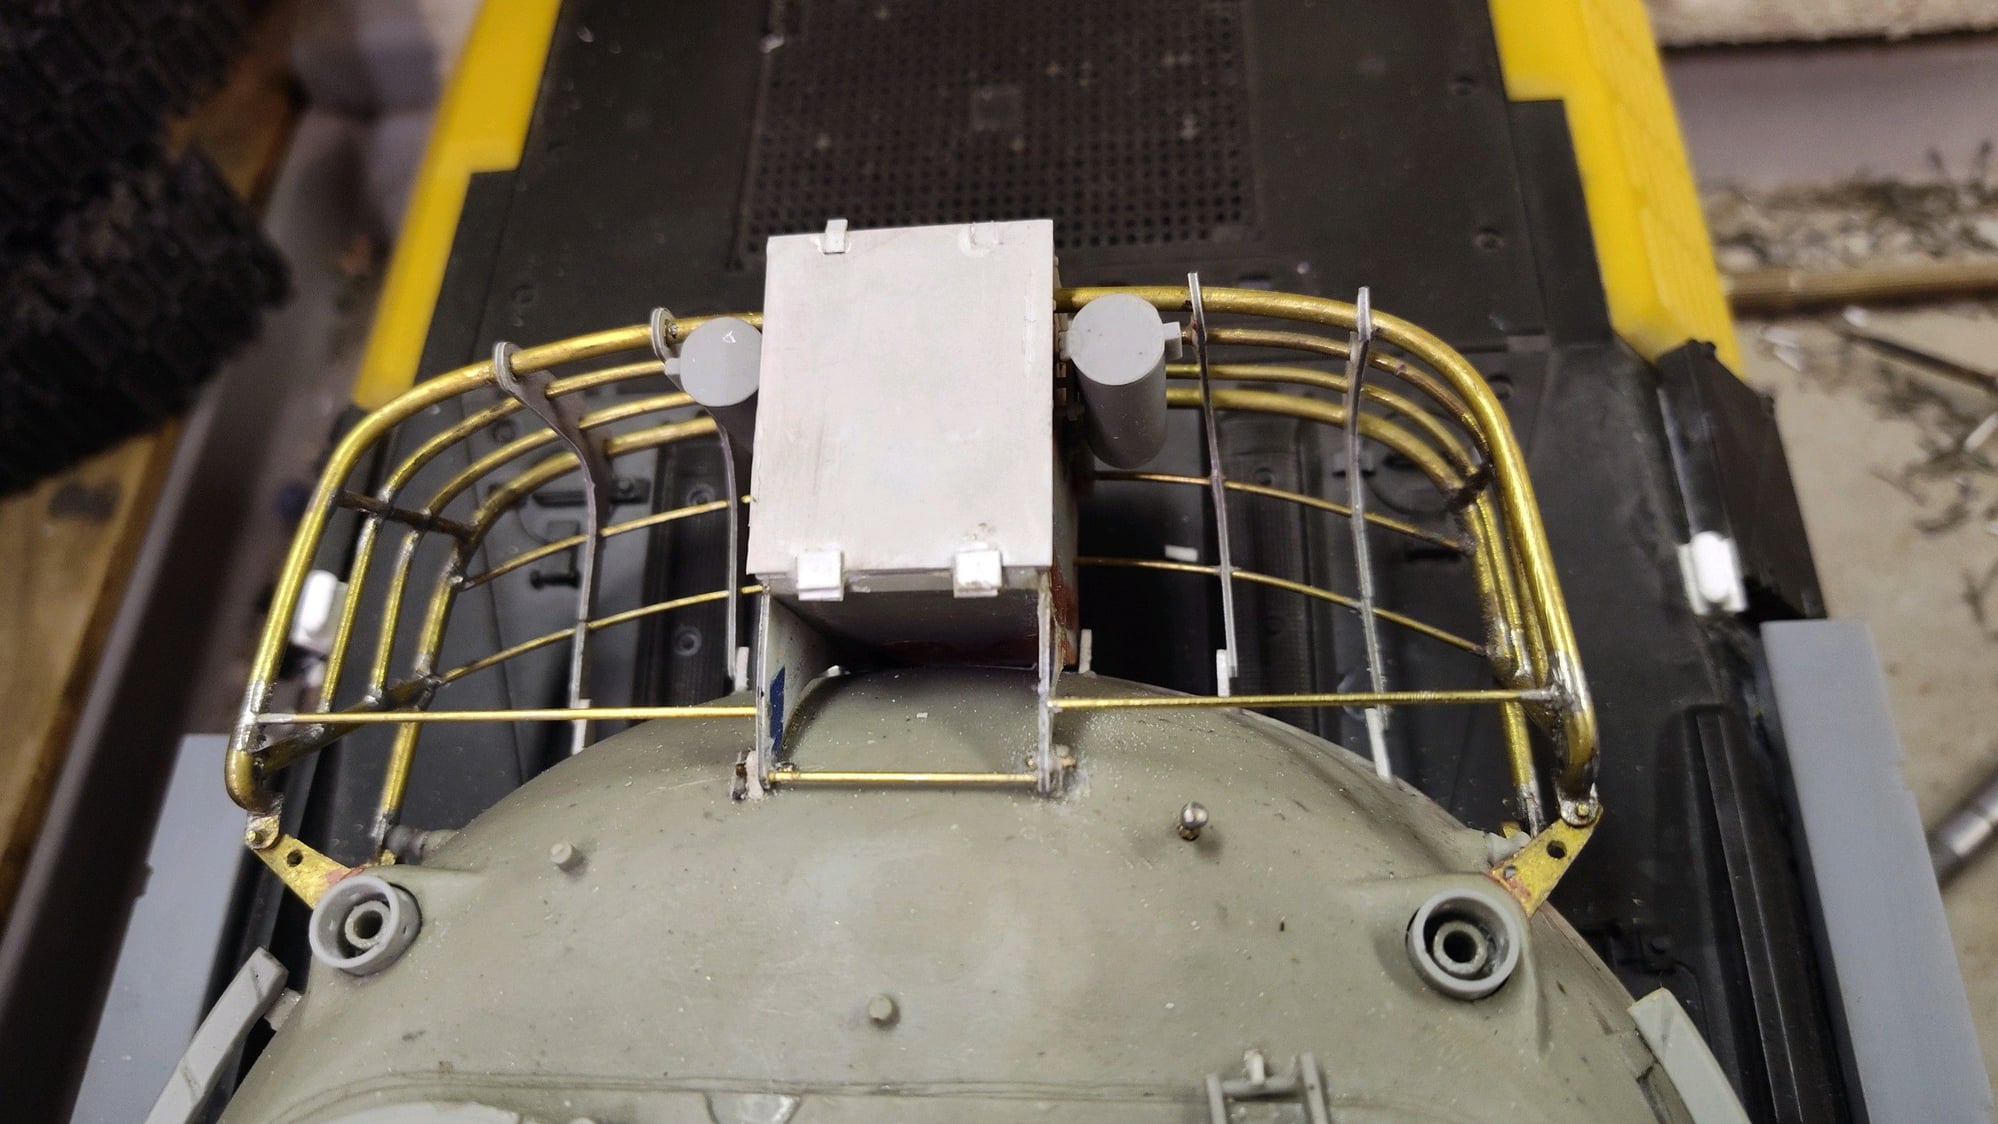
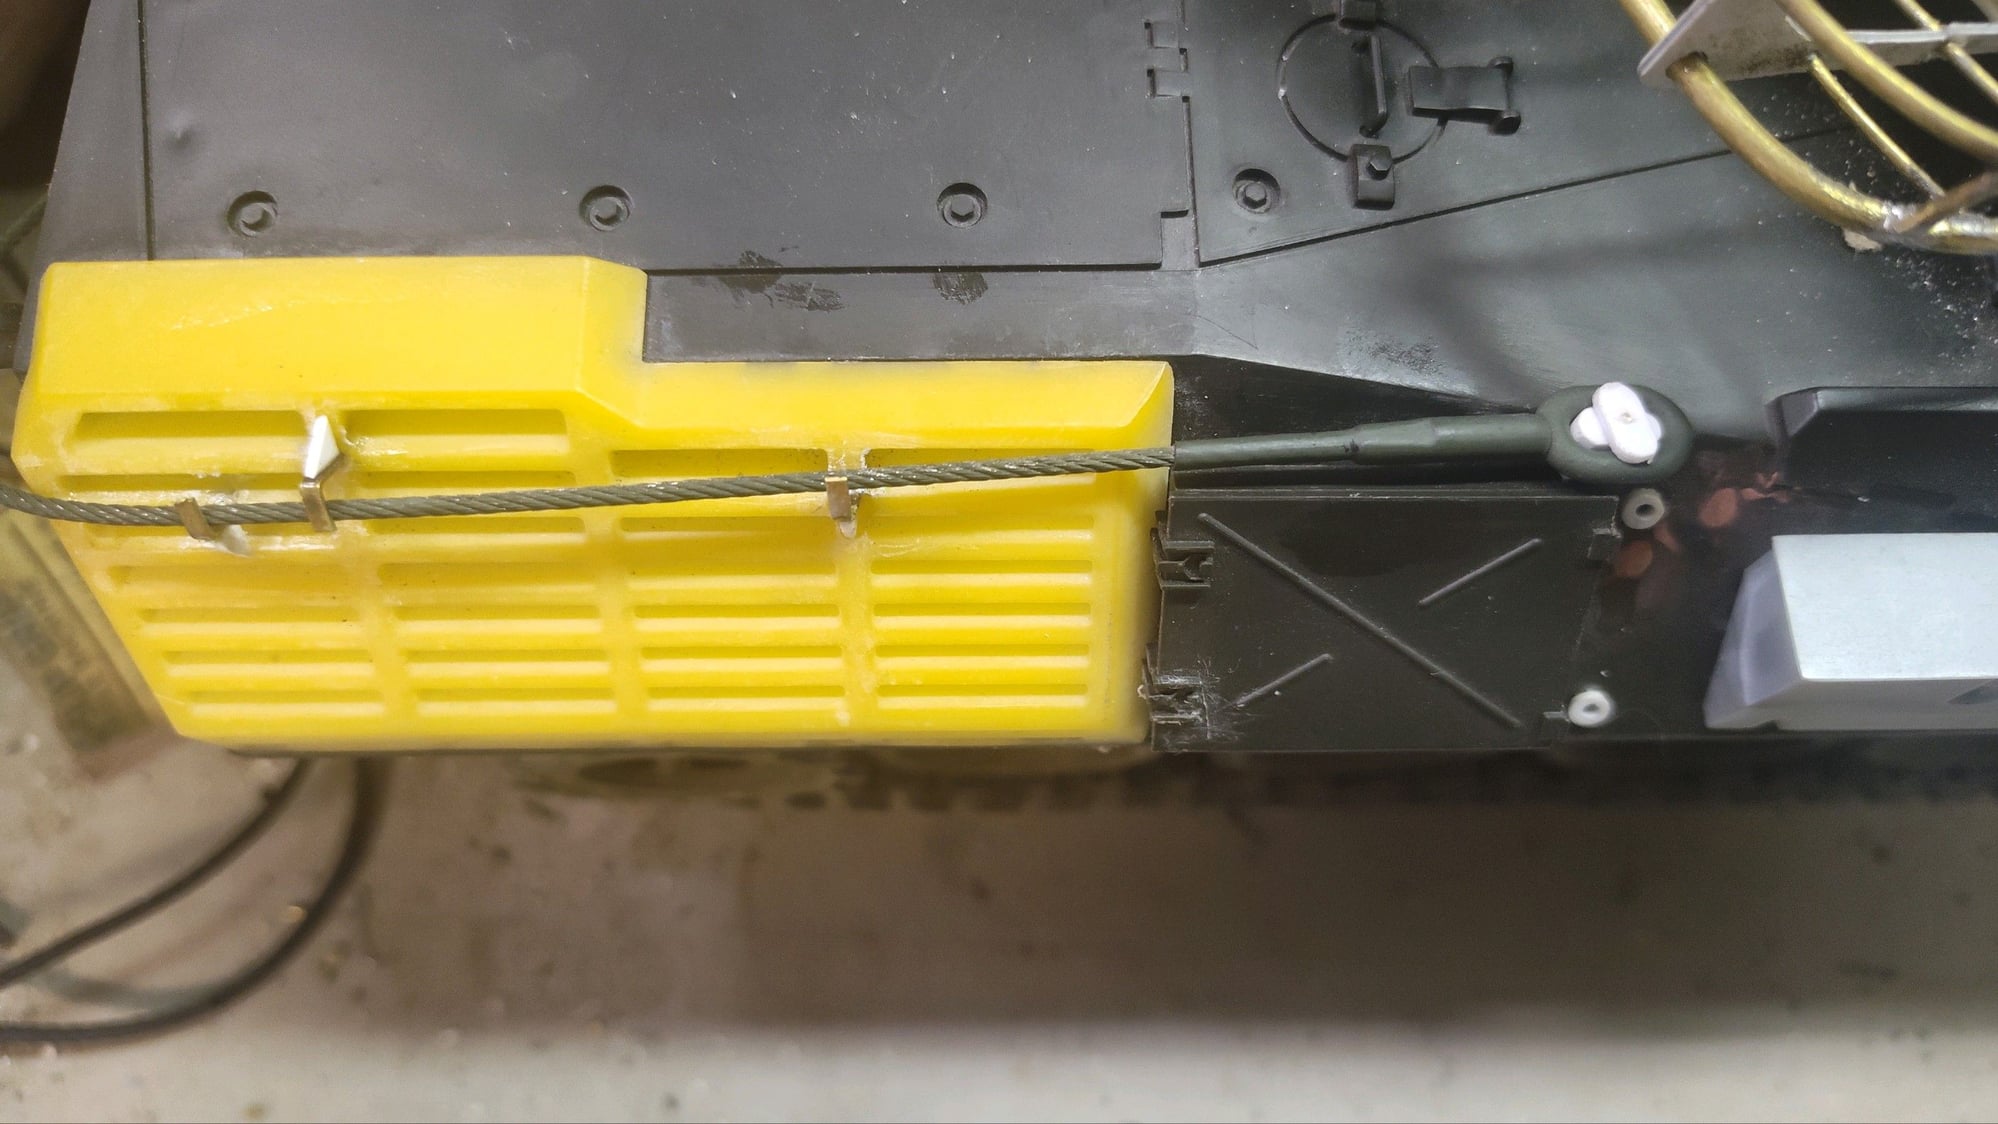
I have finally gotten the mounts made for the bustle basket. What project this has been to build up.
Now it is suspended from its mounts, pinned in place. I still need to remove it and clean up all the solder joints with a file and wire brush and dress it before installing it in place.
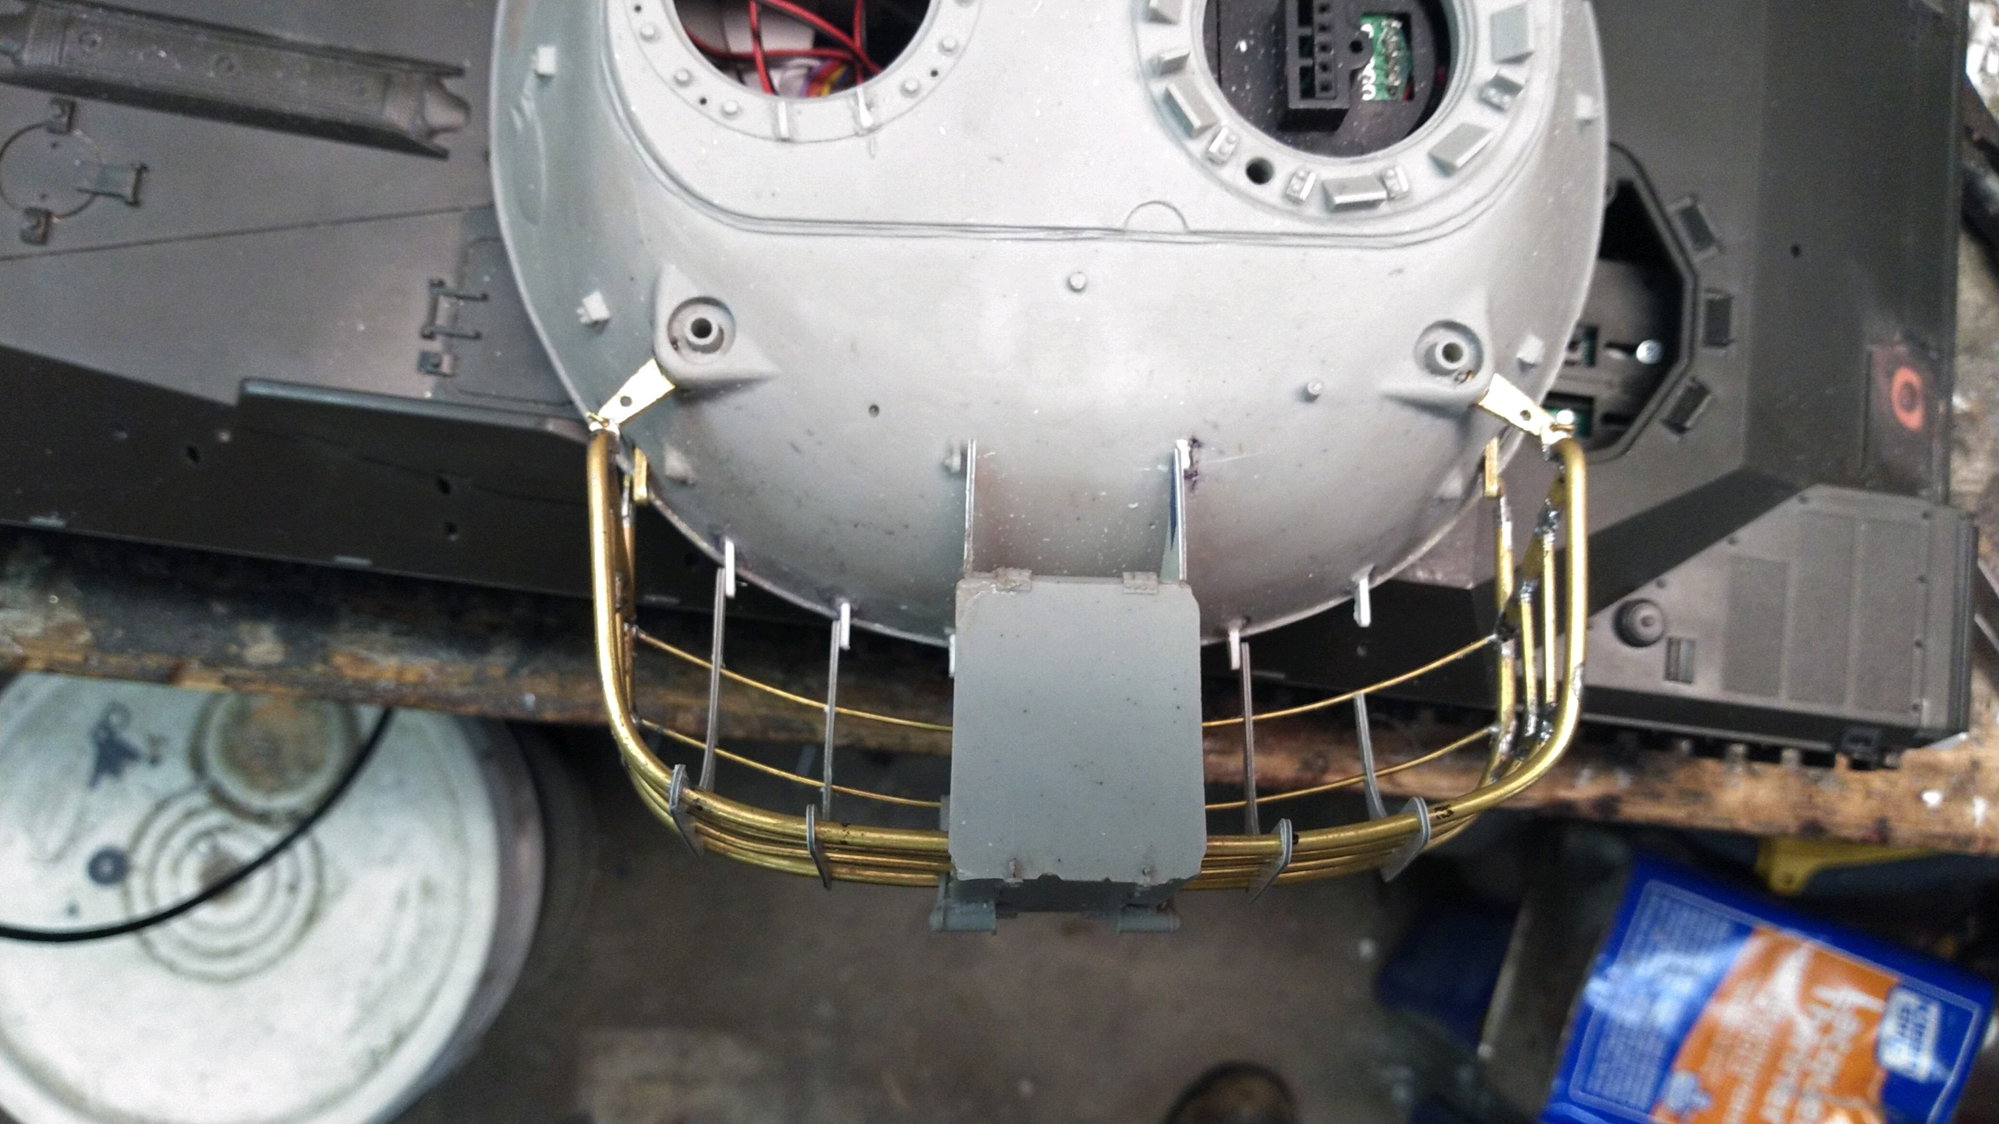
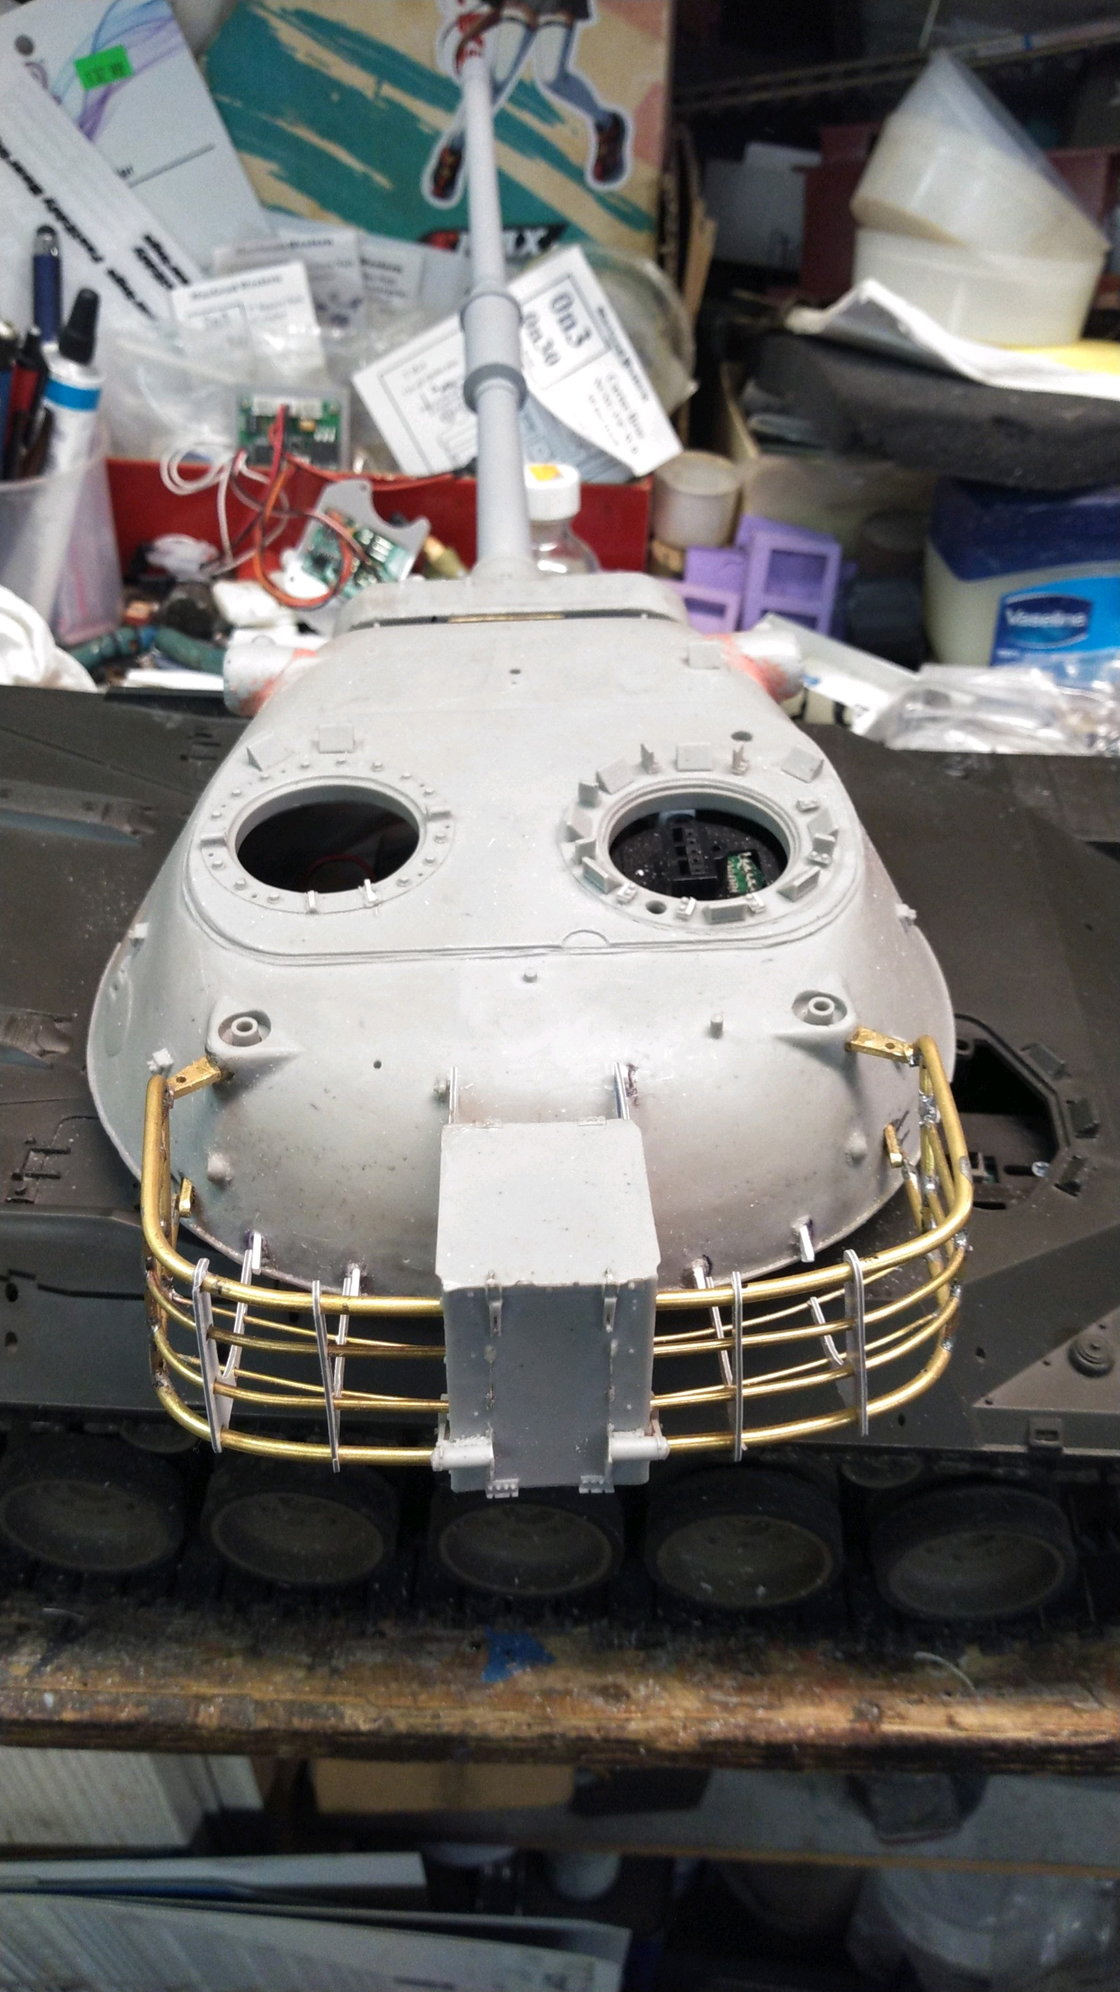
Now it is suspended from its mounts, pinned in place. I still need to remove it and clean up all the solder joints with a file and wire brush and dress it before installing it in place.
04-18-2023, 02:28 PM
#58
Wow, nice builds so far Rich!!! Turret basket redo looks great.
05-03-2023, 09:38 PM
#59
Thread Starter
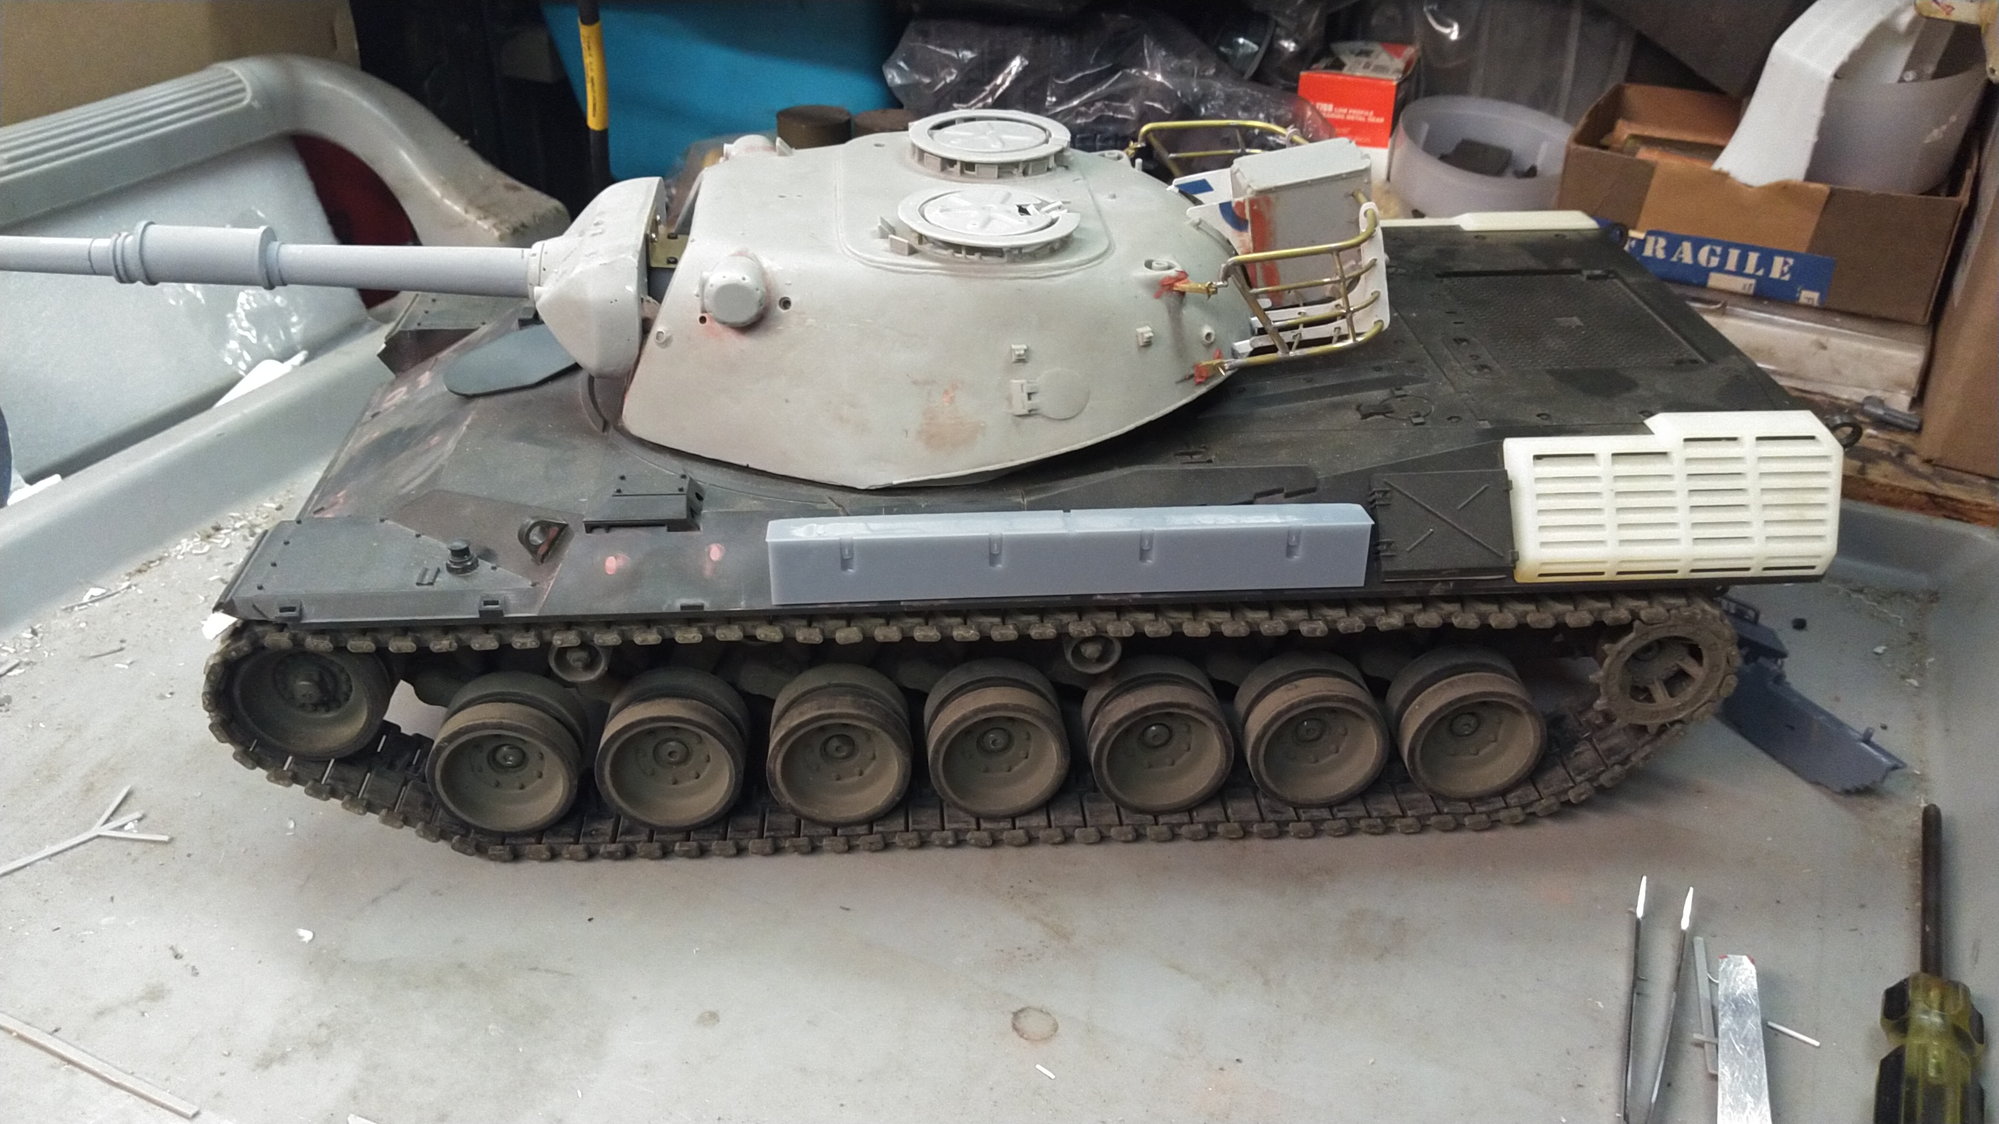
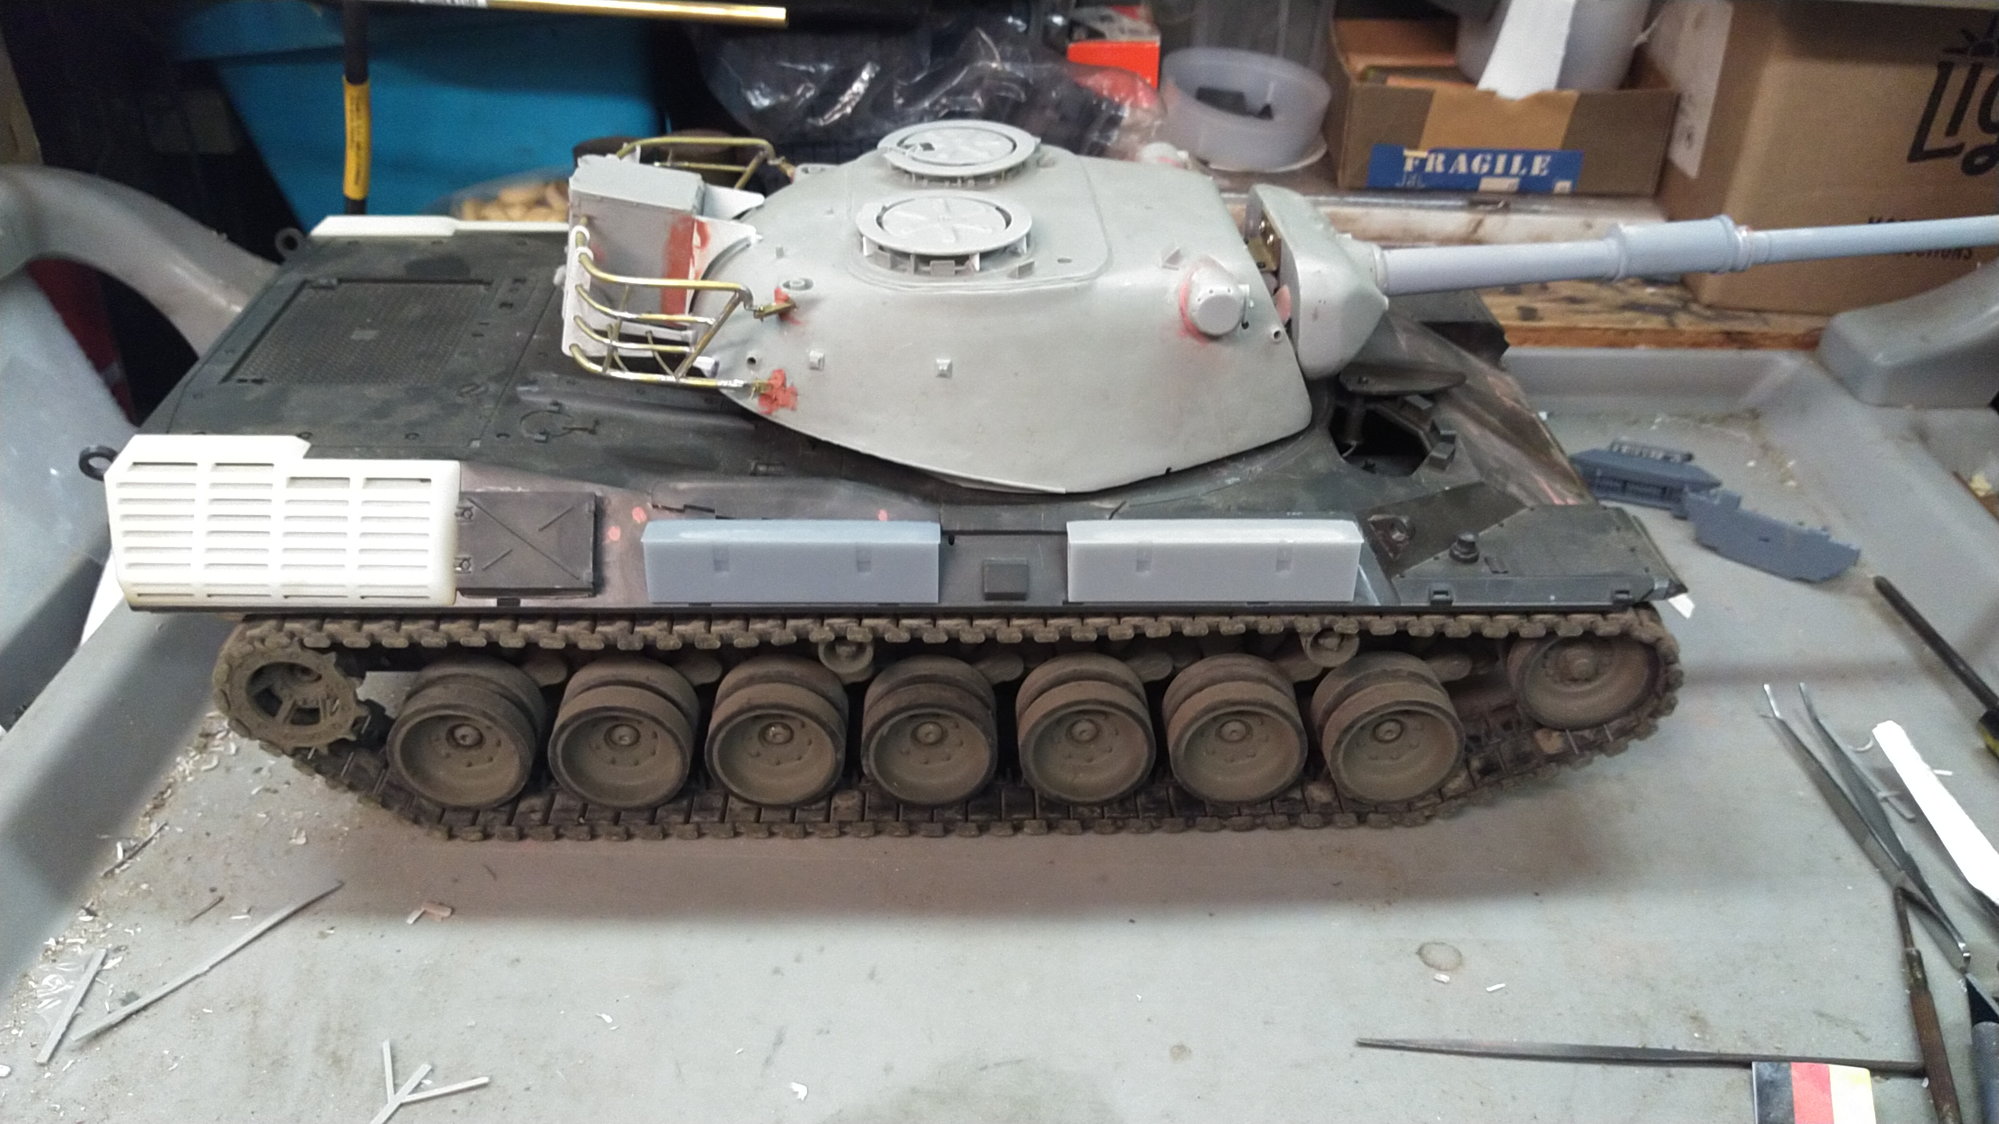
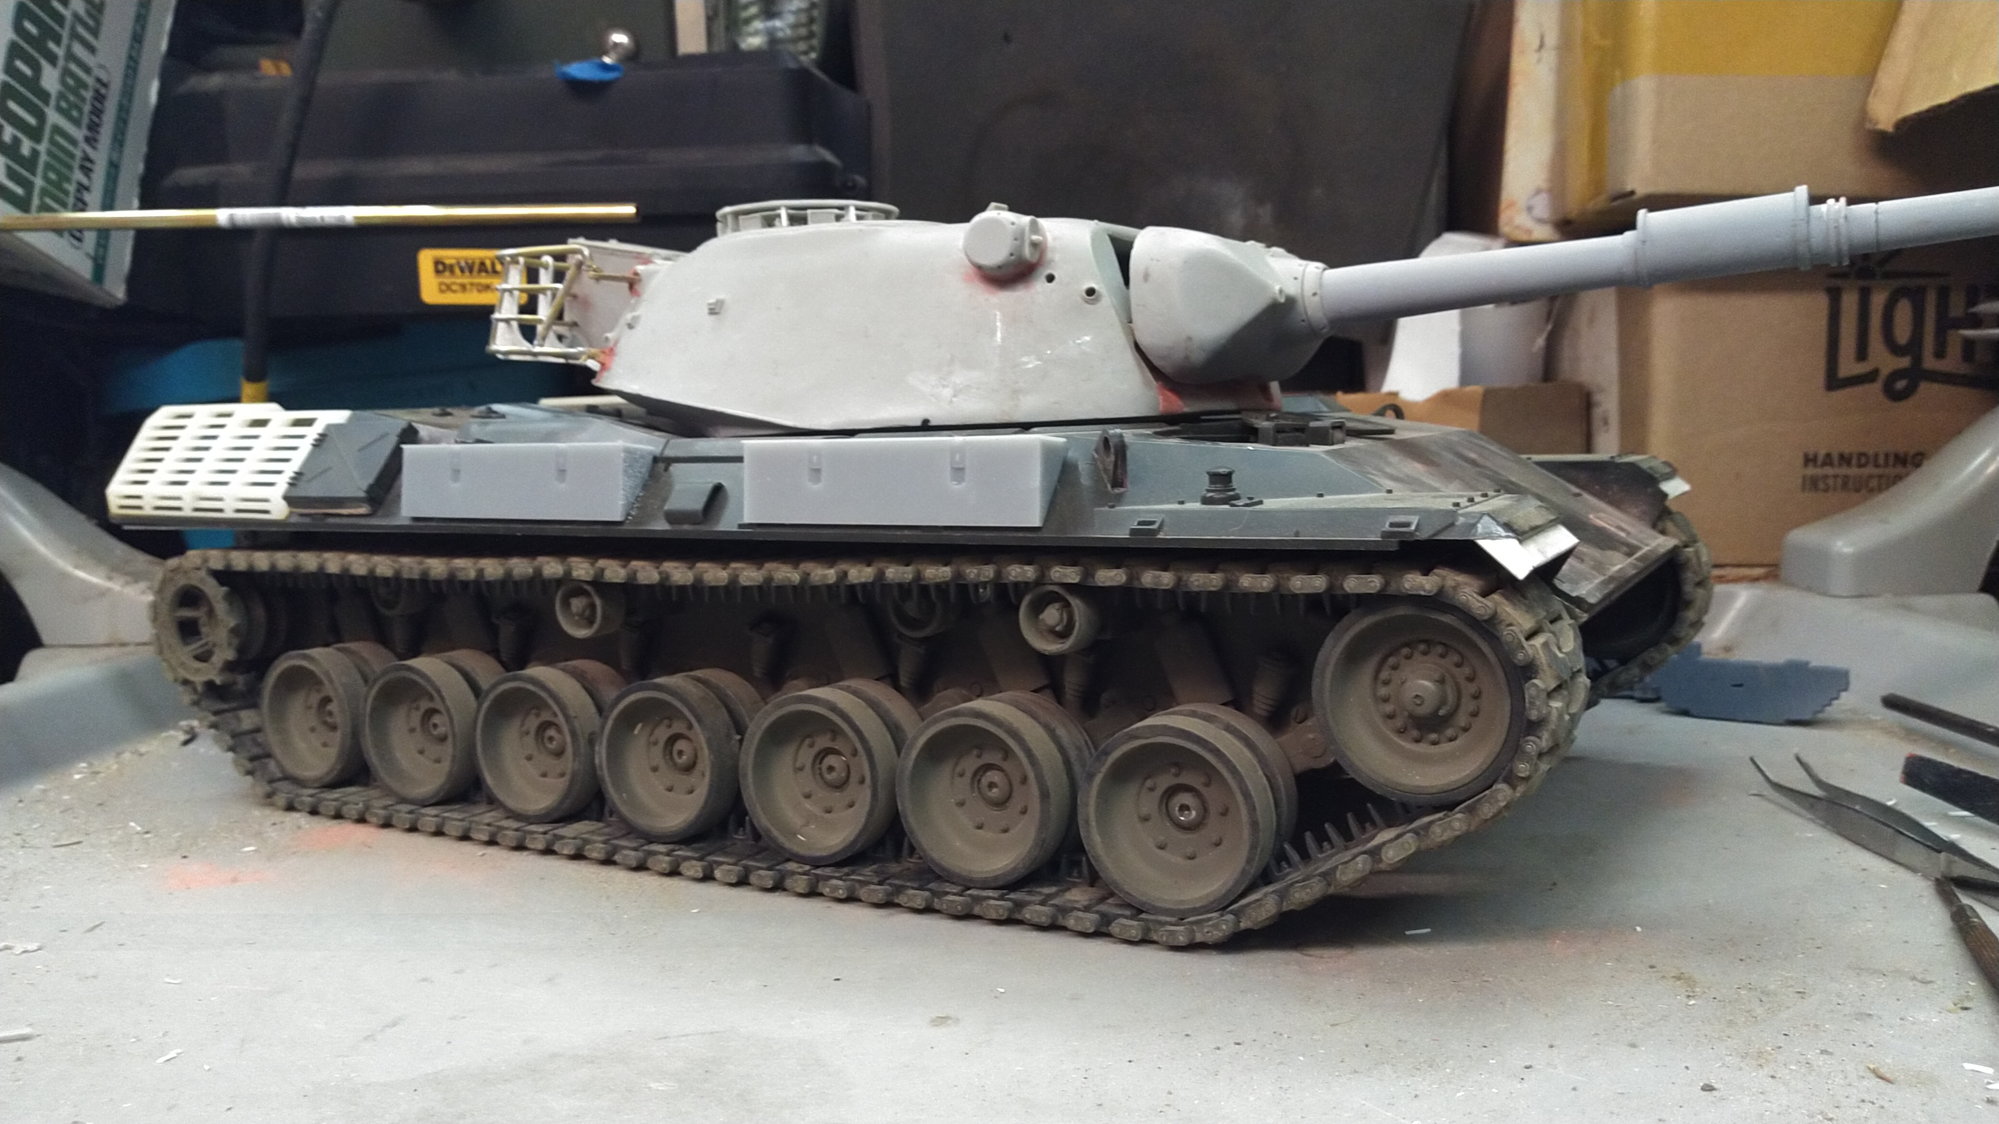
So I took the Belgian out for some more shake down this weekend at our local tank event. It seemed to battle well against other tanks and drives very well with the new T84 pads from JVM3d concepts.
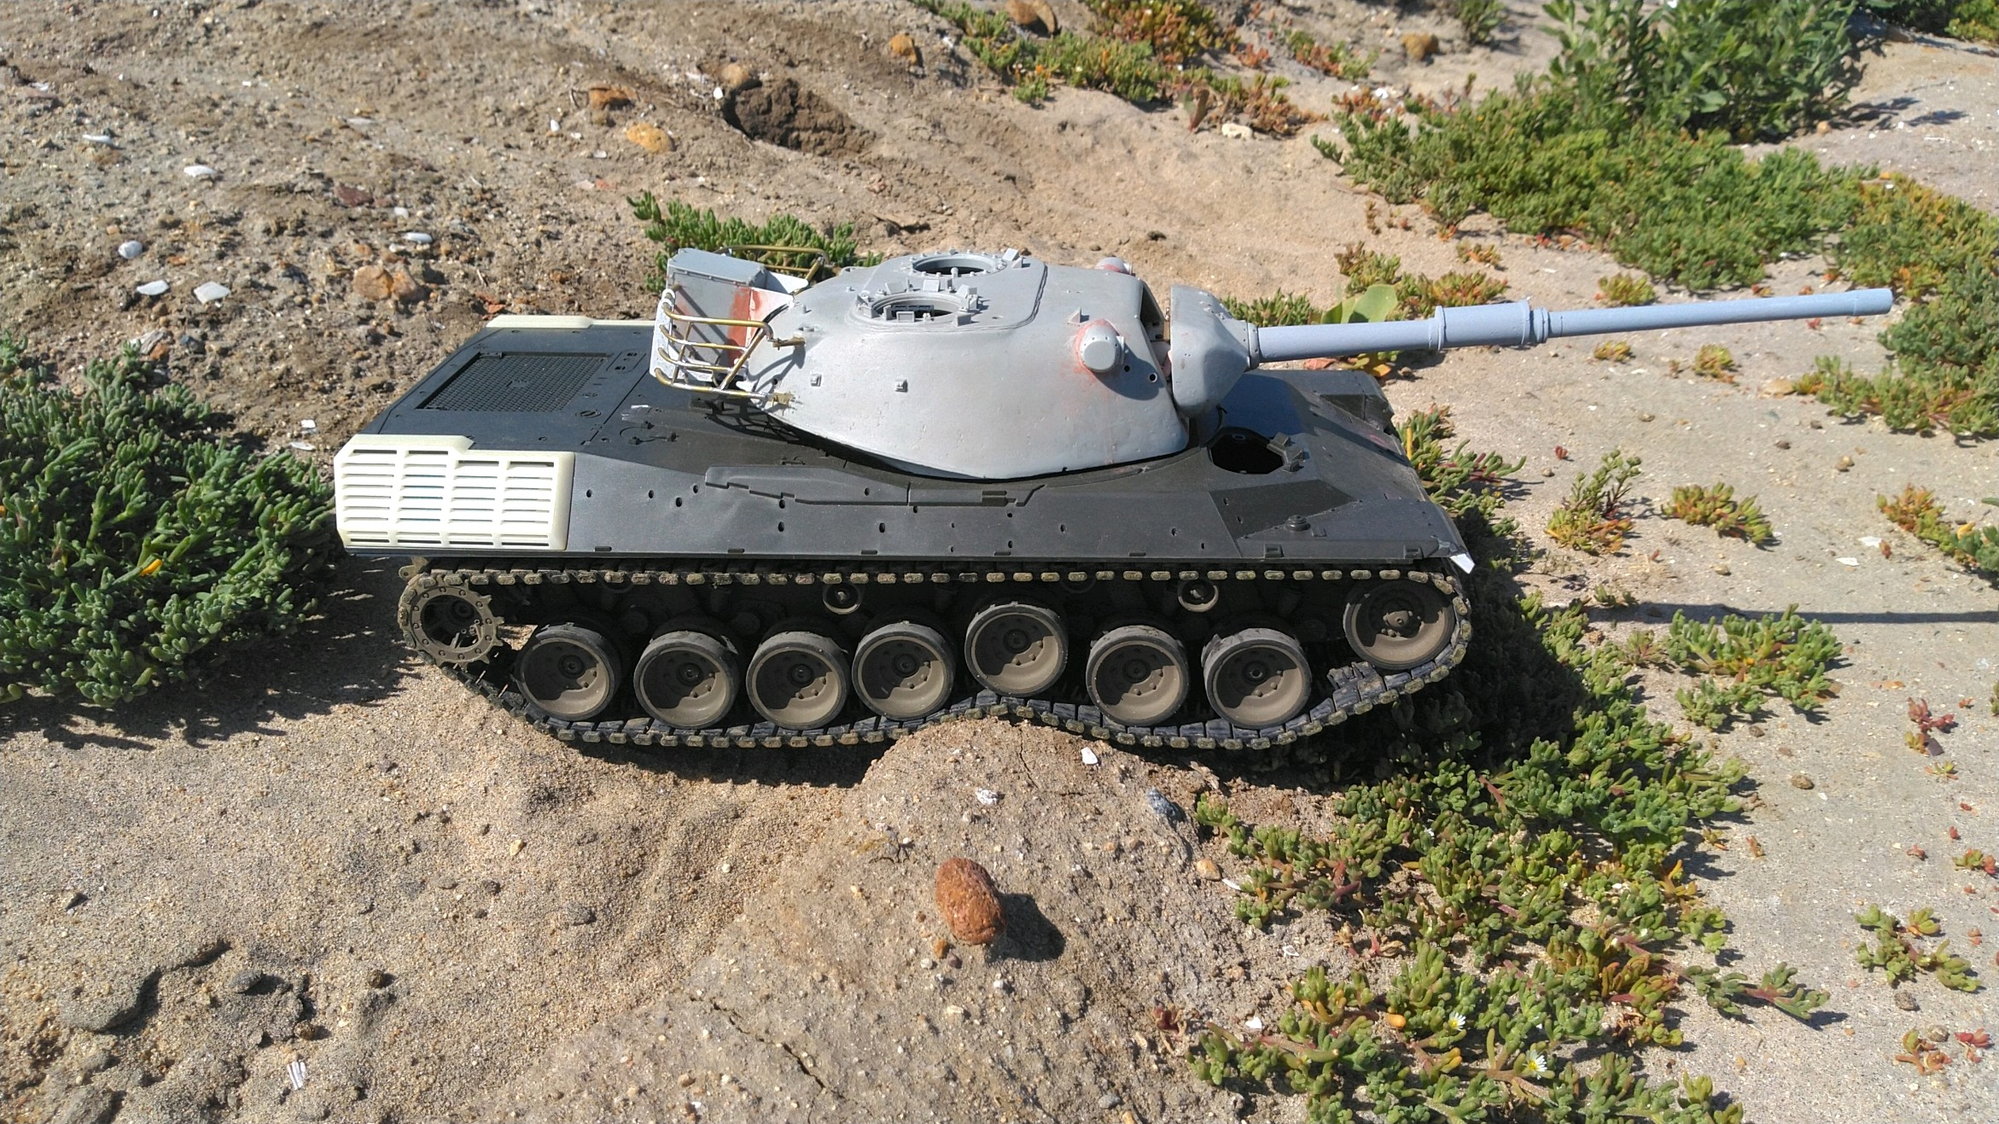
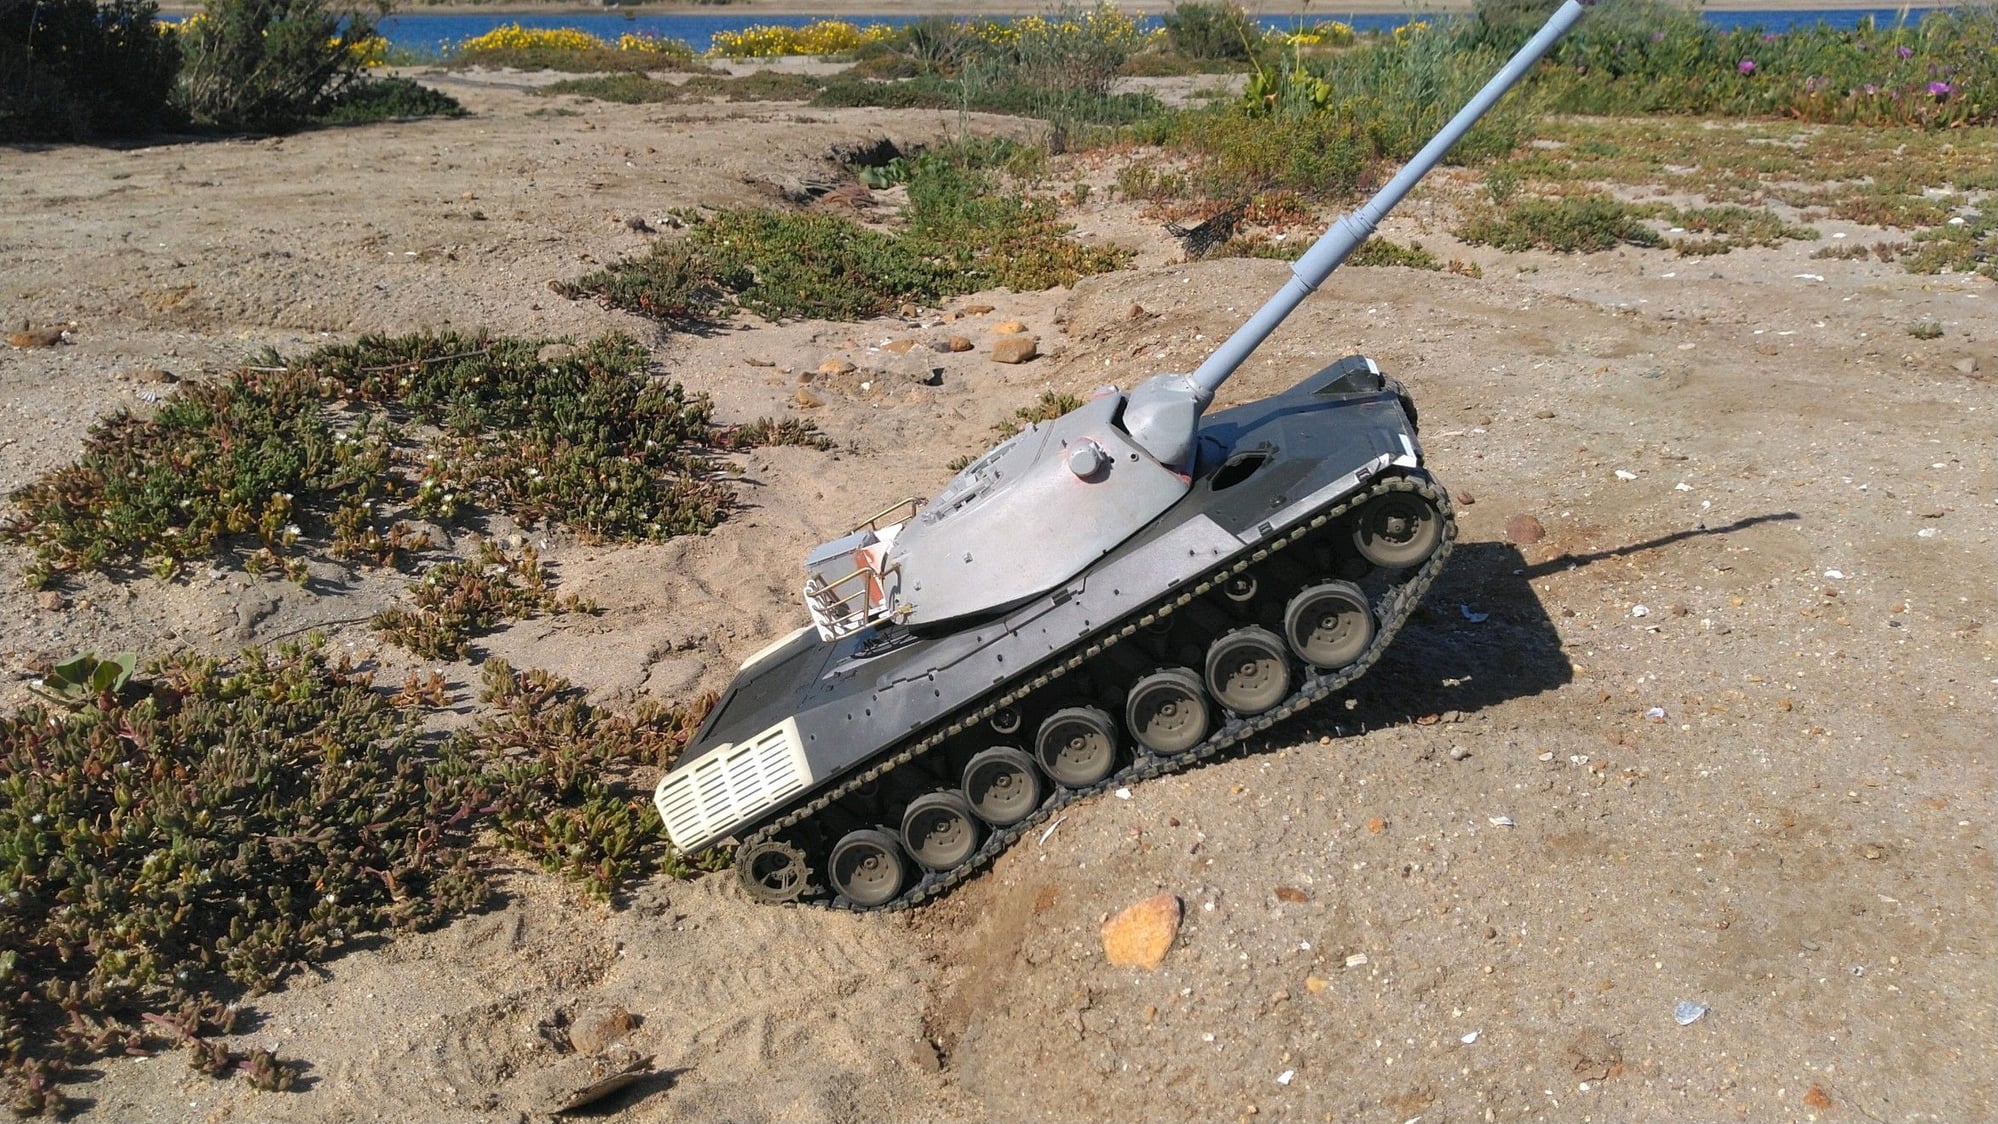
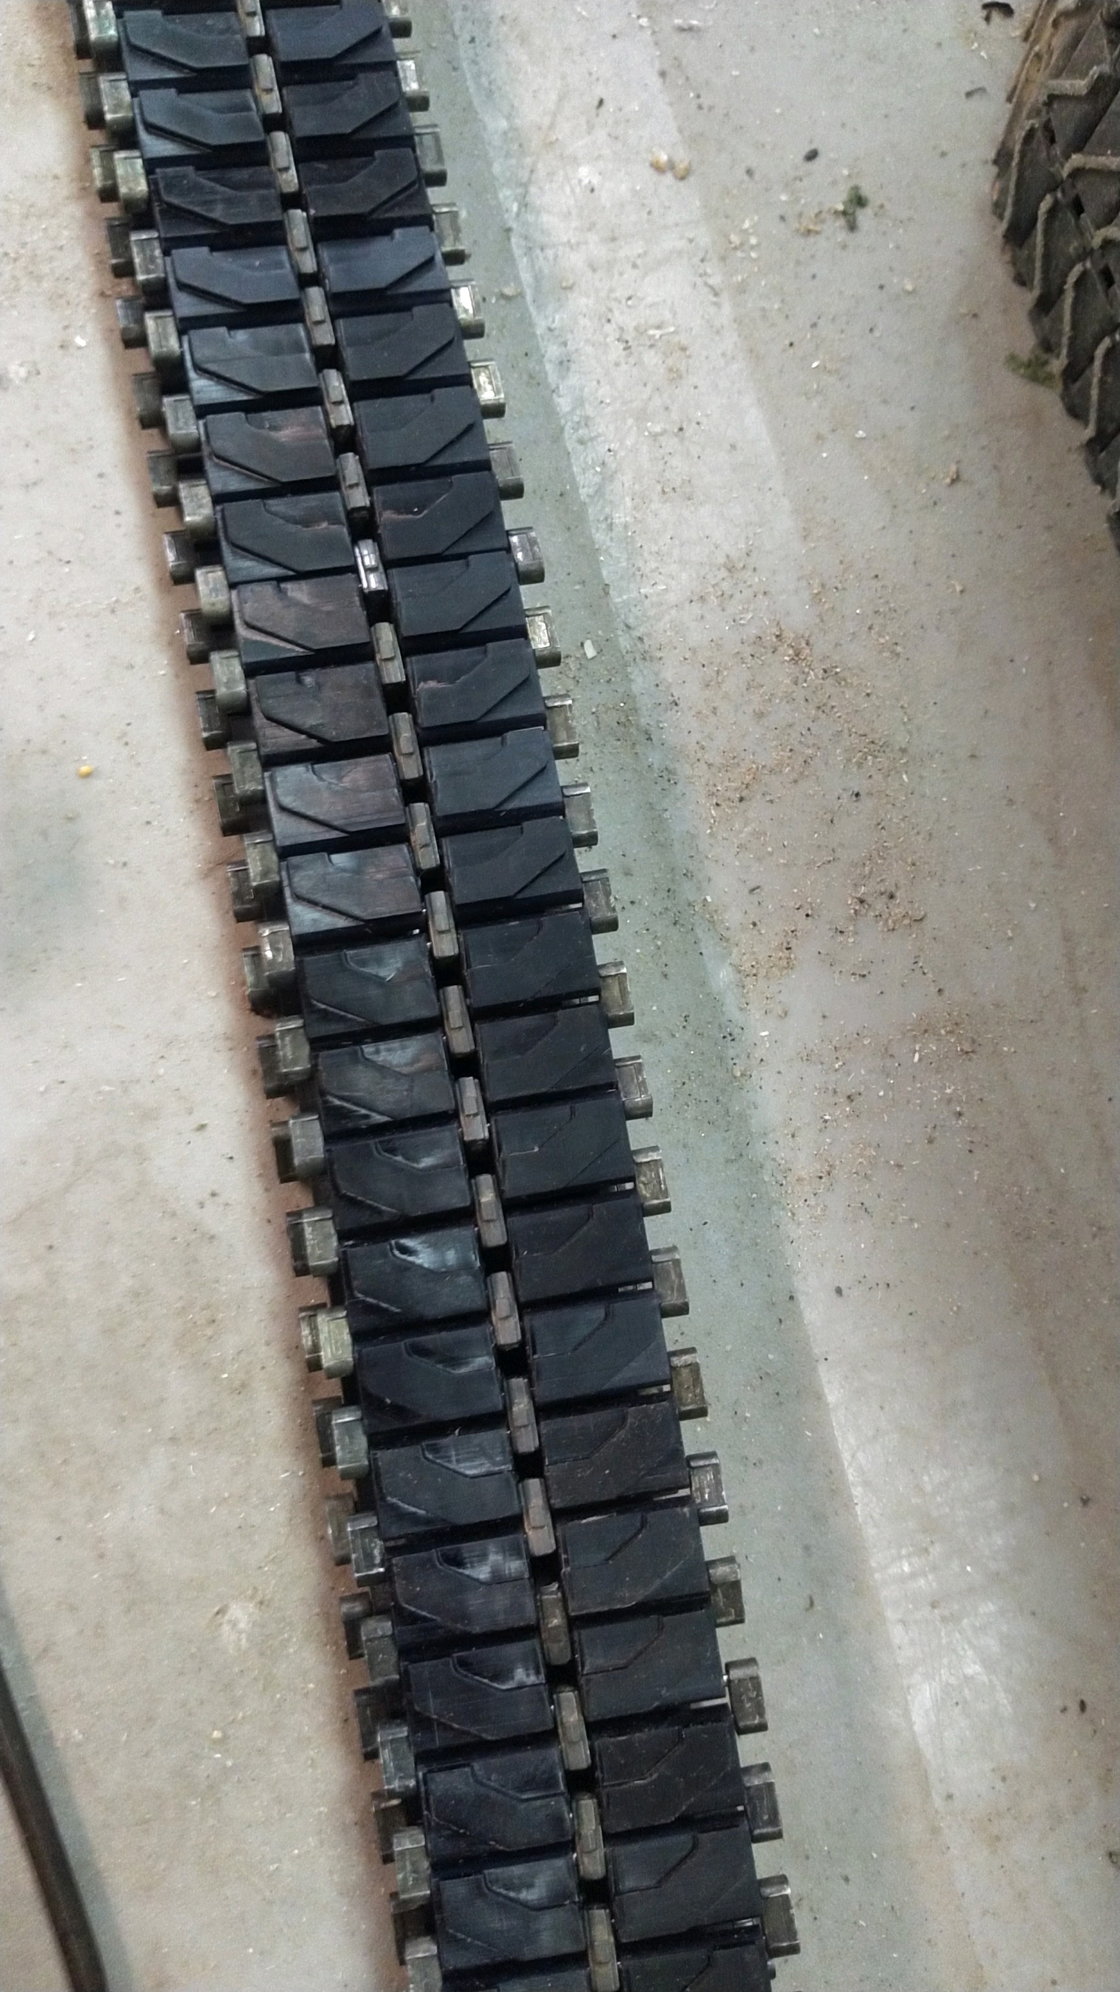
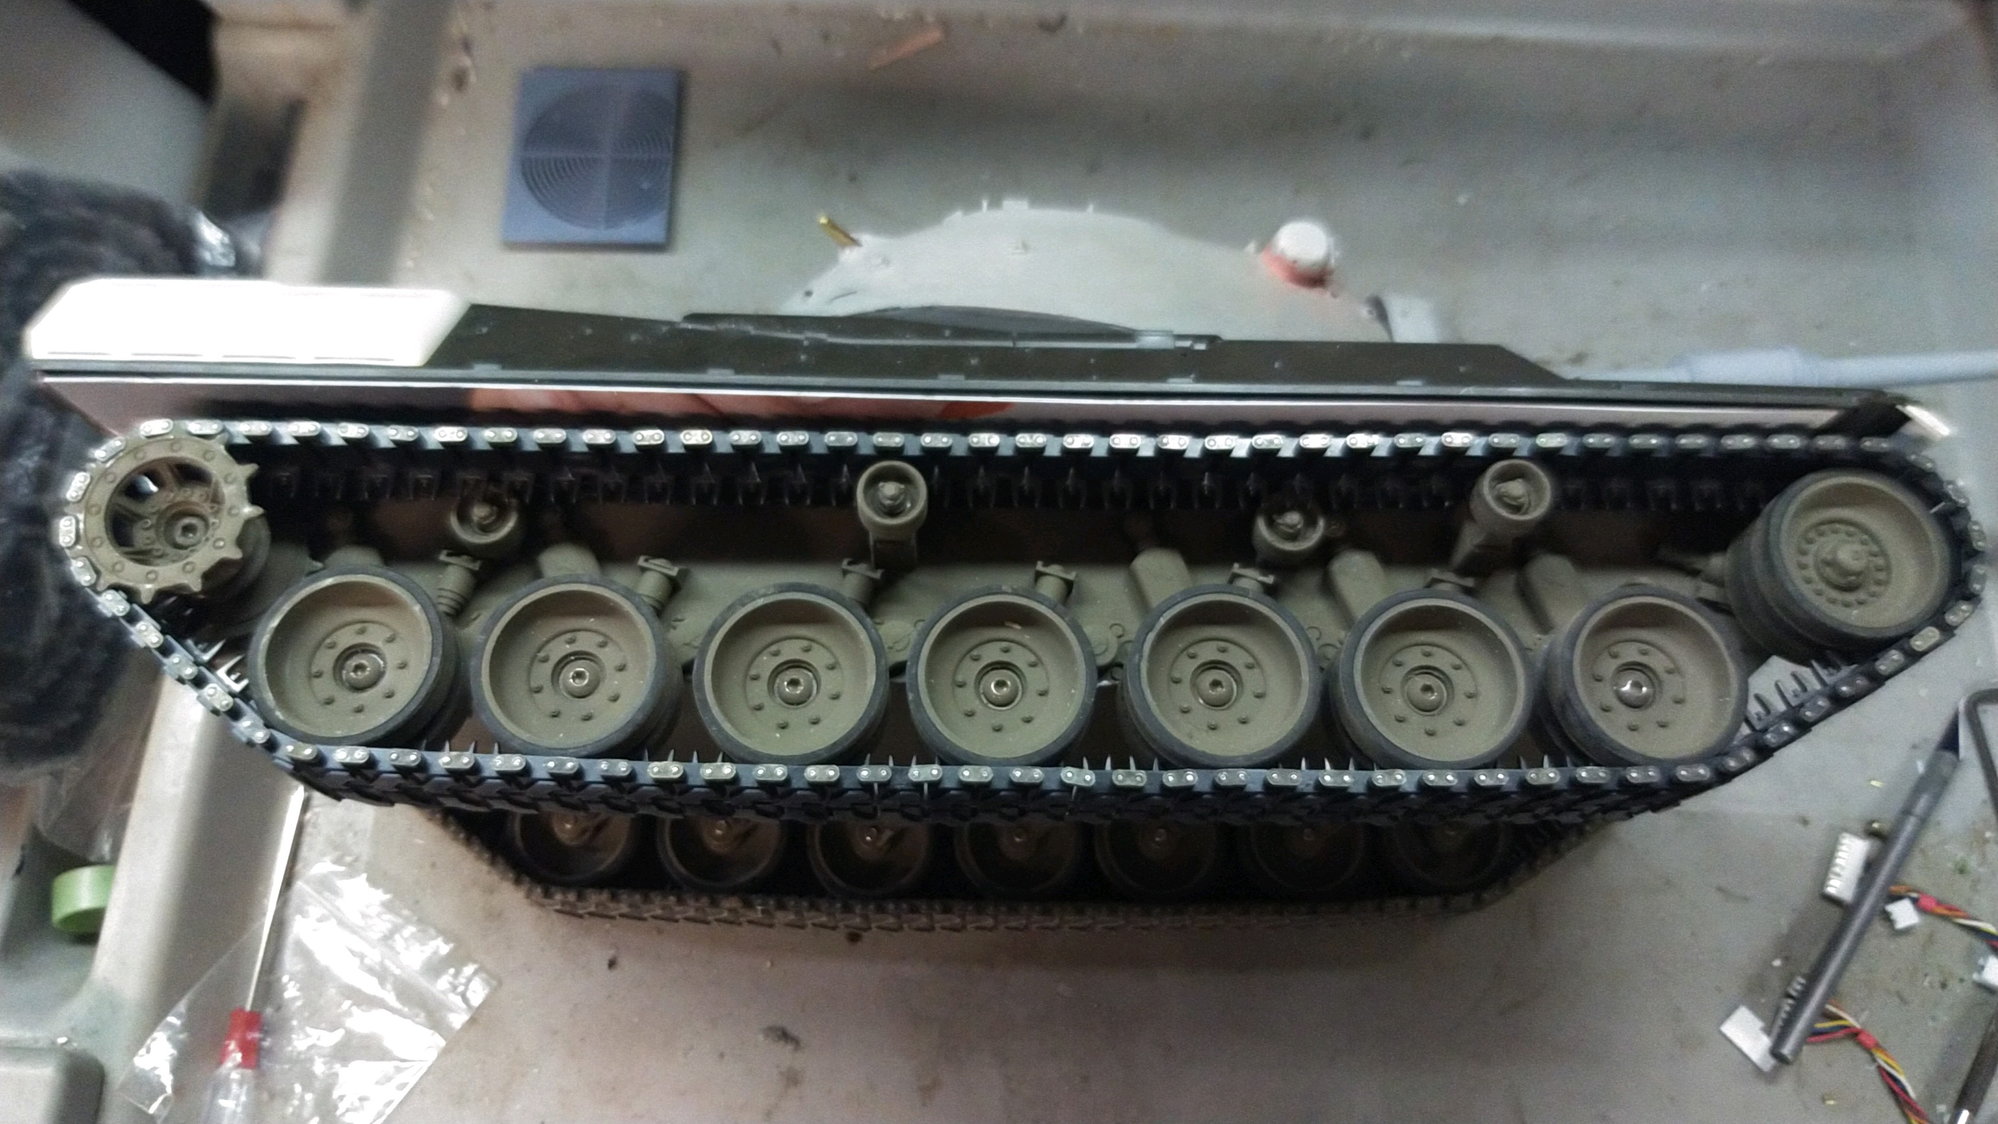
Now I am back building up track again this time from scratch. Thanks to the guys at JVM3dconcepts again for custom designing me the Leopard 1 pads. I have a complete set of track with the steel pins I cut and dressed myself and Im building up a set of Leopard track to test out on my 1a7 modernized tank to see how it compares to that heavy metal track with rubber pads. That stuff is heavy and grips the ground very well making it hard for the tank to steer and maneuver especially at low speeds. The plastic T84 track has run so much better, Im hoping for the same with this track.
And then I will just drop this right here with the other round turret Leopard 1 on my bench right now. Darn I need to get back to the AS1 Australian Leopard as well.
The following users liked this post:
bowlman (05-04-2023)
The following users liked this post:
bowlman (05-11-2023)
The following 2 users liked this post by RichJohnson:
bowlman (05-15-2023),
tiger rampage (05-19-2023)
05-21-2023, 07:45 PM
#62
Thread Starter
Some visual updates on the round turret projects. Not gonna narrate anything since no one is really paying attention. Tamiya Leopard 1 tanks are just not a thing in this hobby really.

The following 3 users liked this post by RichJohnson:

The following users liked this post:
RichJohnson (05-22-2023)
05-21-2023, 11:21 PM
#64
Actually I disagree that Leopard 1 are not a thing. I'd love to have one, especially the cast turret version because they are so slim and minimalist looking. Its just that I cannot afford to buy one now that they are discontinued, nor pay for the aftermarket cast turret!
05-22-2023, 08:16 AM
#65
I may print the Leo 1A5 eventually.
05-22-2023, 08:22 AM
#66
Thread Starter
yes the even harder part is getting the cast turret. They are expensive no matter who you buy them from, Perfect scale, as I have, Der Emma Laden or AFV model.
Though it�s quite easy to start with a used Leopard 1 and build from that base as long as the hull is in good shape.
If one wanted a Leopard 1a5 variant you can�t go wrong with a Hooben as long as you order the metal arms and sprockets. I�m really liking mine. And if your a good modeler you could back date it carefully.
The following users liked this post:
bowlman (05-22-2023)
05-29-2023, 08:28 AM
#67
I'm listening, Rich!! I might not be a huge Leo fan but I pick up so much more from your threads. For example, the way you scratch built the basket was very informative and could be used for many vehicles besides just the Leo. I actually wish you'd go into a bit more detail on techniques like that. I mean, what kind of solder did you use? Did you need flux? Do you think a 30w iron is better for this or a 60w? So don't stop narrating, dammit!!! 
05-29-2023, 11:02 AM
#68
Thread Starter
To solder I always use flux even with flux core solder. I think Im using silver bearing solder with some lead in it. Its a roll older than me. I cant read it. It came out of my great grandfathers home as did much of the stuff I still have. So it flows a little better than modern lead less solder, its also a bit softer of a joint with lead in it. Another roll I use is a finer diameter from radio shack, it is silver bearing solder. this product but not sure if its still available.
I use a greasy looking flux from tin cans that is also 4 times older than myself LOL. It probably causes cancer and birth defects and all kinds of issues because its really friggin old and it works great. Though my secret stash of antiquated supplies is dwindling as I use it. Erik formerly at Imex sent me a sample of some he was using that worked even better. He said it is basically the same stuff I have, a petroleum based non water soluble flux. So maybe stuff for the stain glass window hobby would work.
The trick I learned to soldering all my brass train models together and making these tank parts from brass is first perfectly clean both parts. Sand, file or scrape the joints to be soldered. Then apply a tiny dab of .flux and then hit it with the tinned iron that has a blob of solder on it waiting. I use bigger wattage irons for bigger parts that suck up more heat.
I also often use pencil torches or slightly bigger ones. I keep a wet sponge on hand to quickly cool my joint, and so the heat doesnt loosen other parts I use metal clips at heat sinks around my joint to dissipate heat from reaching already soldered joints.
The key, is rapid acceleration and deceleration of heat. The faster you can get it to soldering tempreature the less likely you are to burn your parts, brass will burn if over heated, or heated too long, also the flux will oxidize in the heat and tarnish the brass if you take too long then you have to cool it down and scrape both joints clean and start over.
Hope this helps anyone trying to solder brass stuff. Start small and work your way up and never be afraid of a challenge. I have put torches onto model trains that are worth over $3k to make modifications or to make repairs. One such model fell off a 6 foot shelf, it was horribly damaged. I let it sit on my dresser for a month or so for me to calm down after it happeend and then I used a torch and took it apart, straightened all the bent parts out, including the trucks, it was a model of a 3 truck shay, and then cleaned all the parts joints and slowly put it back together. I think I posted photos on my instagram a few years ago when I did it. It took me a few weeks to do,, but had i sent it to other people that claim to specialize in such repairs I am sure the repair bill would have been nearly a grand because that is what they typically charge to build the brass locomotive kits.
Dont feel overwhelmed, just follow the basics, dont be afraid to take a bad joint apart and try again, I do all the time. I will spend hours building something and then look at it and go, anh that needs to come off and get redone. I had to do that with part of this leopard basket.
Dont be afraid of using too much solder if you can get your part on where you want it. That is what tiny files, wire brushes and fine sand paper are for, cleanup work. More solder touching the brass means it will heat up faster and that goes back to heat it up as fast as possible , just dont put the tip of a torch right on the brass you will burn it.
Using a torch you are heating the bras and melting the flux to get to the temp that solder will melt on your joint when you touch it.
With an iron, the solder on your iron tip will touch the brass, heat it up, and start to adhere and flow to the heated area of the brass, so its imperative to have enough solder on the tip to get the job done.
This is basically all I can say from my experience from working on brass trains as a kid up to now where I have continously gotten better.
The last piece of equipment is a resistance soldering unit but I only use that on my trains, and its got a huge learning curve to it because you can nearly vaporize brass parts with the electrical resistance.
02-26-2024, 11:13 AM
#69
Thread Starter
Well, since my work iPad is the only device I have that seems to be able to load pictures onto rcu I have to send pictures to this device to make posts.
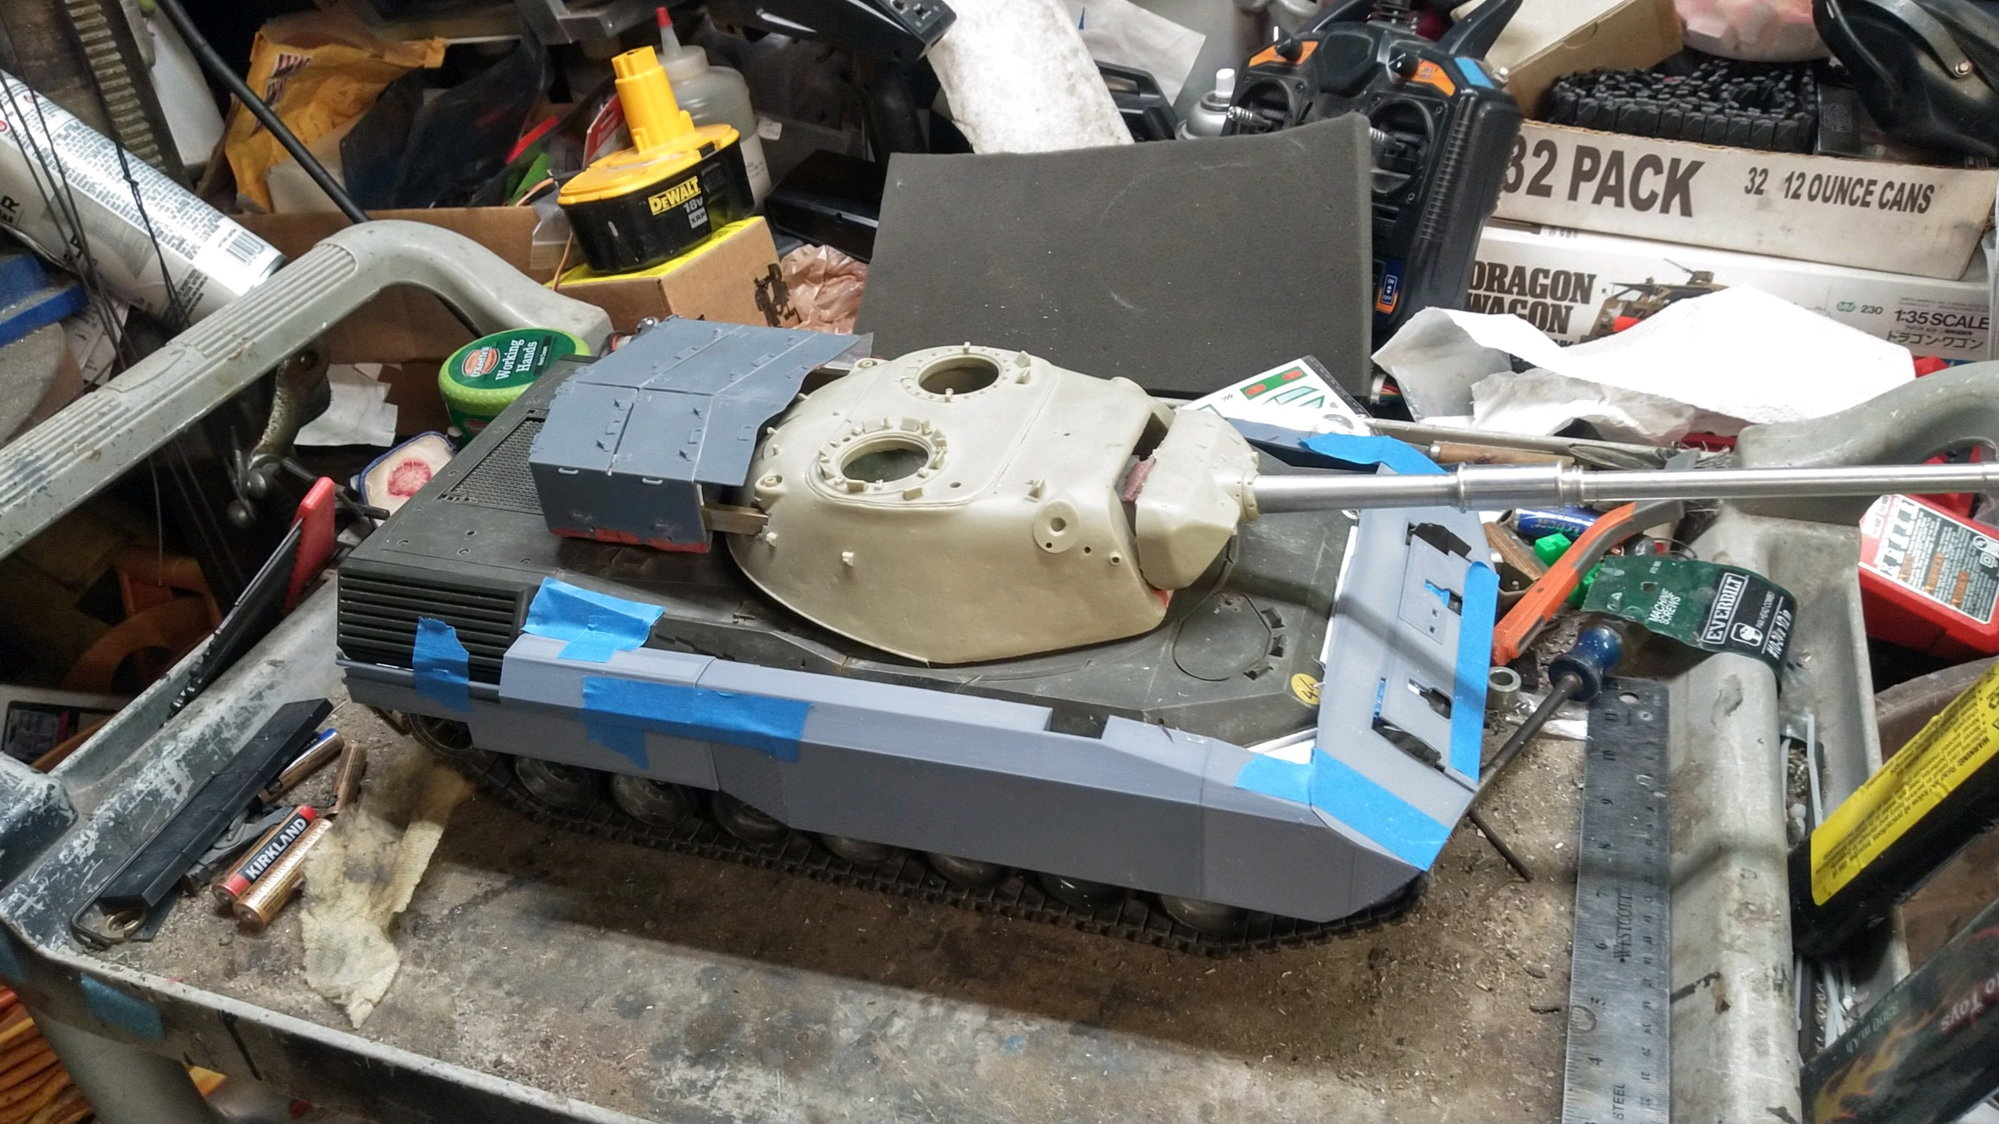
so big update on the Leopard 1 projects and specifically the Belgian BE1
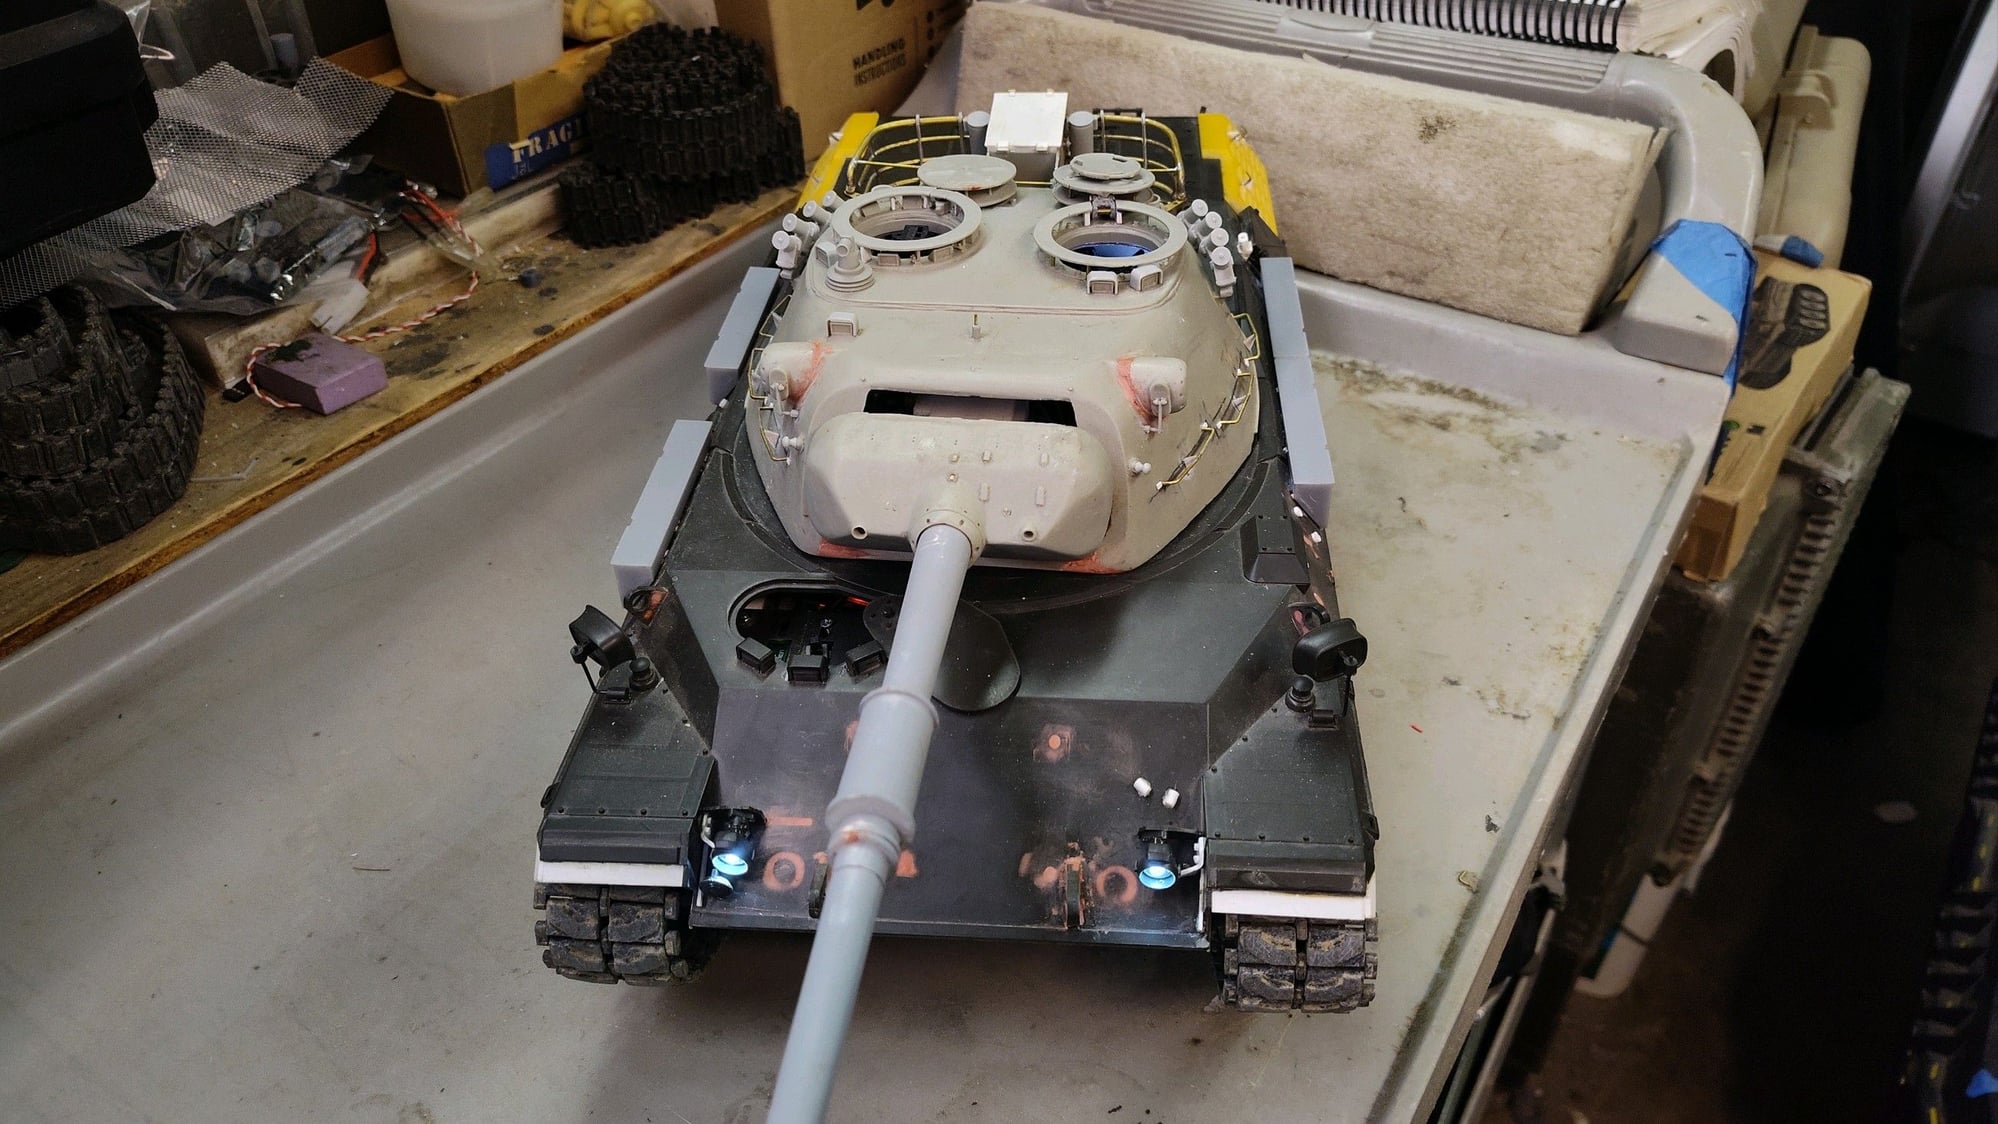
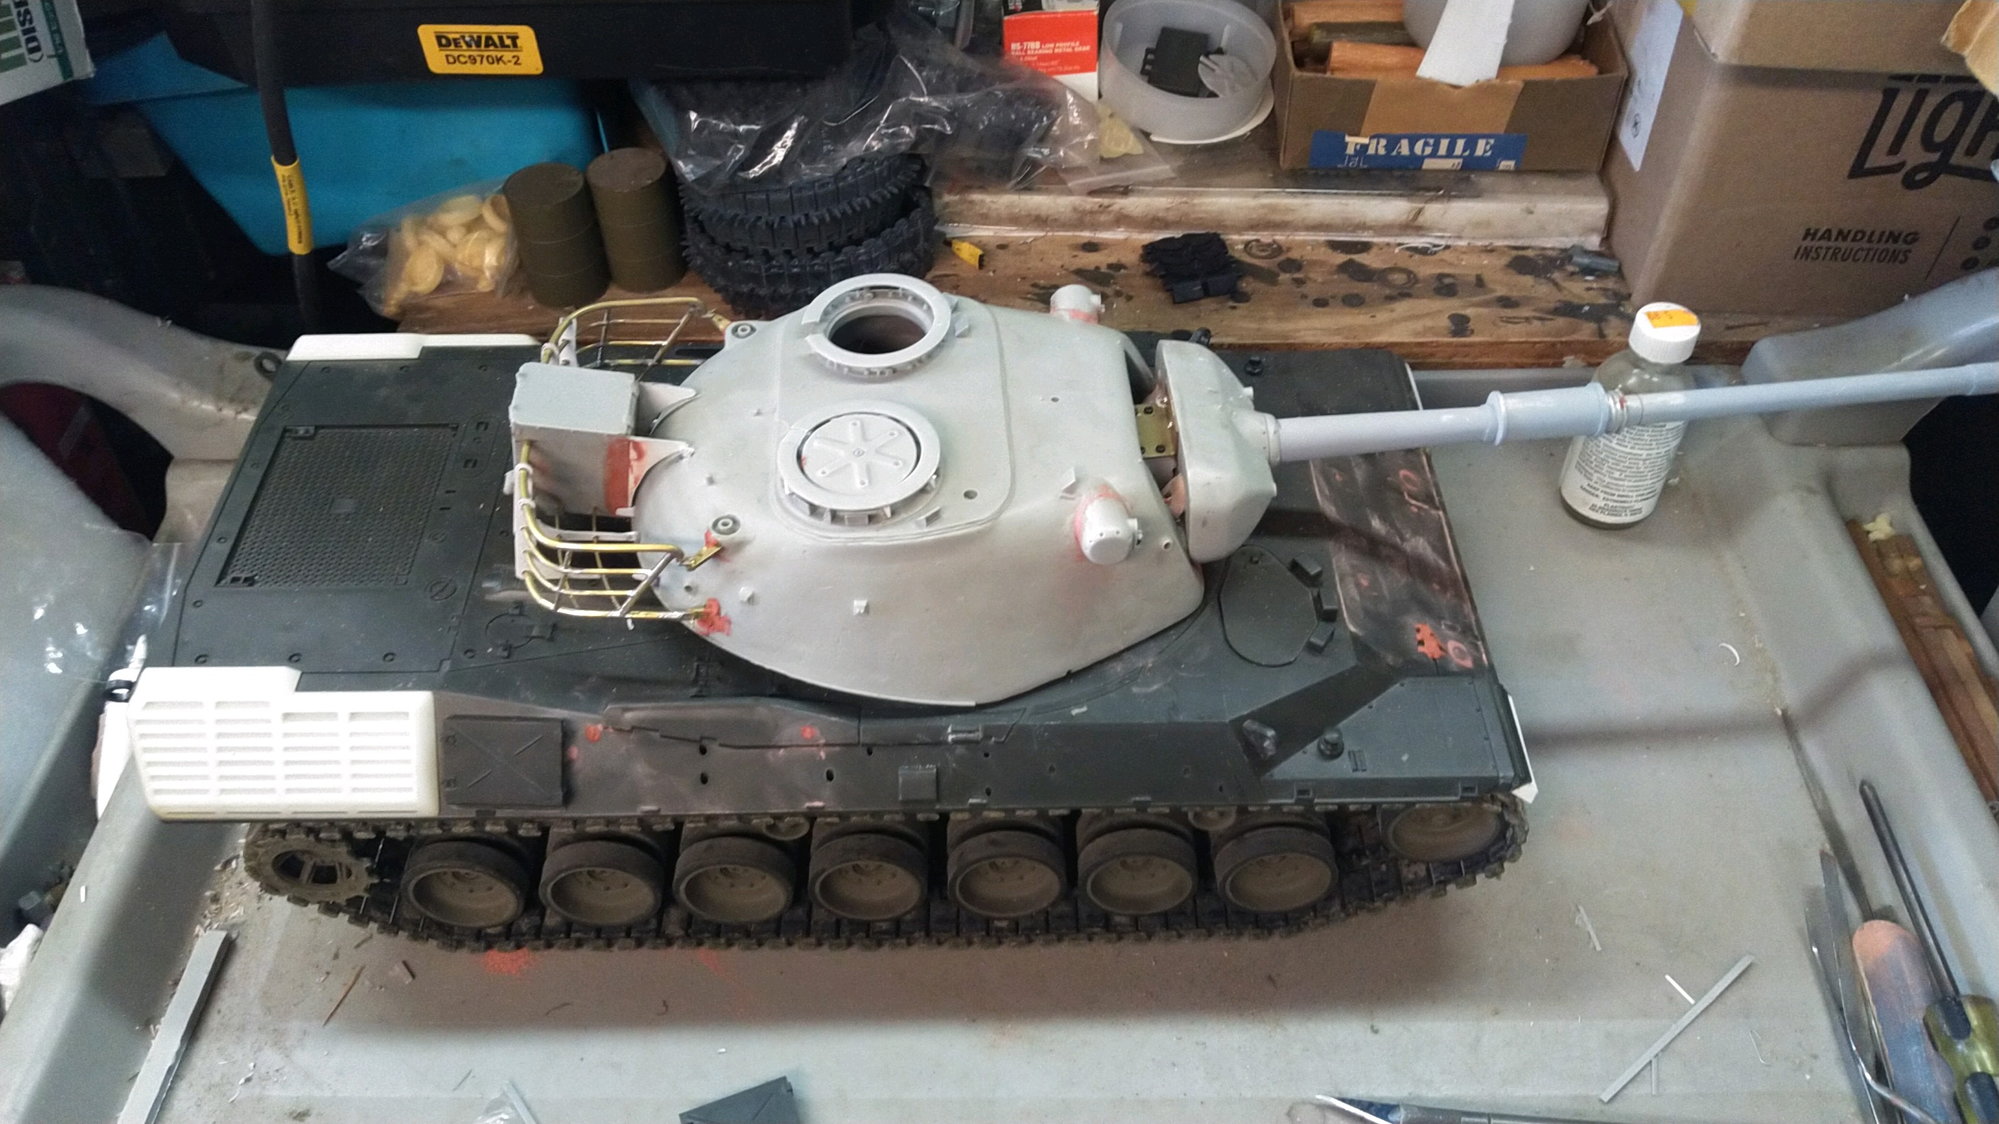
i broke the loader hatch hinge on the perfect scale turret. It was very fragile and I knew it was going to happen. I tried making new hinges a few times but decided finally to mock up one that was really close to prototype shape and have JVM3D concepts draw it up for me and print it in my pla+ printer. It worked very well and I got out the Australian AS1 I am building and tested the hinge and hatch on it. Fit perfectly there as well.
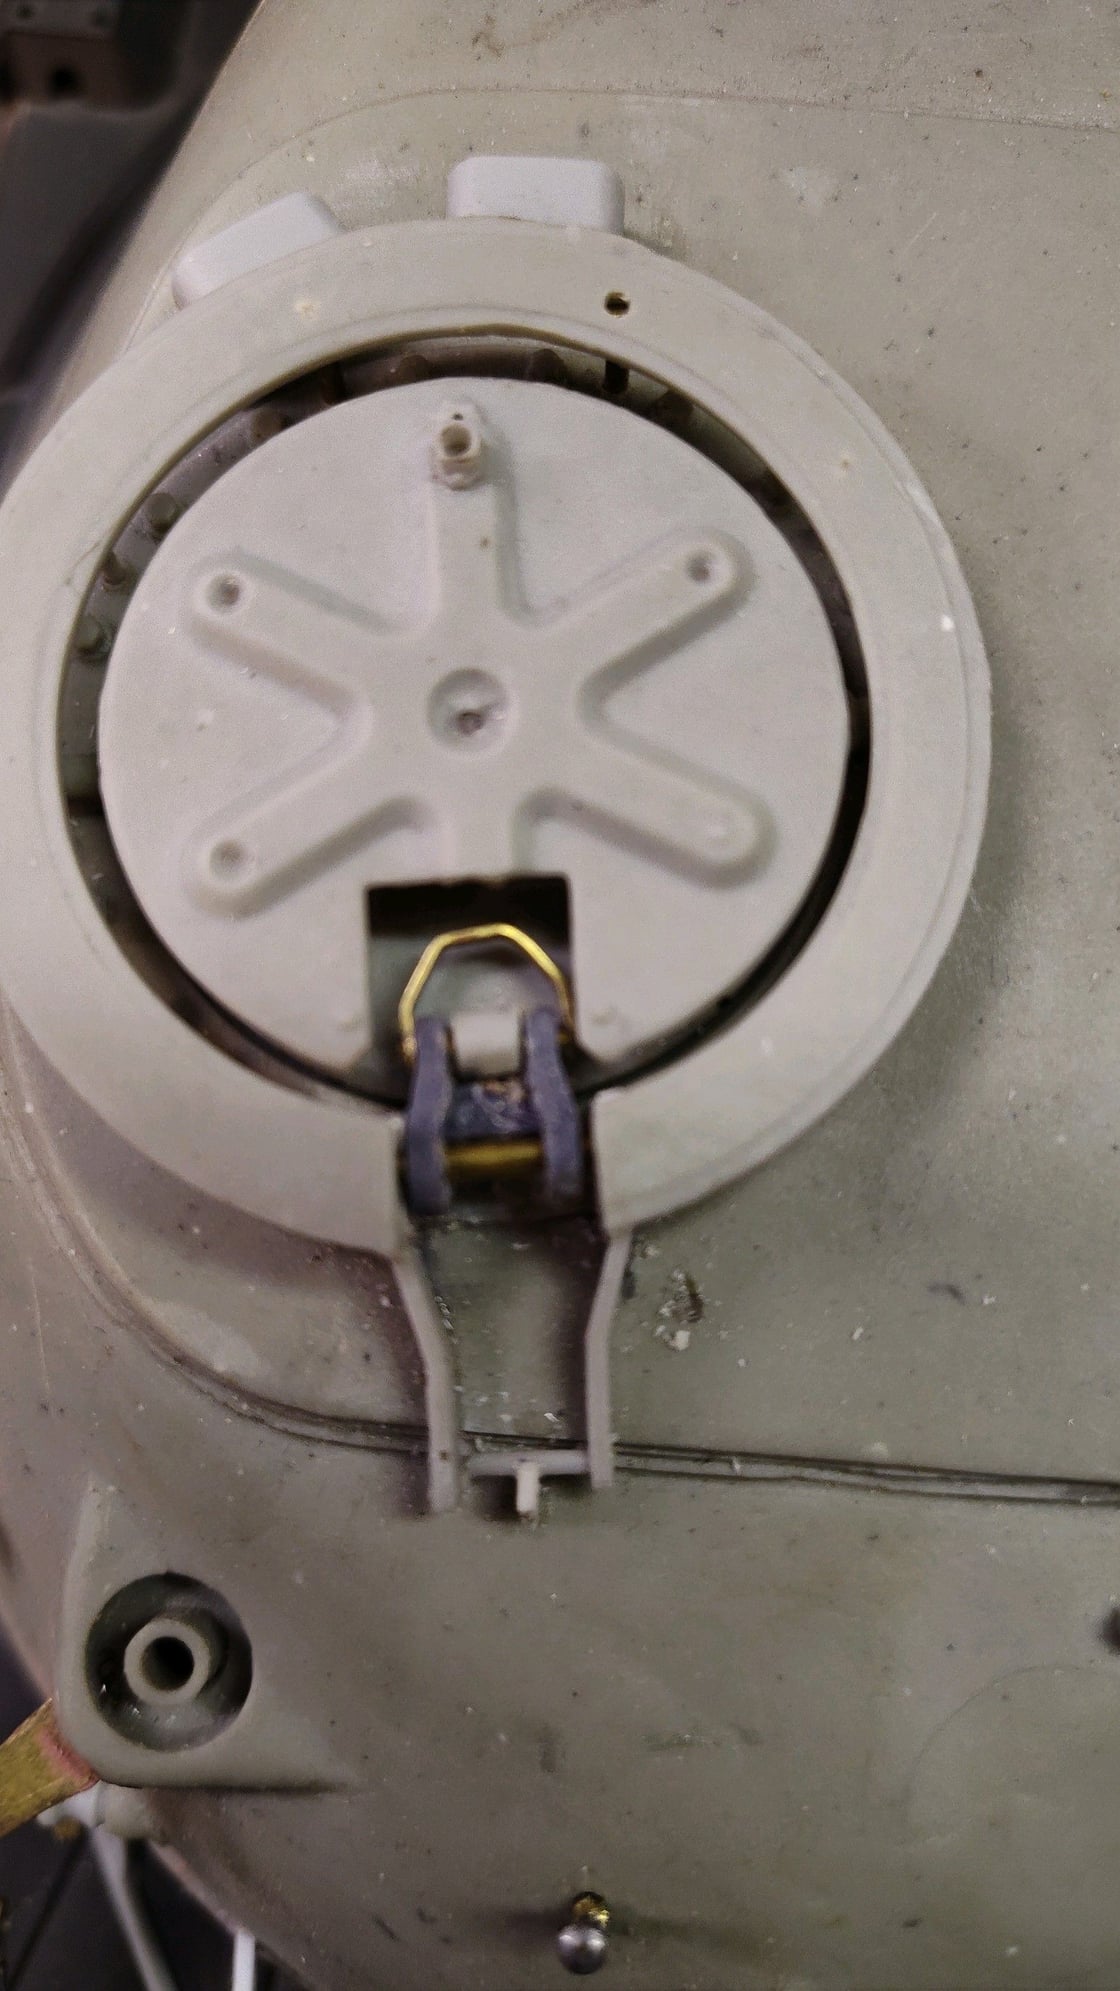


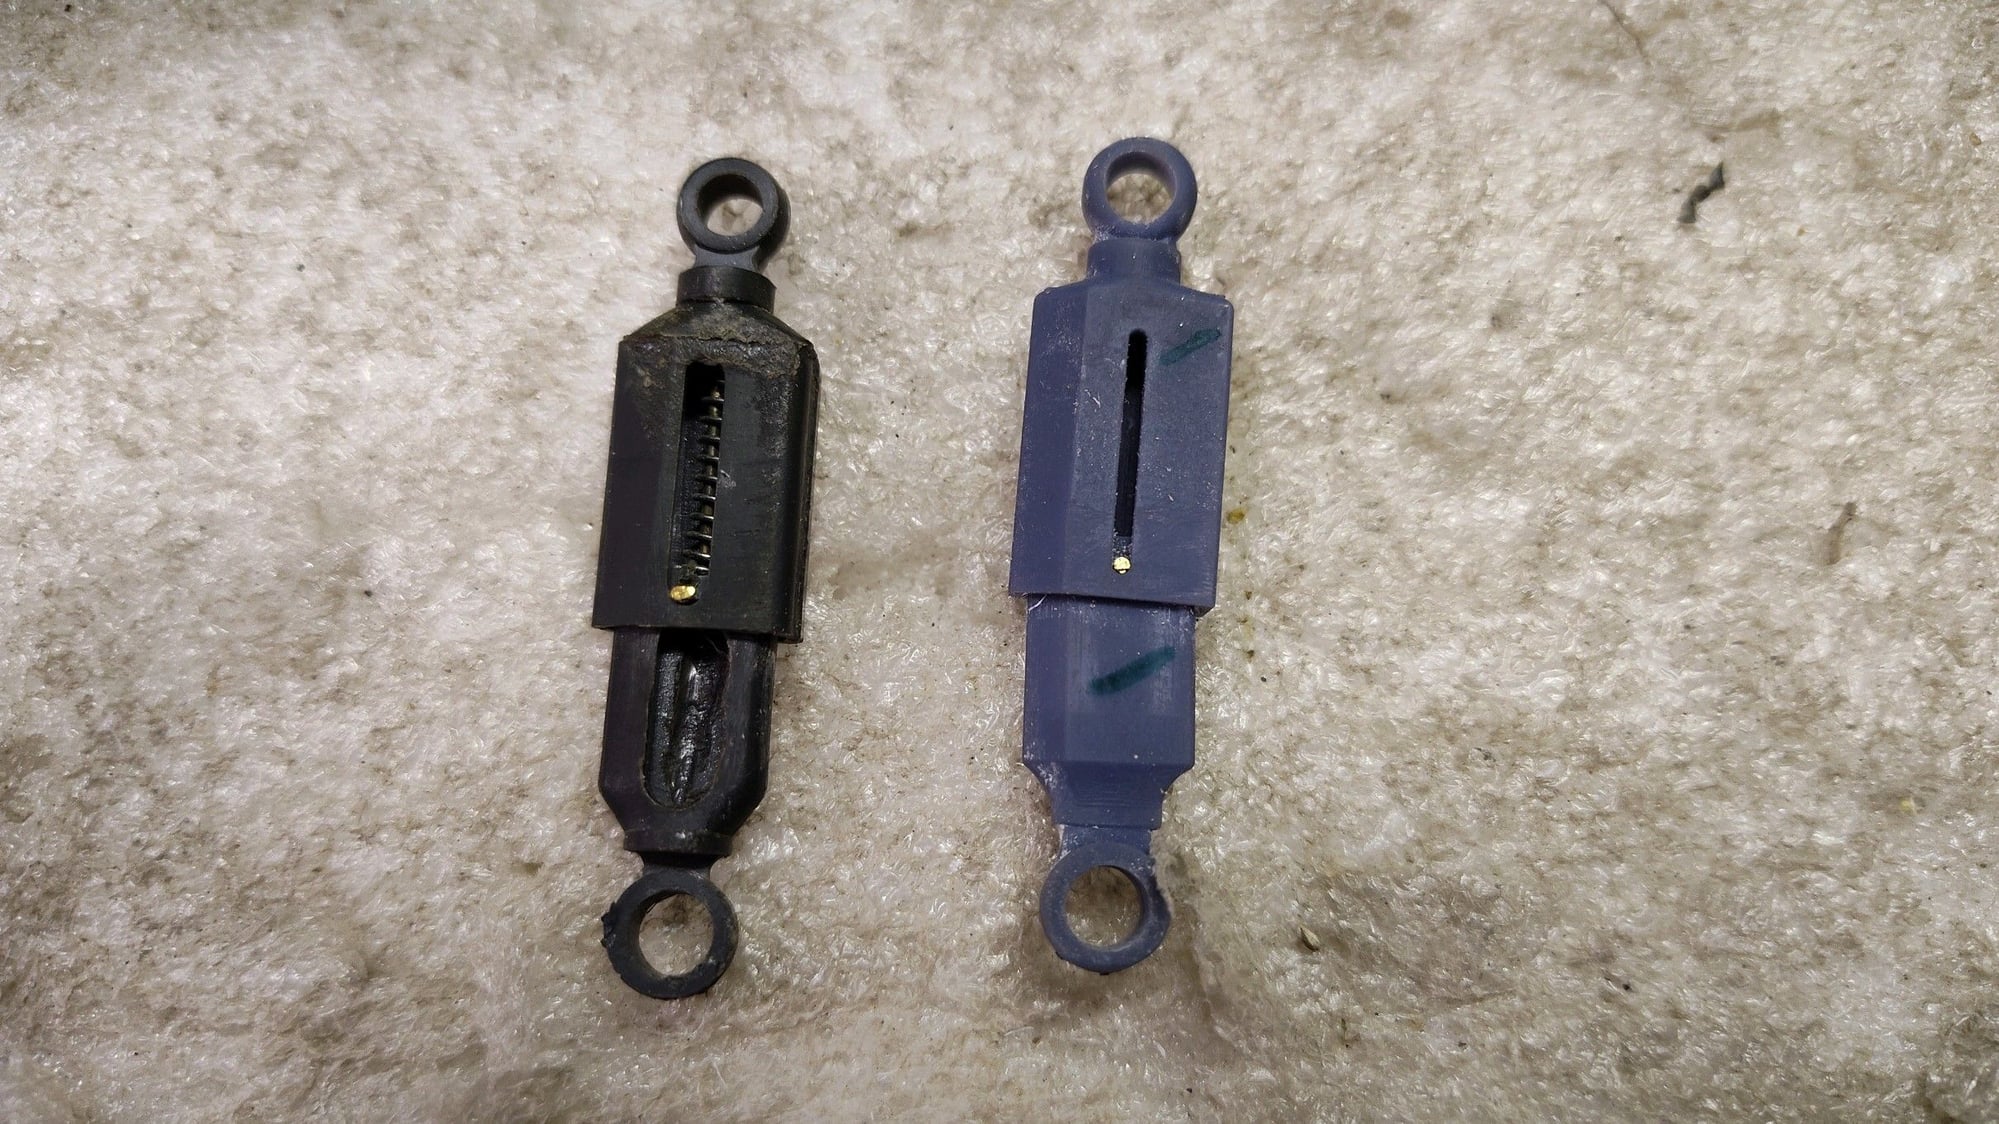
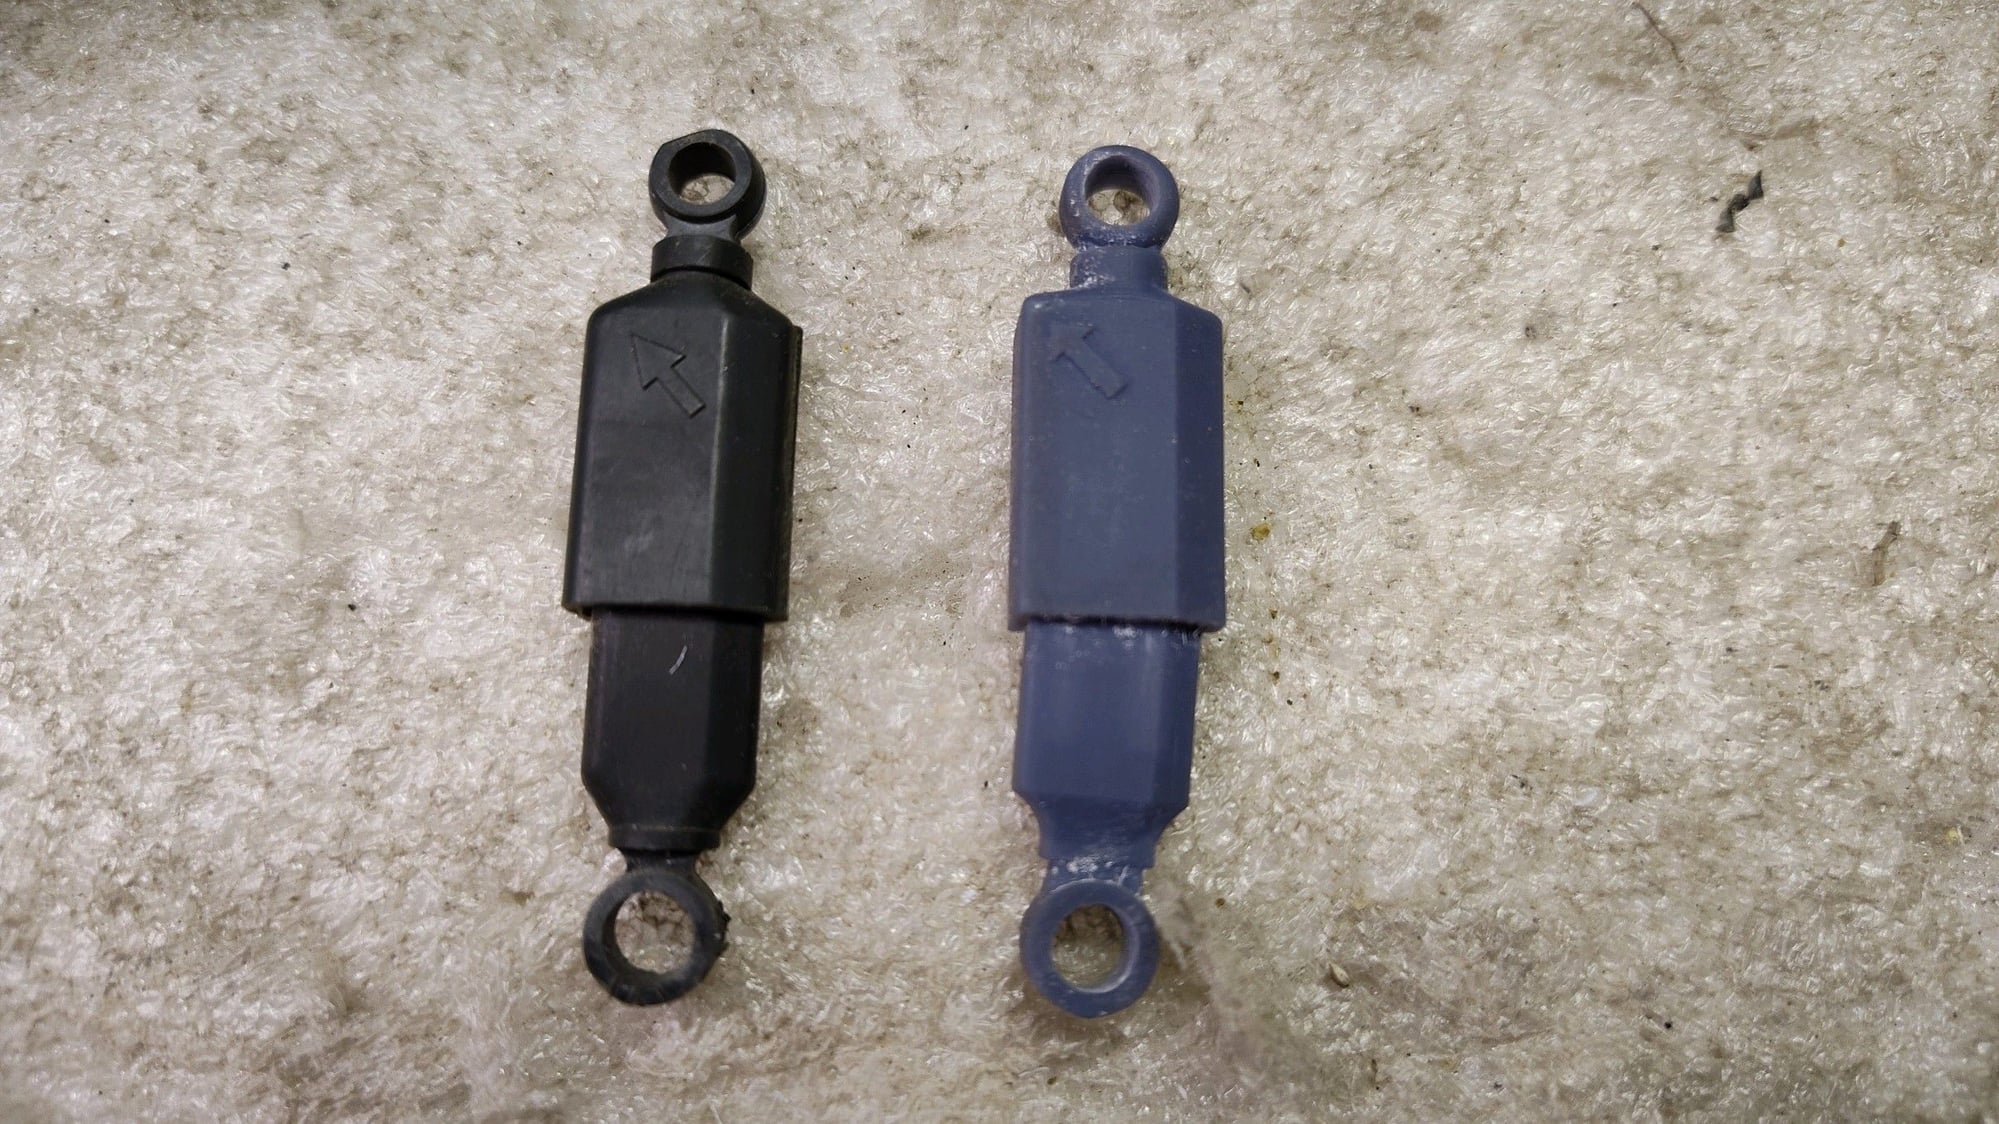
Next, as I showed earlier, I converted the Tamiya shocks to operation with springs inside to help with the added weight off the taigen tranys and batteries because the tortion bat suspension was just too soft.
I kept experiencing shock failures of the shock halves splitting apart or the extension stop breaking off and the shock opening up.
so I had JVM3d take up the project and draw me some new shocks. These initial ones are designed with dual springs in them for good down pressure and shock absorption. The plan is now to probably just use sprung shocks actively in the front and back wheels and the rest be empty shocks without springs. After some preliminary testing retrofitted onto my Modernized 1A7 Mexas I think this is going to work well.
I debated a lot if I wanted to install headlights on the tank, since I have an operation spot light in the works and already lighting up on rc control, I decided to install the Tamiya lighting harness. Quite a bit of work on this tank as the headlights are quite fragile.
so big update on the Leopard 1 projects and specifically the Belgian BE1
i broke the loader hatch hinge on the perfect scale turret. It was very fragile and I knew it was going to happen. I tried making new hinges a few times but decided finally to mock up one that was really close to prototype shape and have JVM3D concepts draw it up for me and print it in my pla+ printer. It worked very well and I got out the Australian AS1 I am building and tested the hinge and hatch on it. Fit perfectly there as well.
Next, as I showed earlier, I converted the Tamiya shocks to operation with springs inside to help with the added weight off the taigen tranys and batteries because the tortion bat suspension was just too soft.
I kept experiencing shock failures of the shock halves splitting apart or the extension stop breaking off and the shock opening up.
so I had JVM3d take up the project and draw me some new shocks. These initial ones are designed with dual springs in them for good down pressure and shock absorption. The plan is now to probably just use sprung shocks actively in the front and back wheels and the rest be empty shocks without springs. After some preliminary testing retrofitted onto my Modernized 1A7 Mexas I think this is going to work well.
I debated a lot if I wanted to install headlights on the tank, since I have an operation spot light in the works and already lighting up on rc control, I decided to install the Tamiya lighting harness. Quite a bit of work on this tank as the headlights are quite fragile.
The following users liked this post:
tankme (02-26-2024)

The following users liked this post:
Tanker1966 (03-08-2024)
 03-14-2024, 04:40 PM
#73
Thread Starter
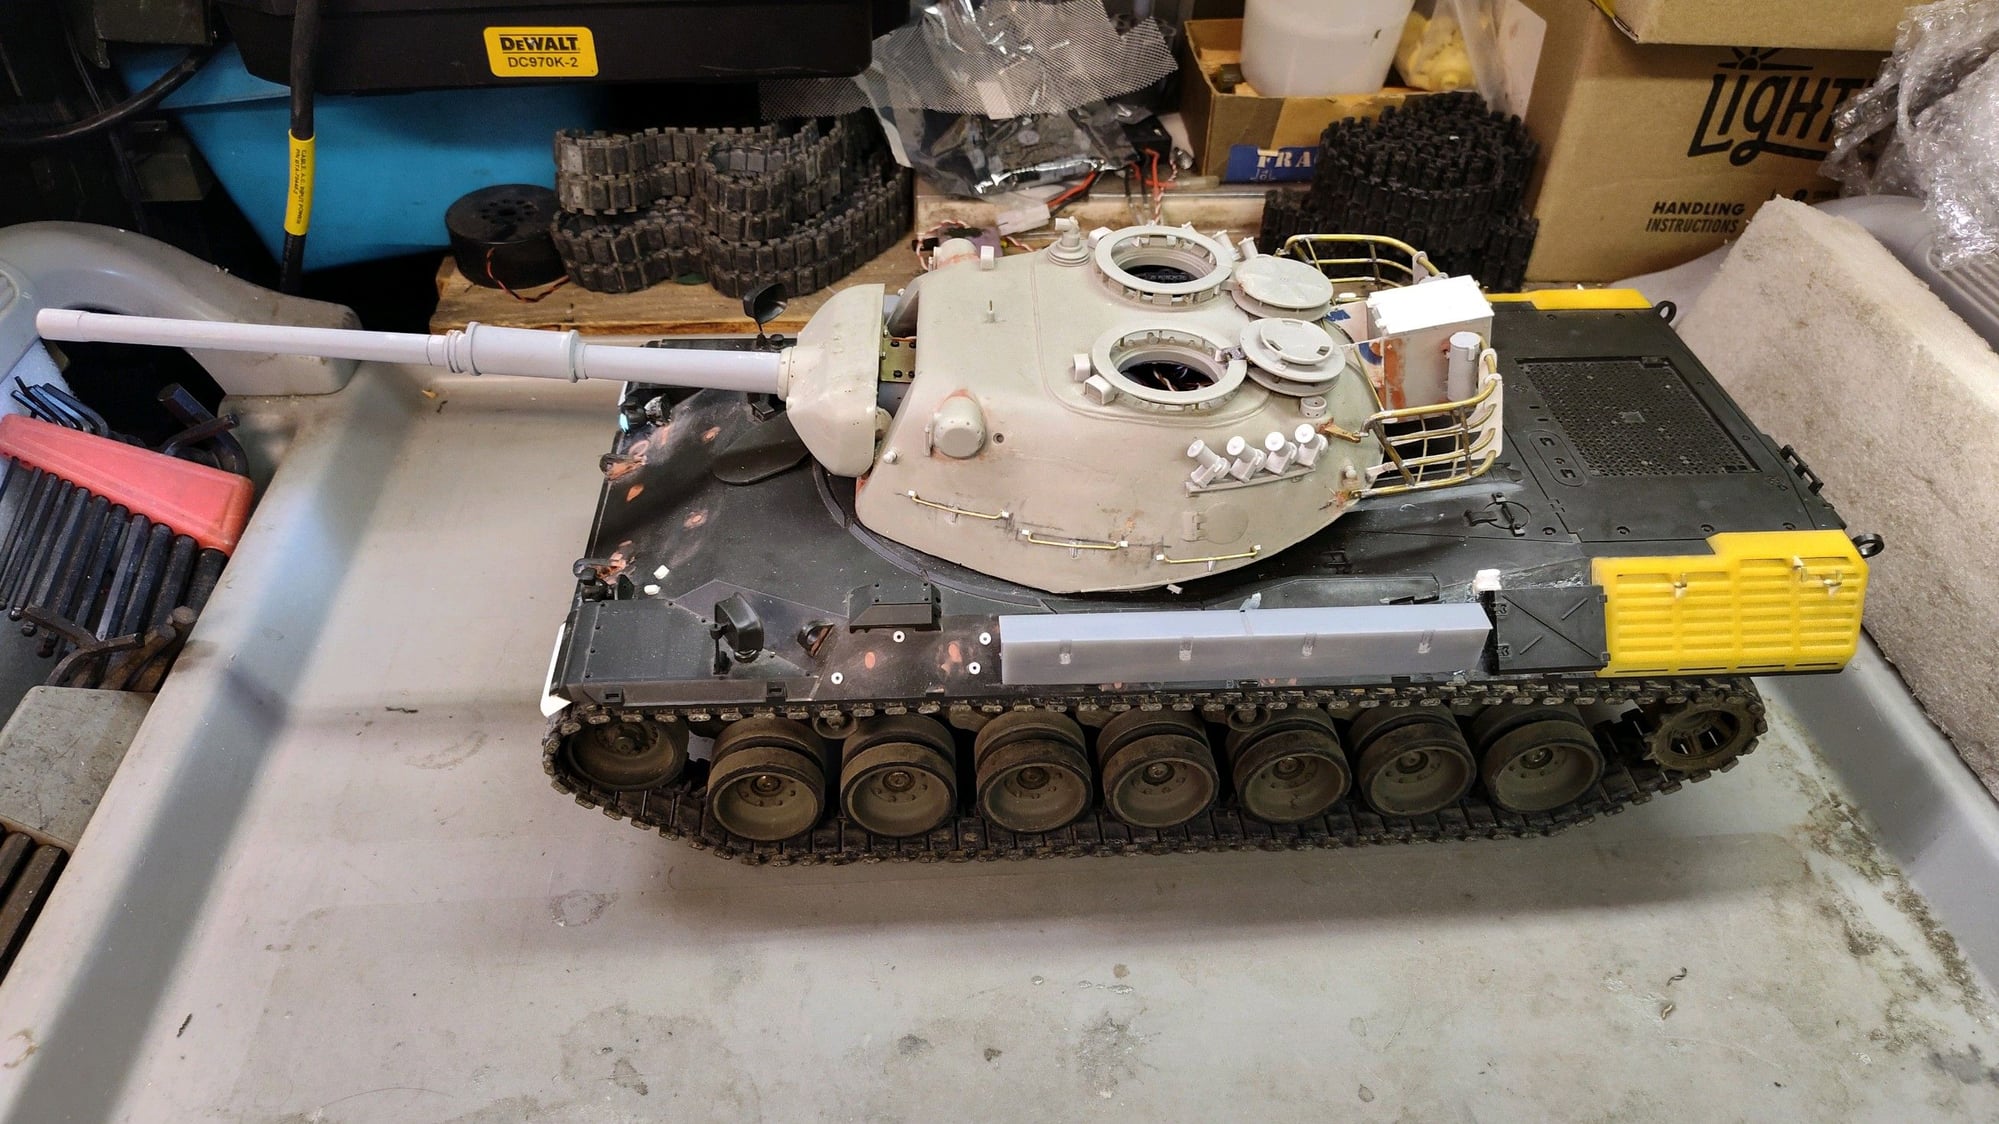
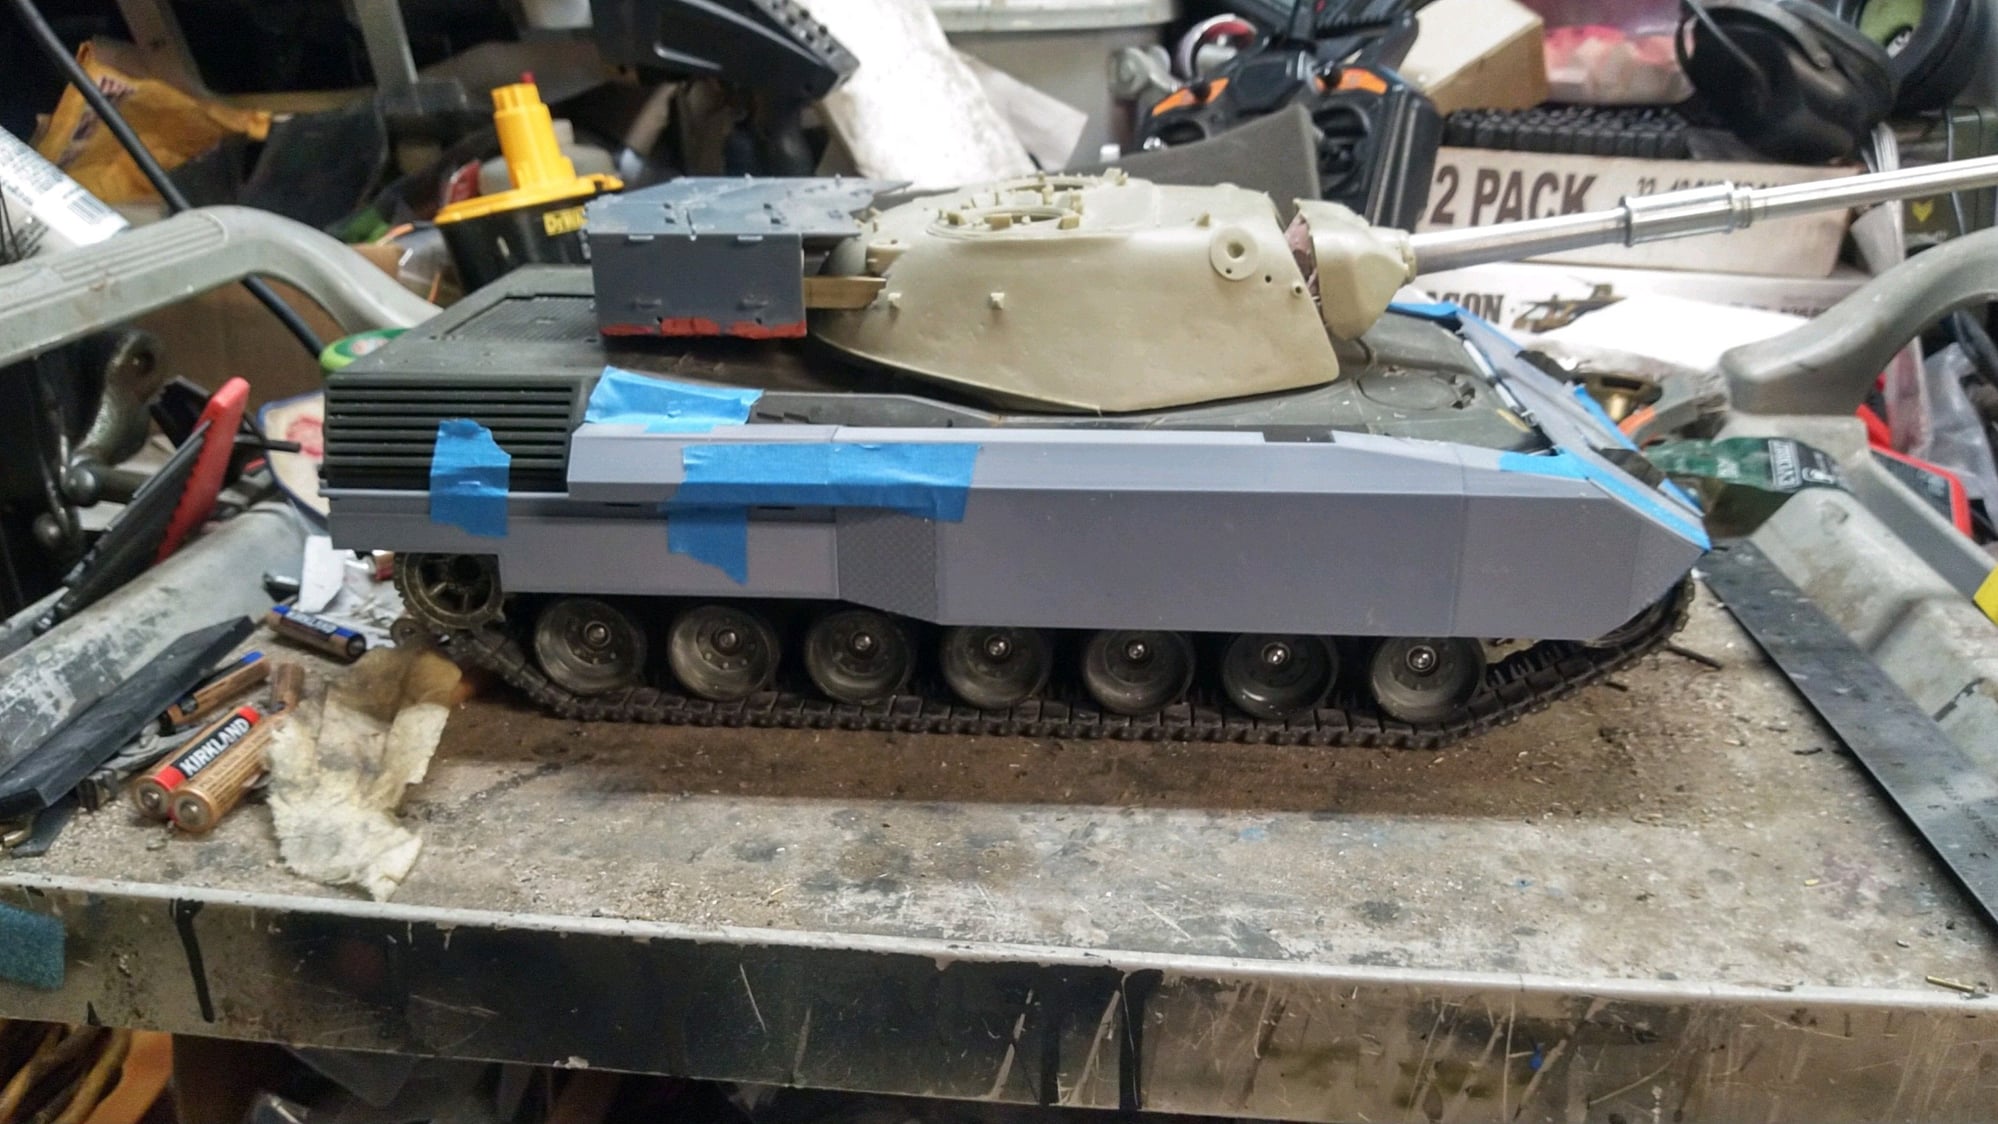
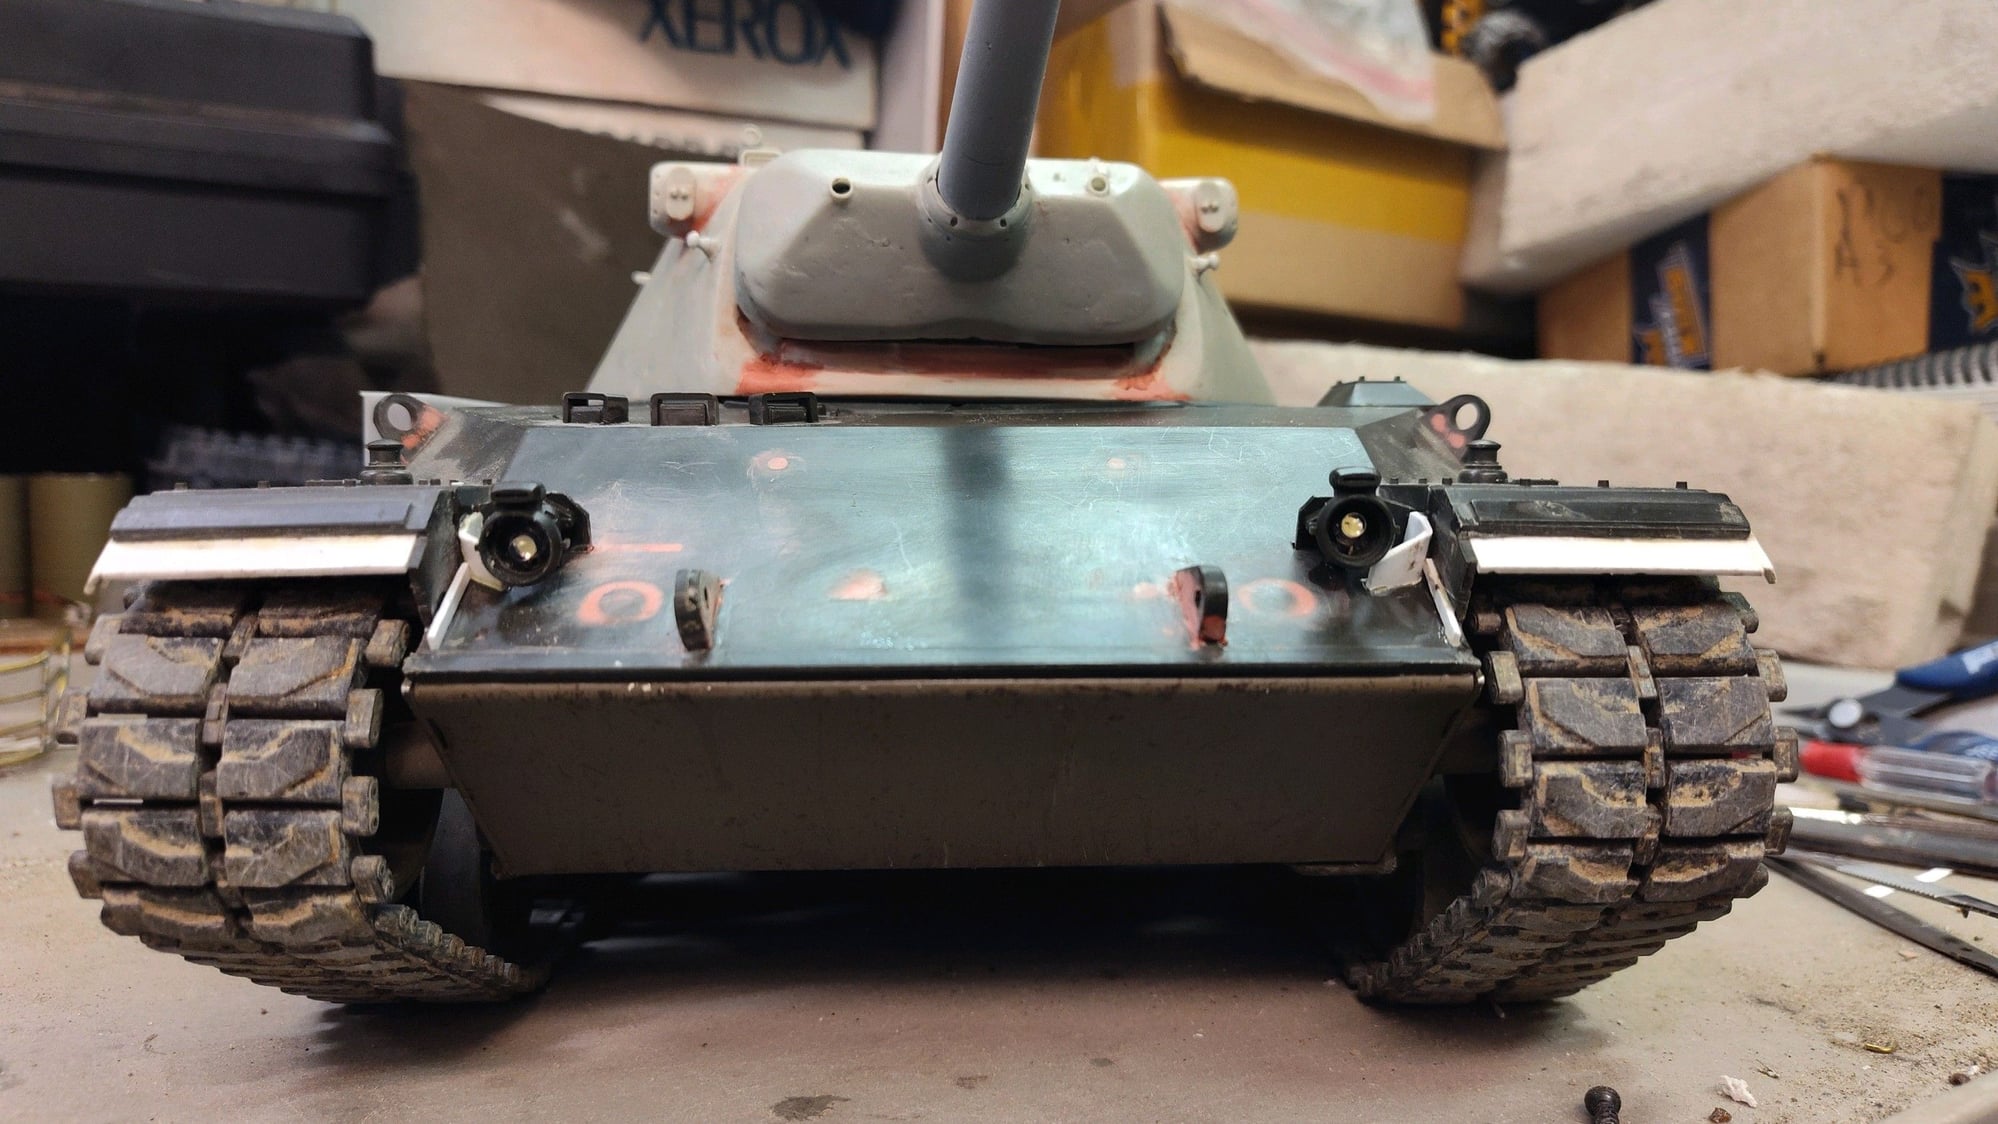
Doesnt really matter. There are so many other tanks with dimensions that are off. Show me a sherman that can actually open the drivers hatches with the turret facing forward other than a 105. The turret looks correct and has great detail level. Its tough to build and very tedious. I have 4 or 5 of them. There are only 3 that I am aware of, round turrets available, perfect scale, AFV and Der Emma Laden. While they two latter are much easier looking to build and offer various built in rc options, they cost even more and require modfiying the tank to the tamiya leopard 2 roation system, something I was not interested in doing so the turret works out fine for me. I would guess the barrel isnt mounted that much too high as it still has the correct look and appearance.
03-18-2024, 01:12 PM
#74
Thread Starter
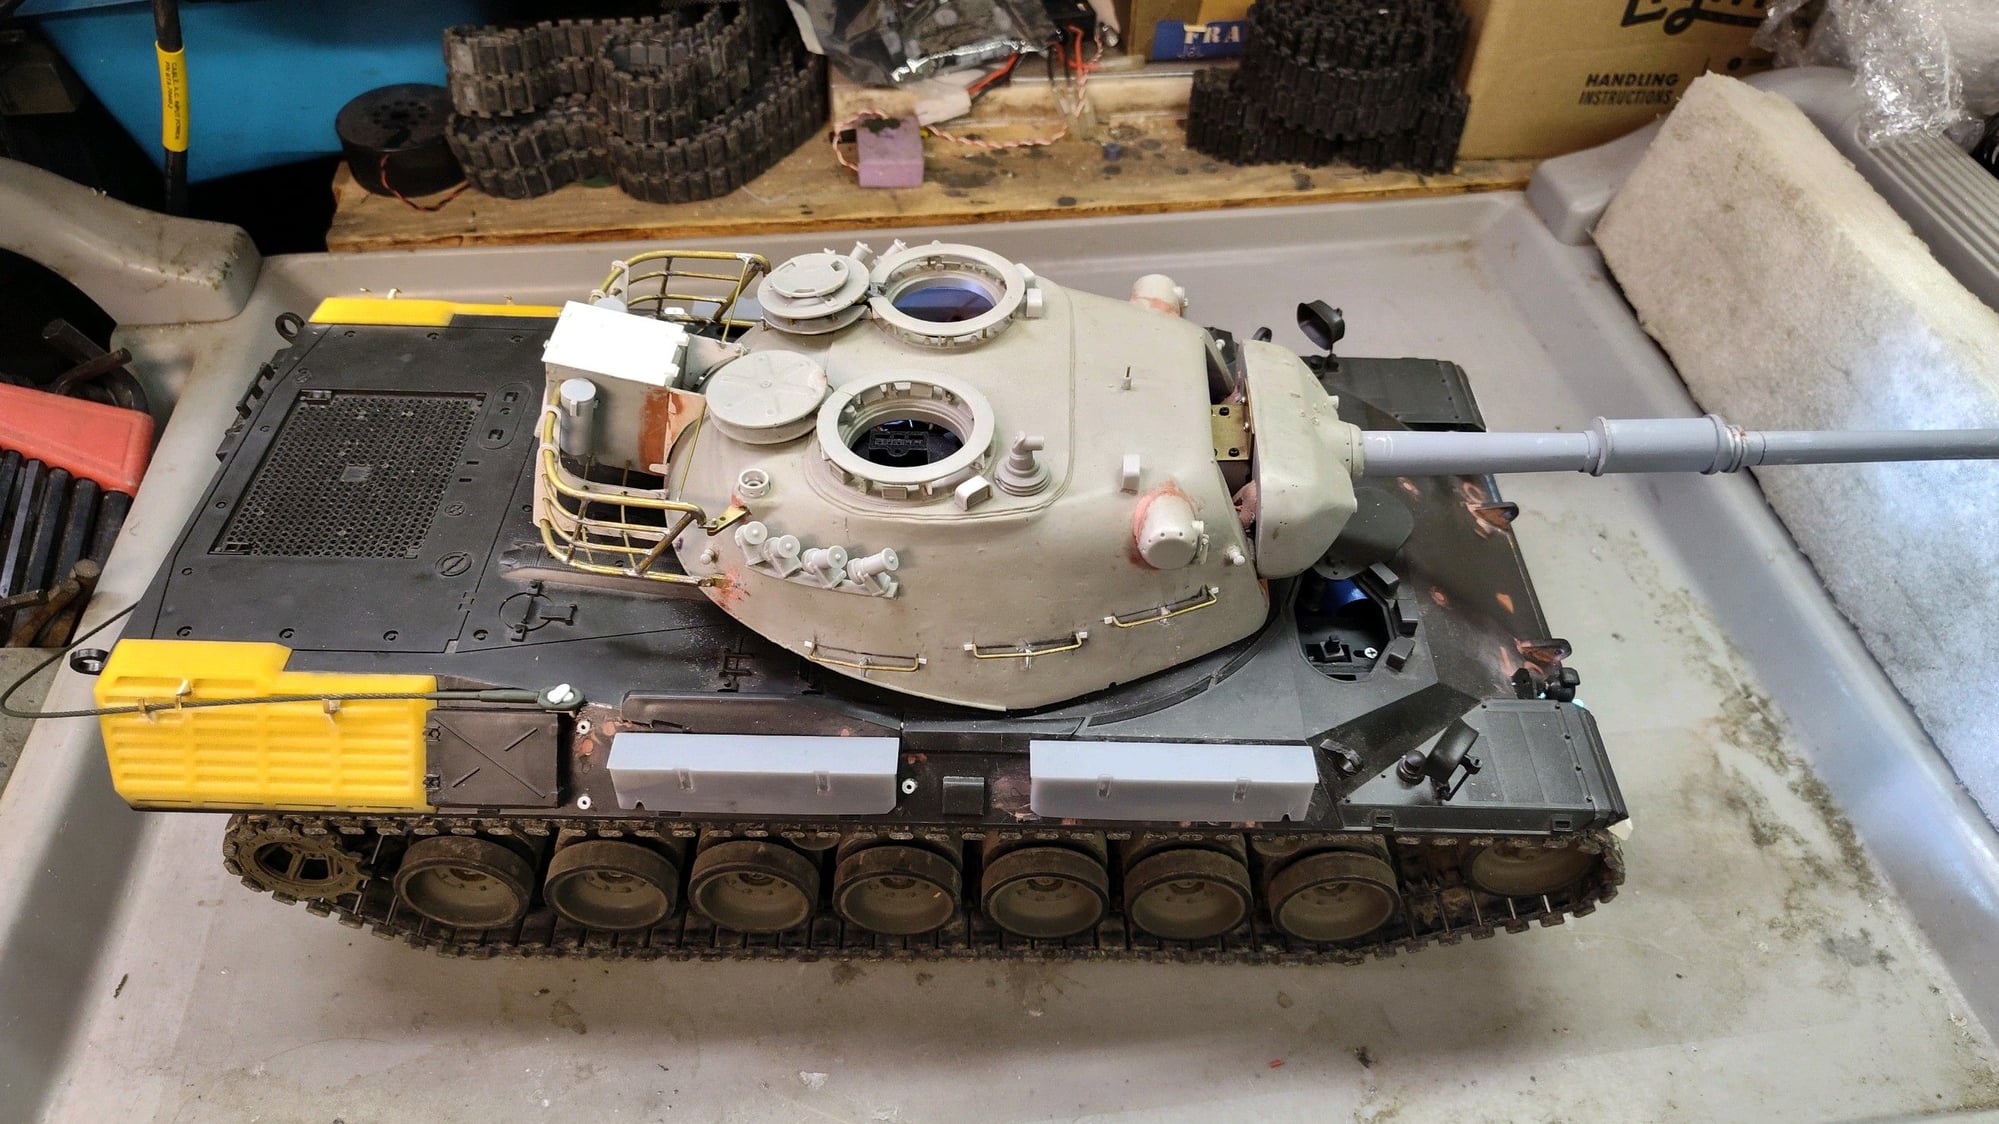
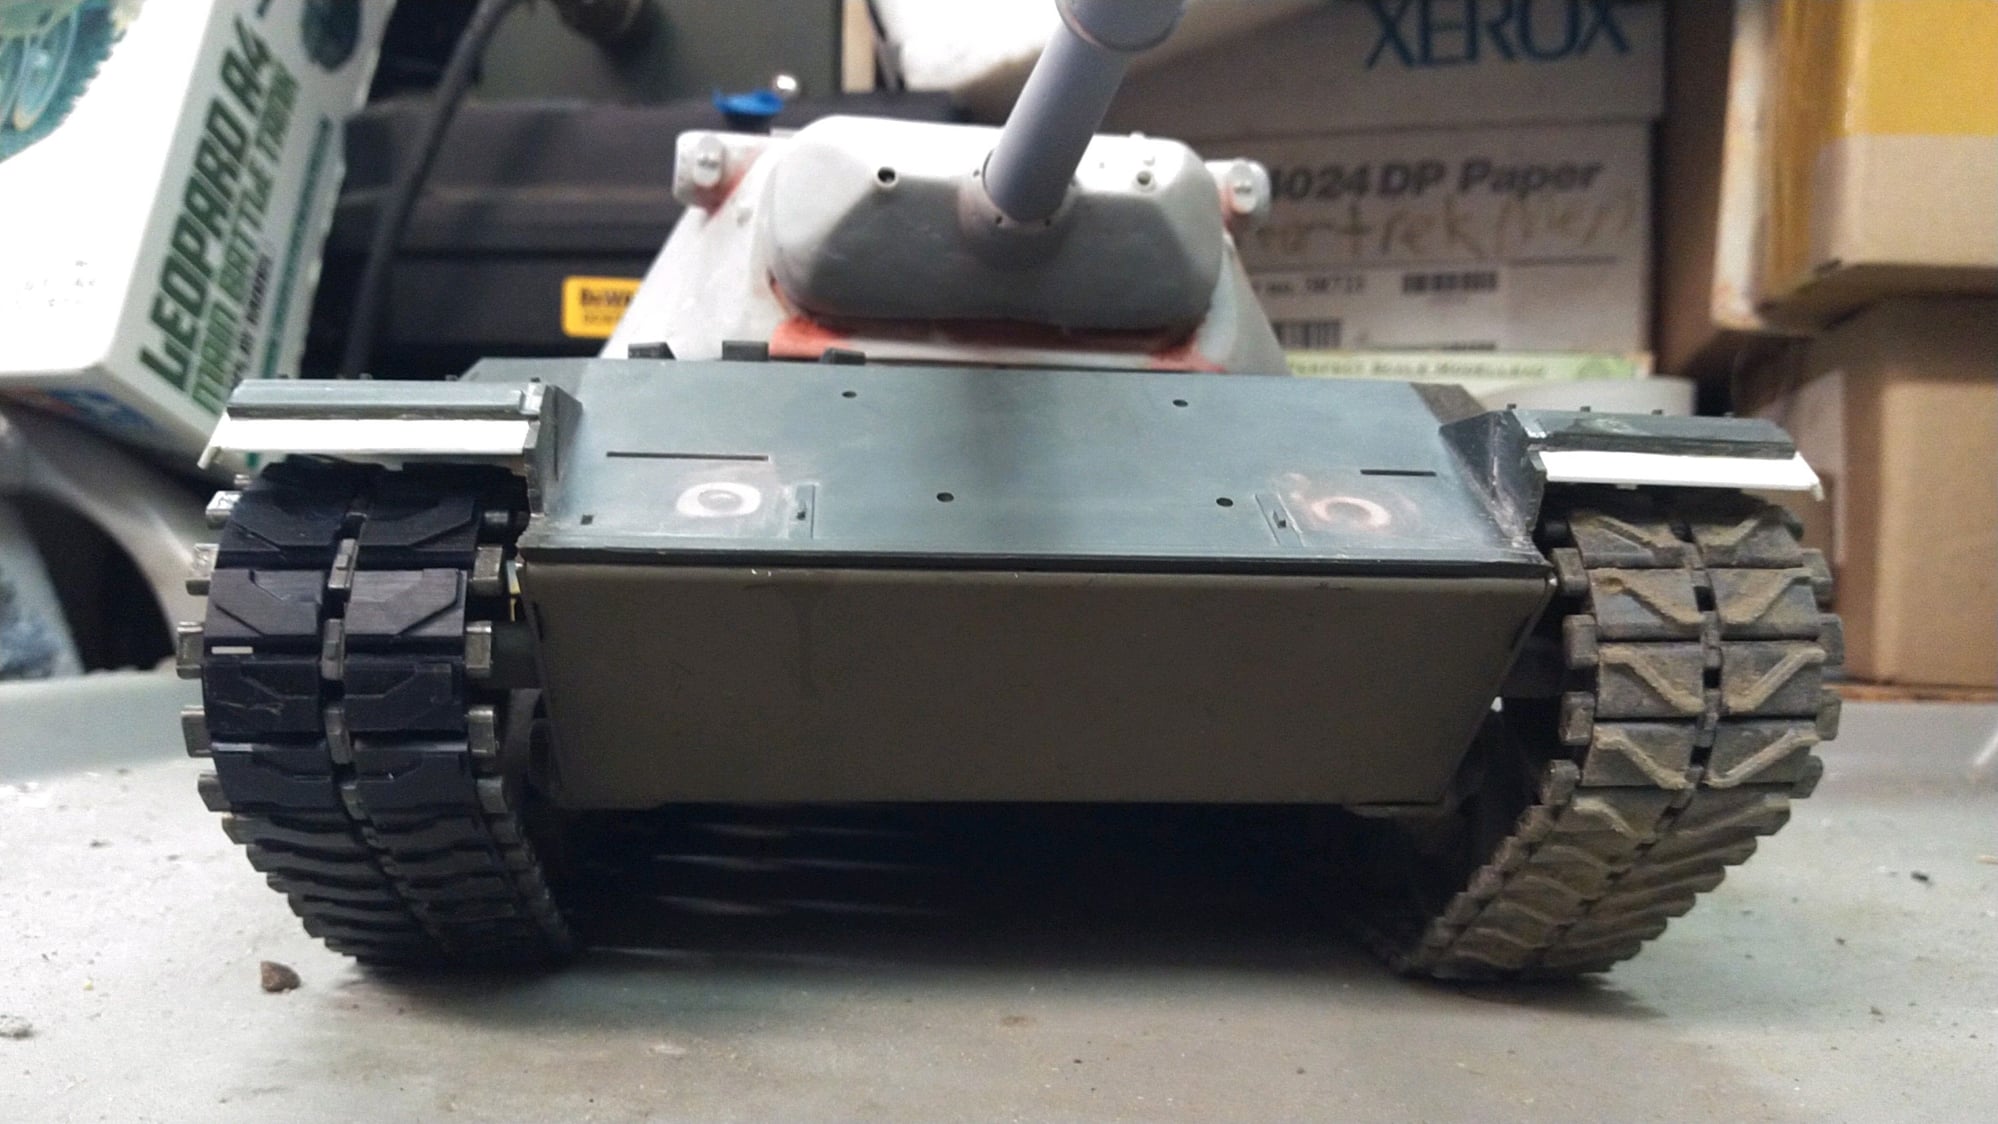
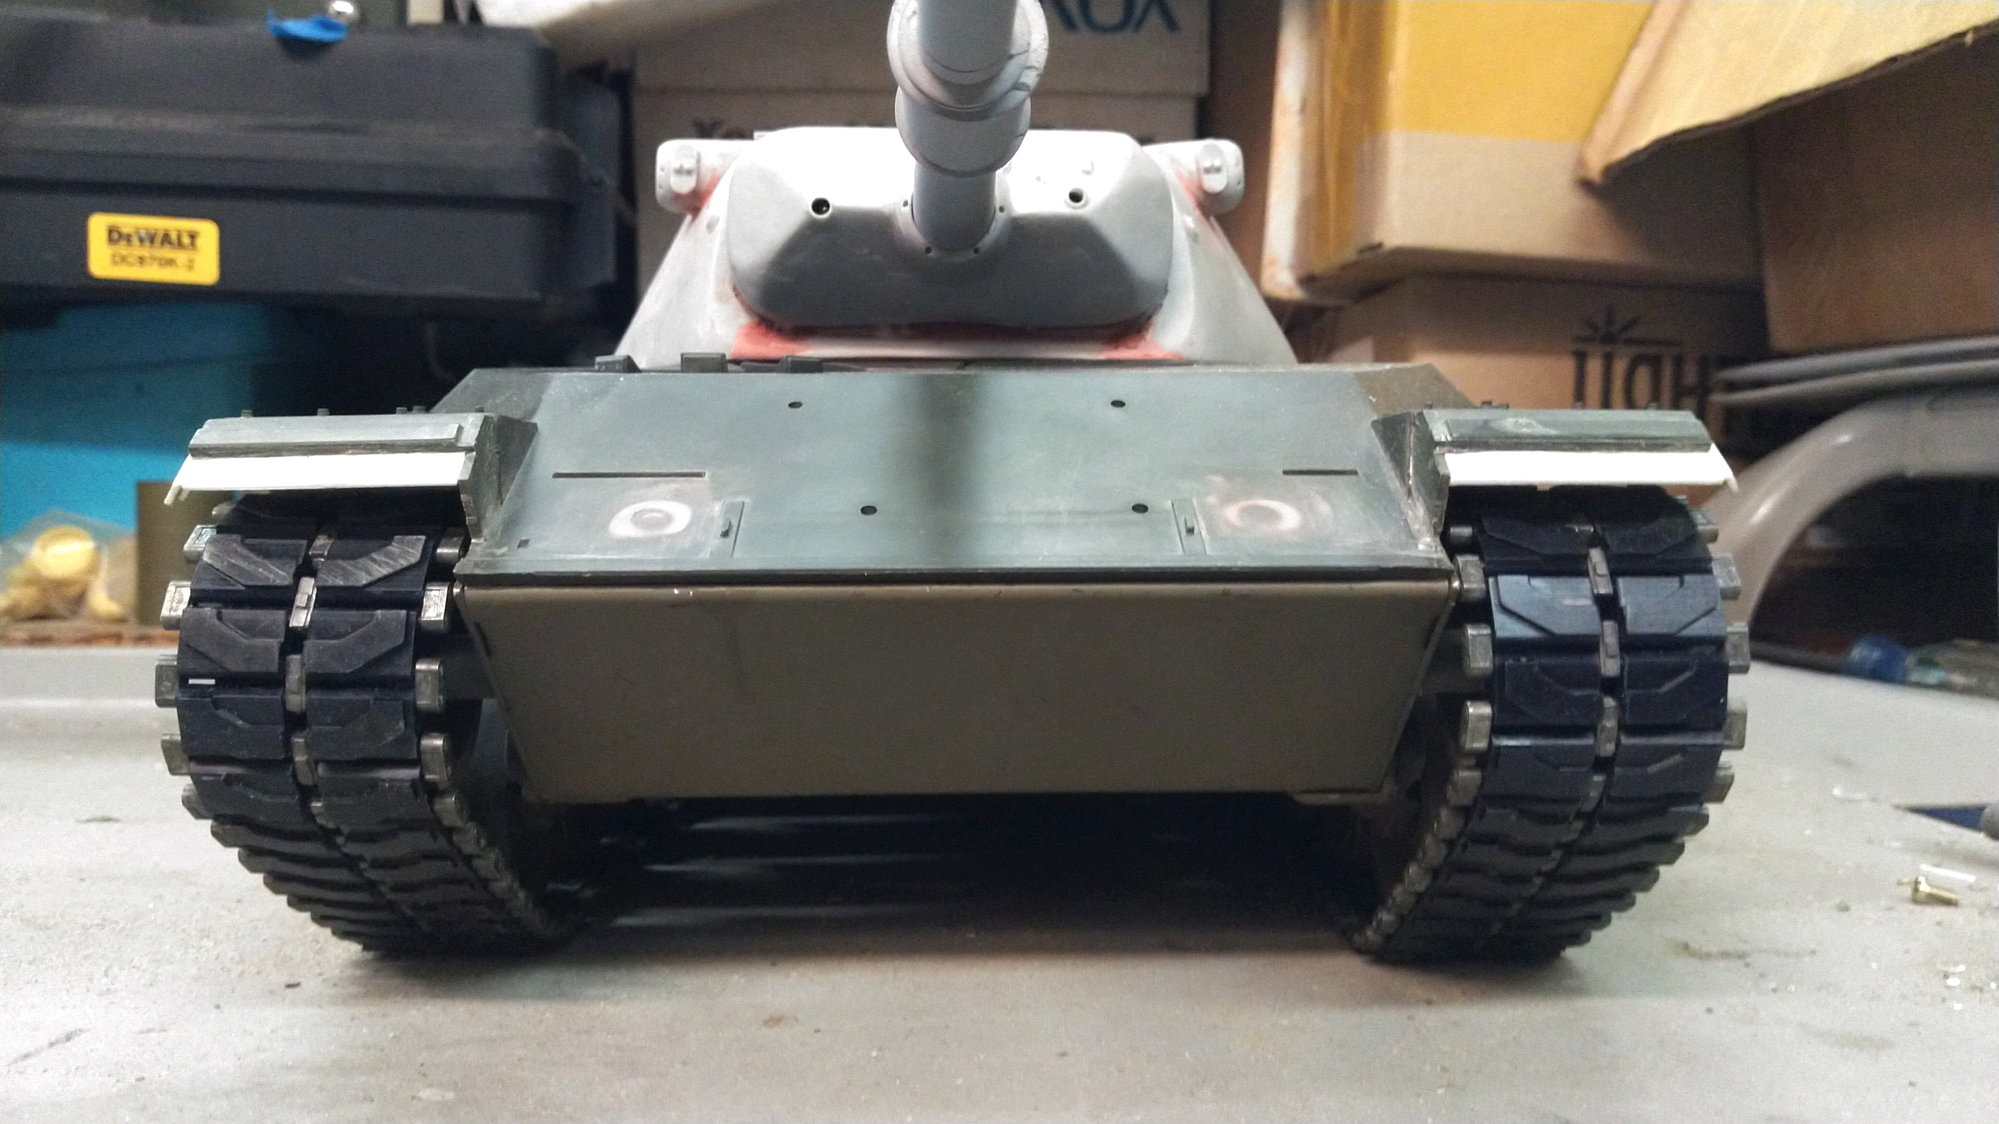
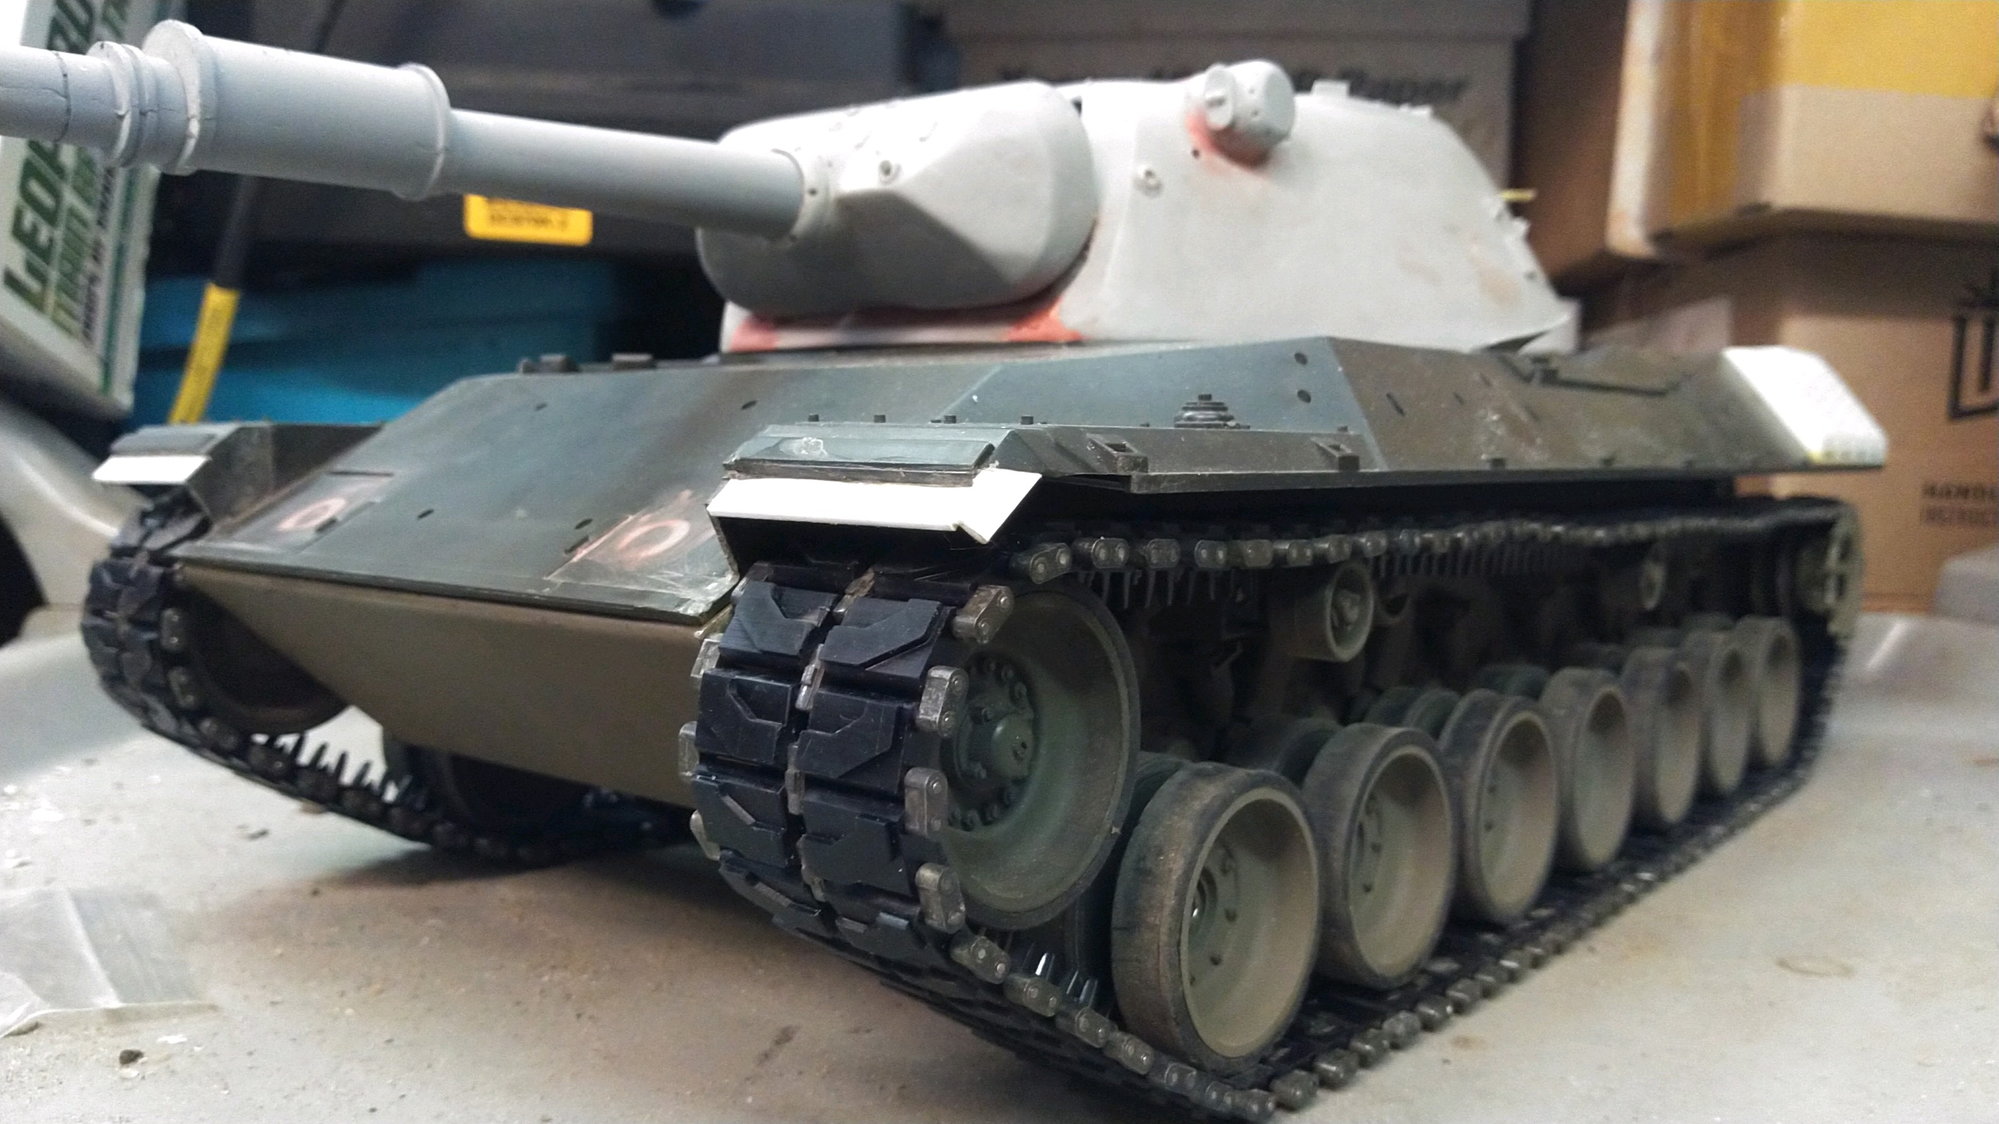
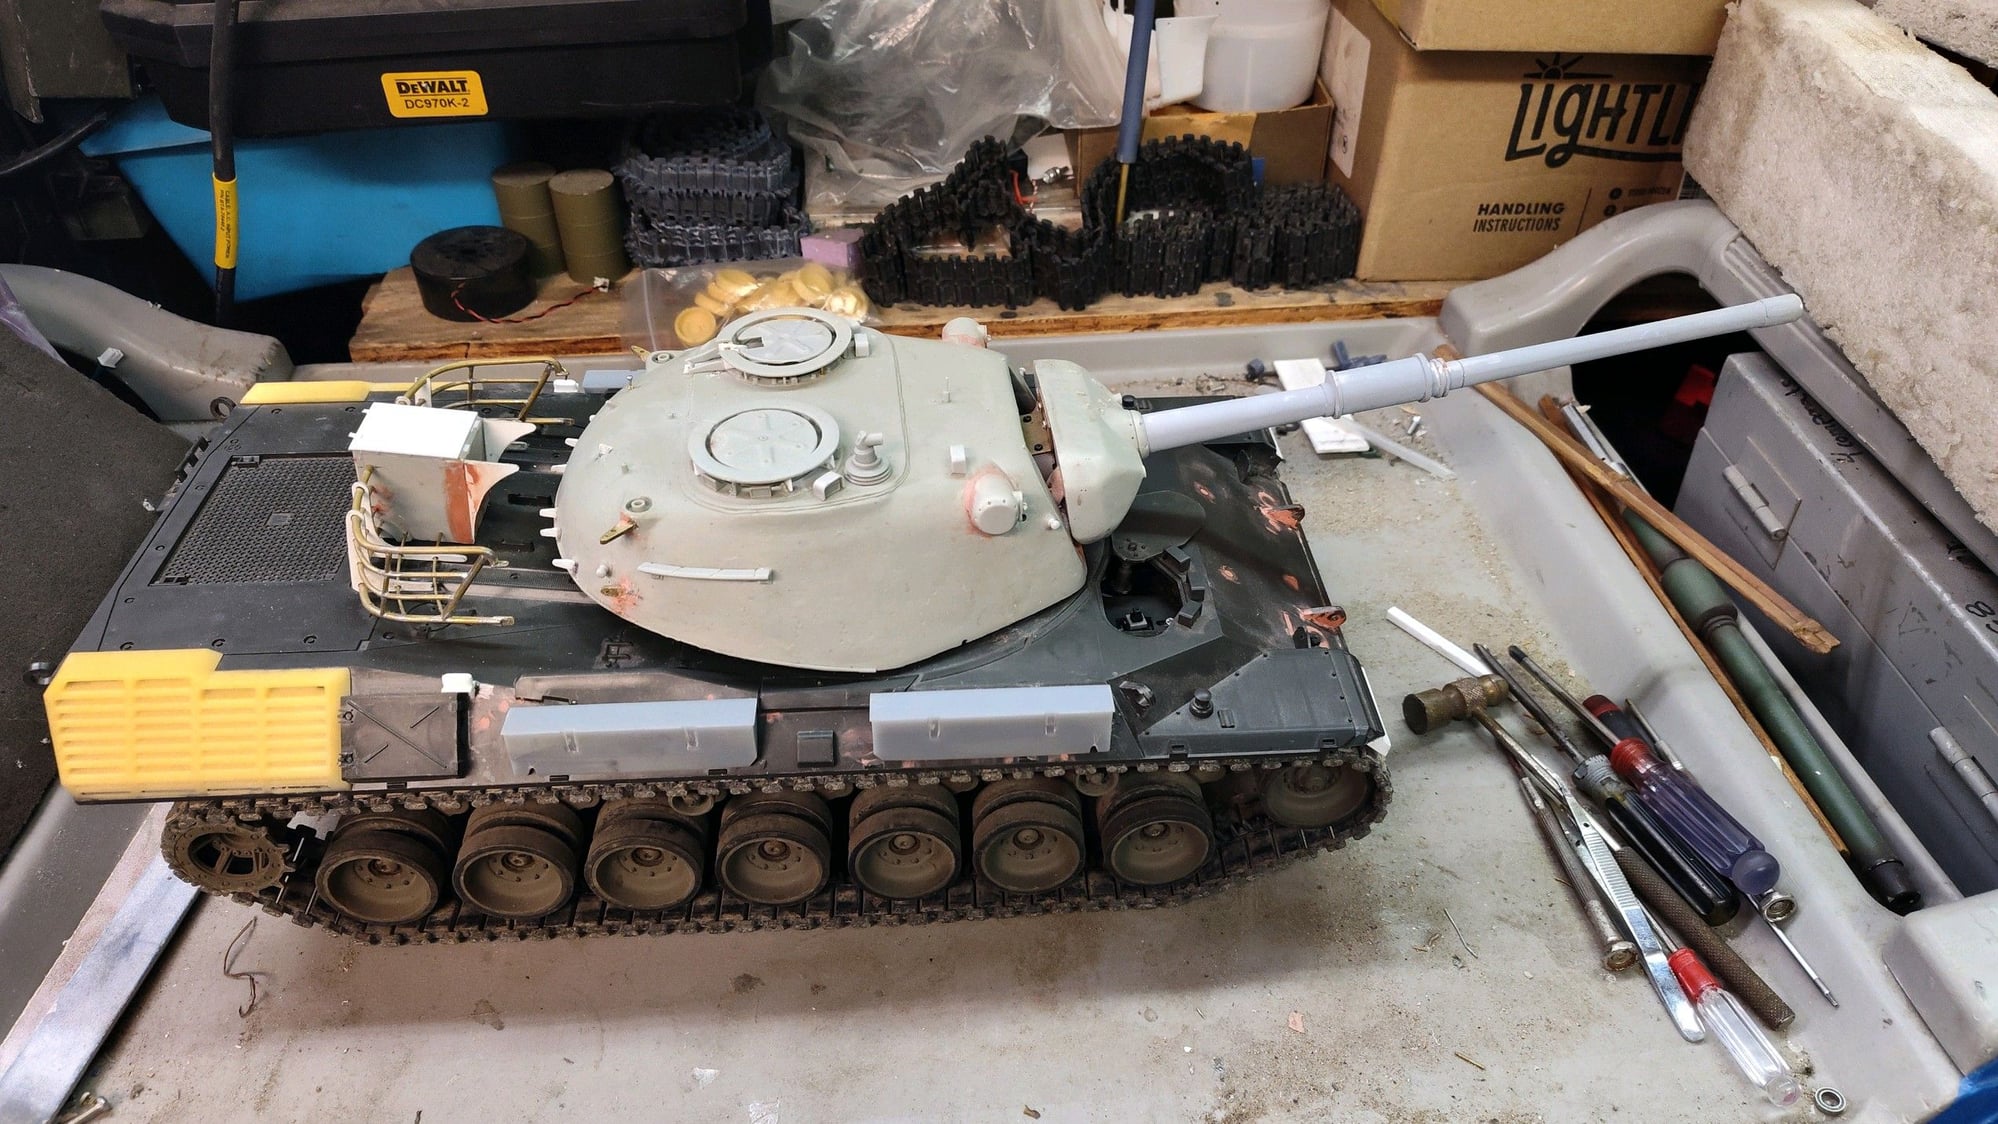
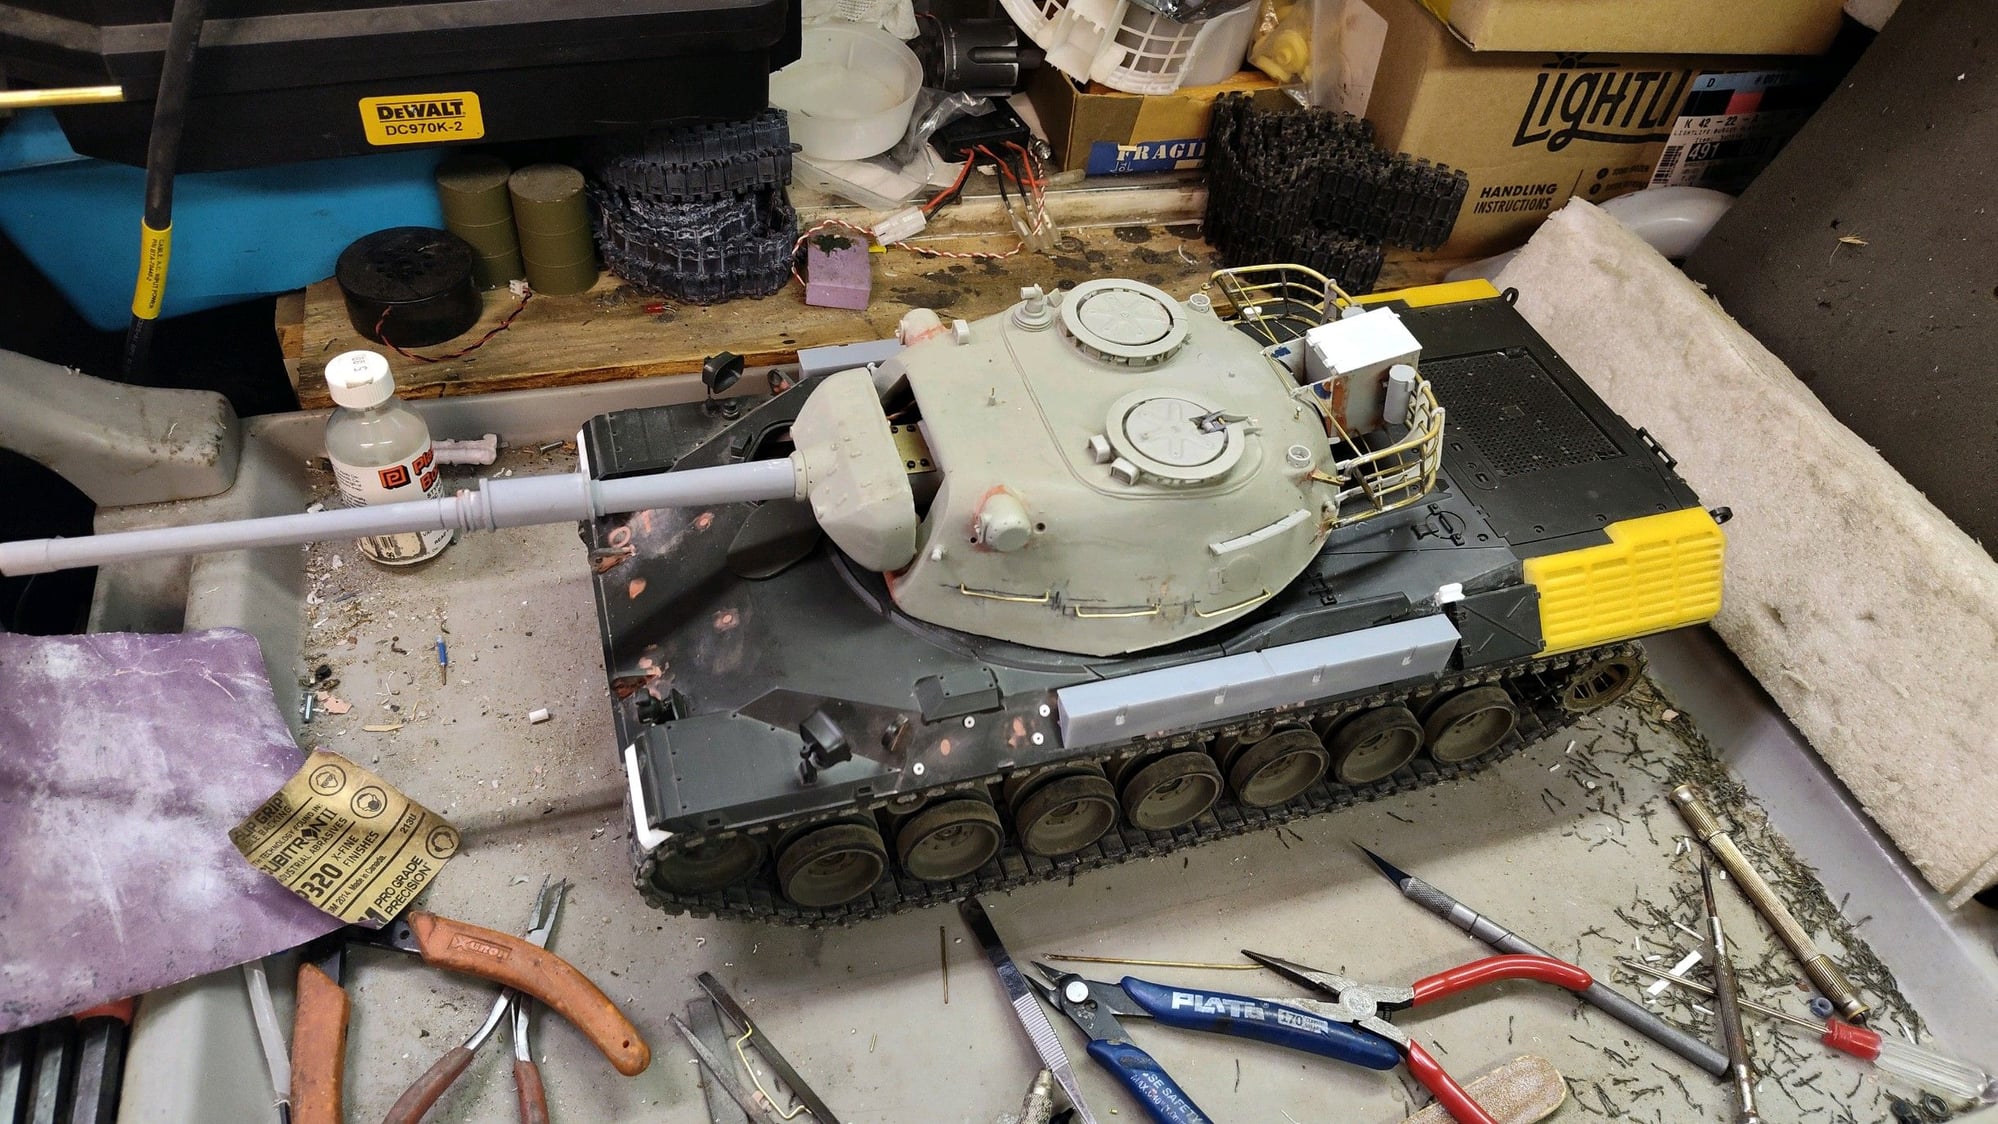
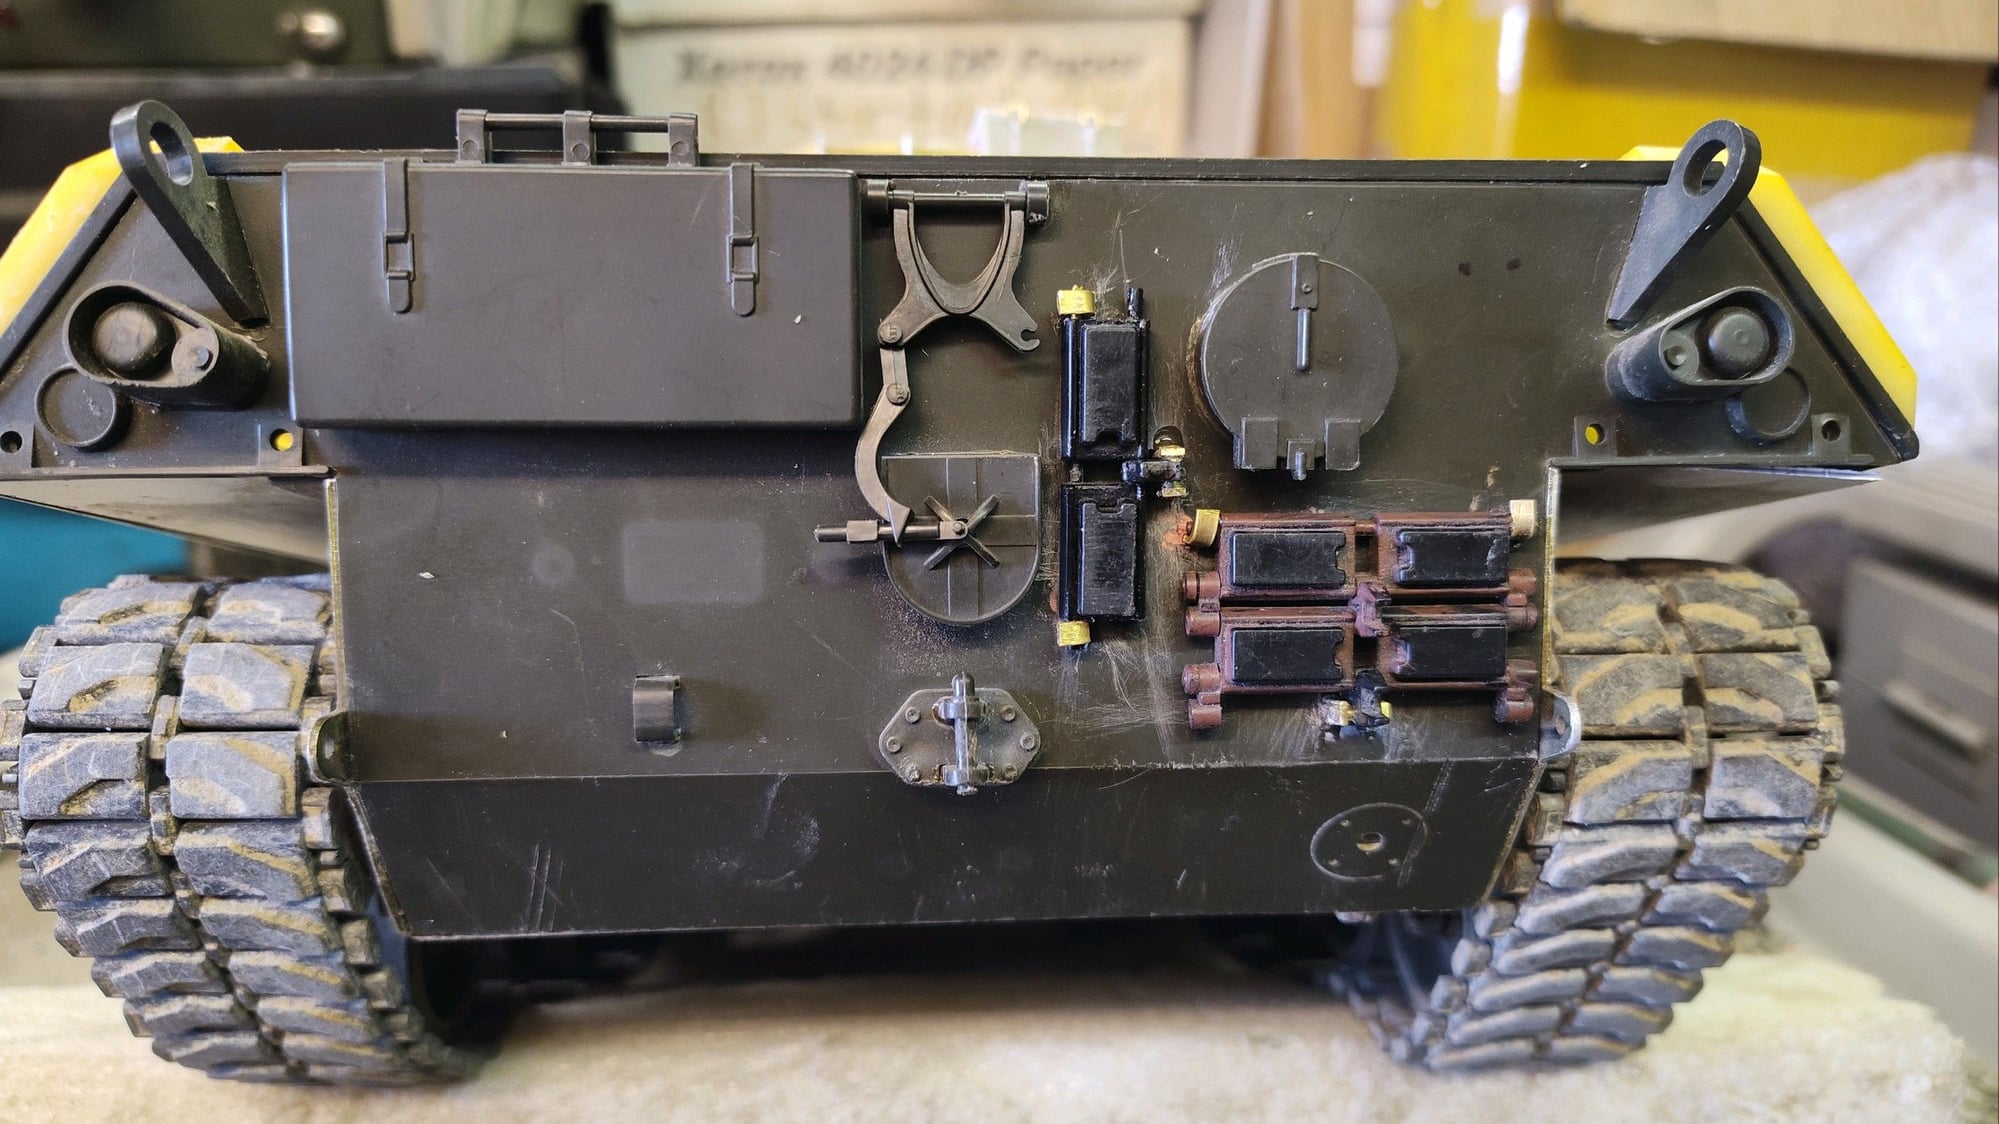
Nearing the end of this build and man am I glad I�m getting tired of waiting to use it in battle.
got he back stowage nearly comp,eye just need to mount the spare center guides.
got he back stowage nearly comp,eye just need to mount the spare center guides.