


SIG Four-Star 60 Build
 03-02-2019, 12:38 PM
#1

Thread Starter
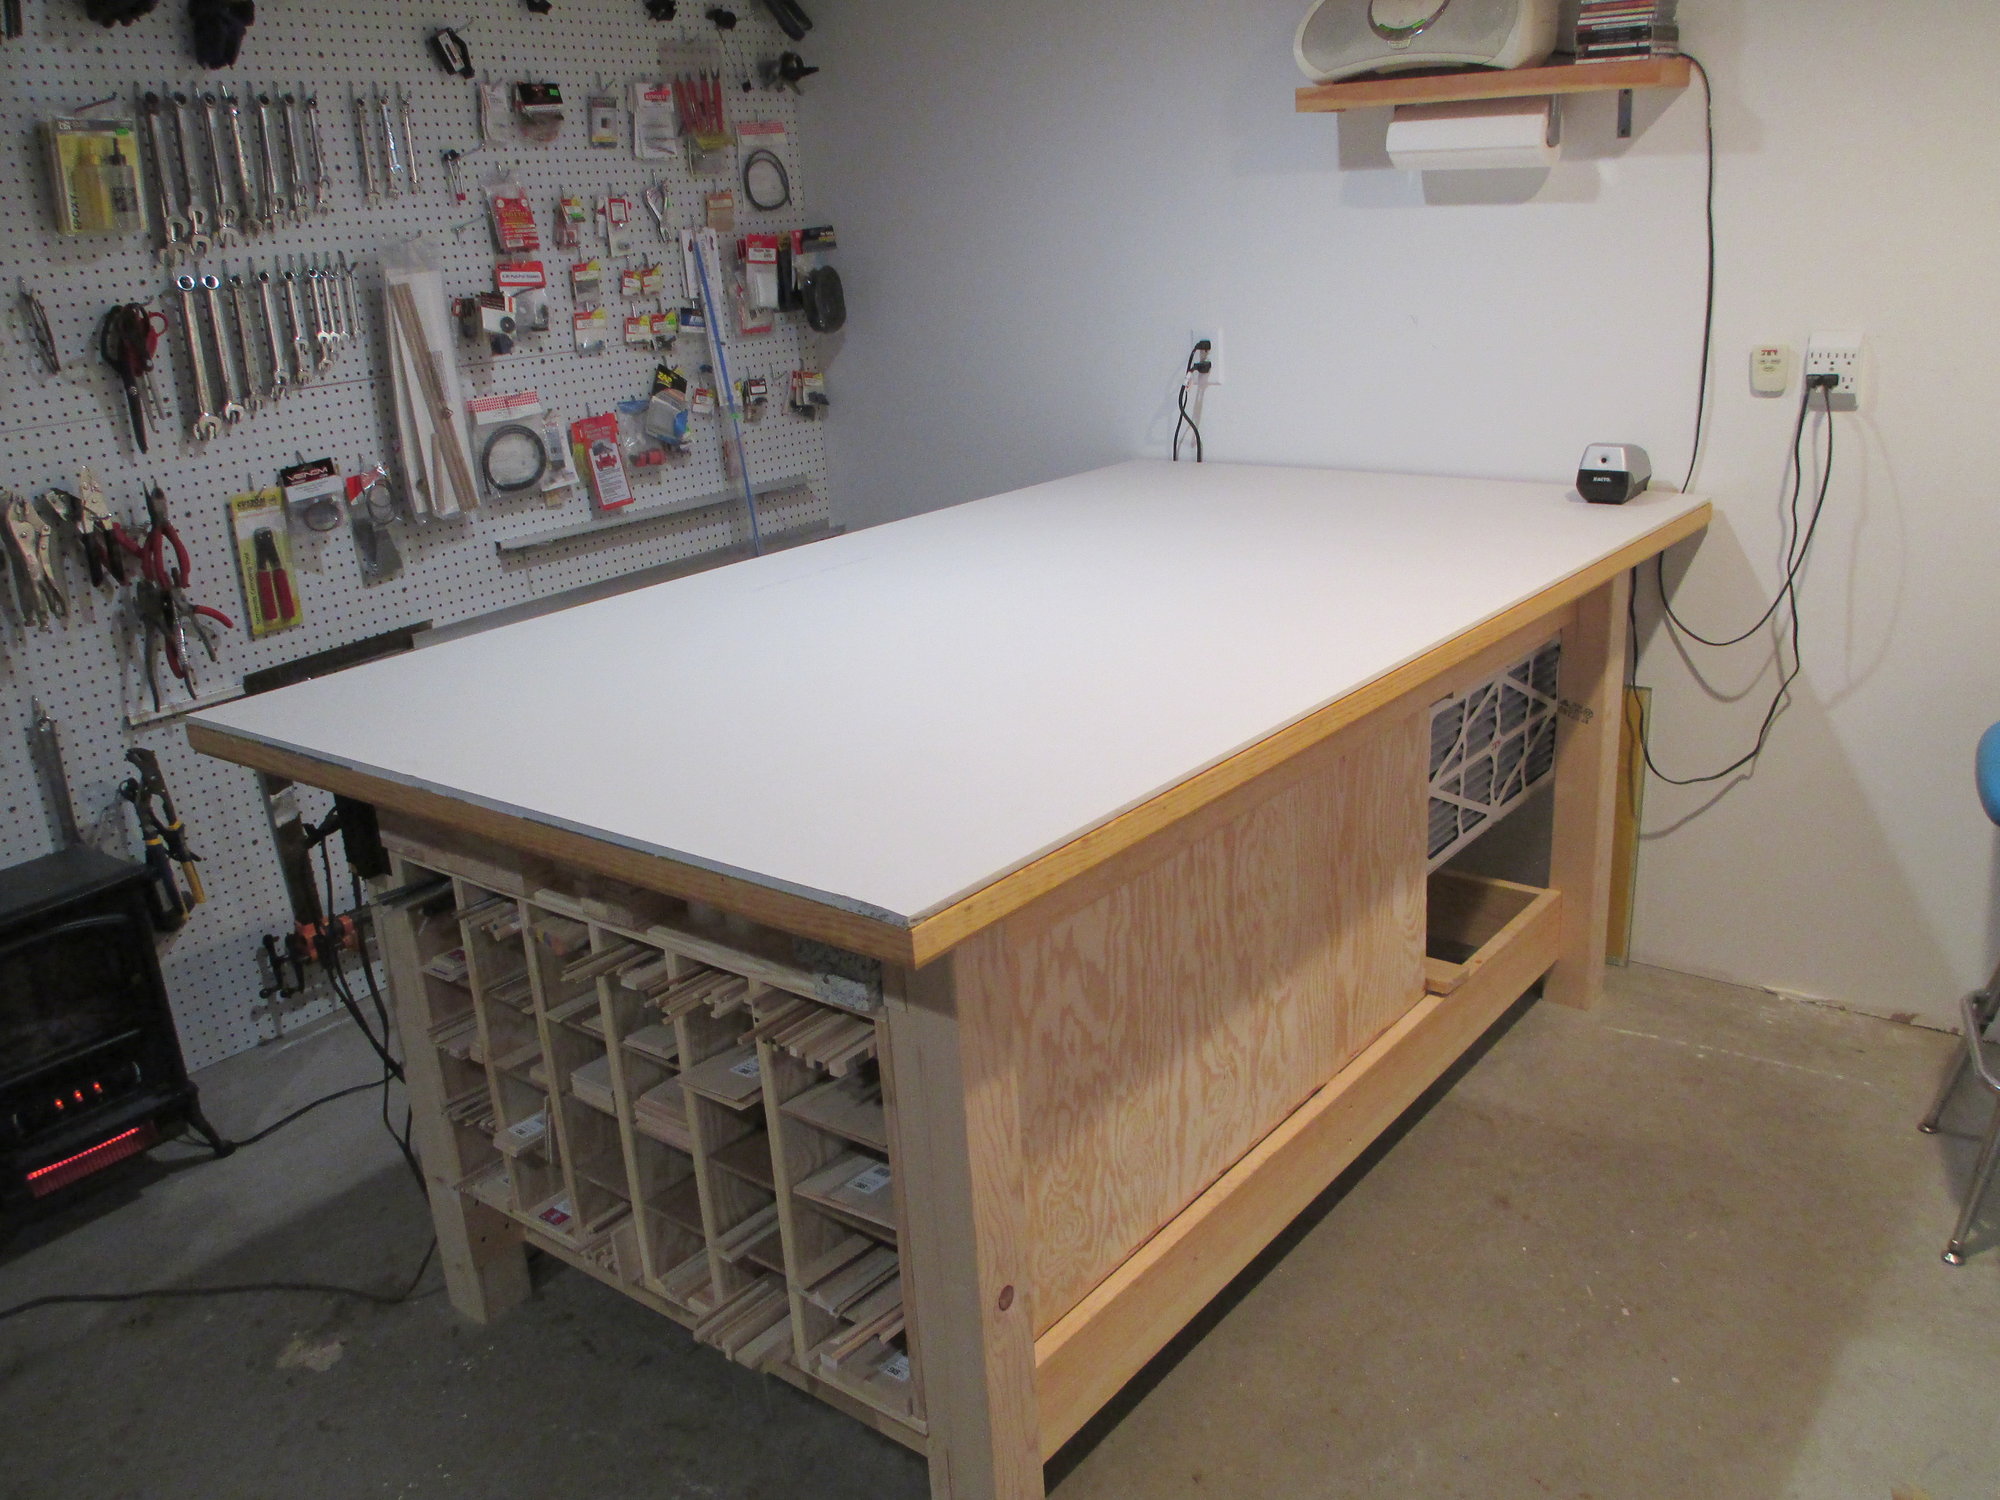
A new, clean sheet of drywall on my build table can only mean one thing...time for a new build project!
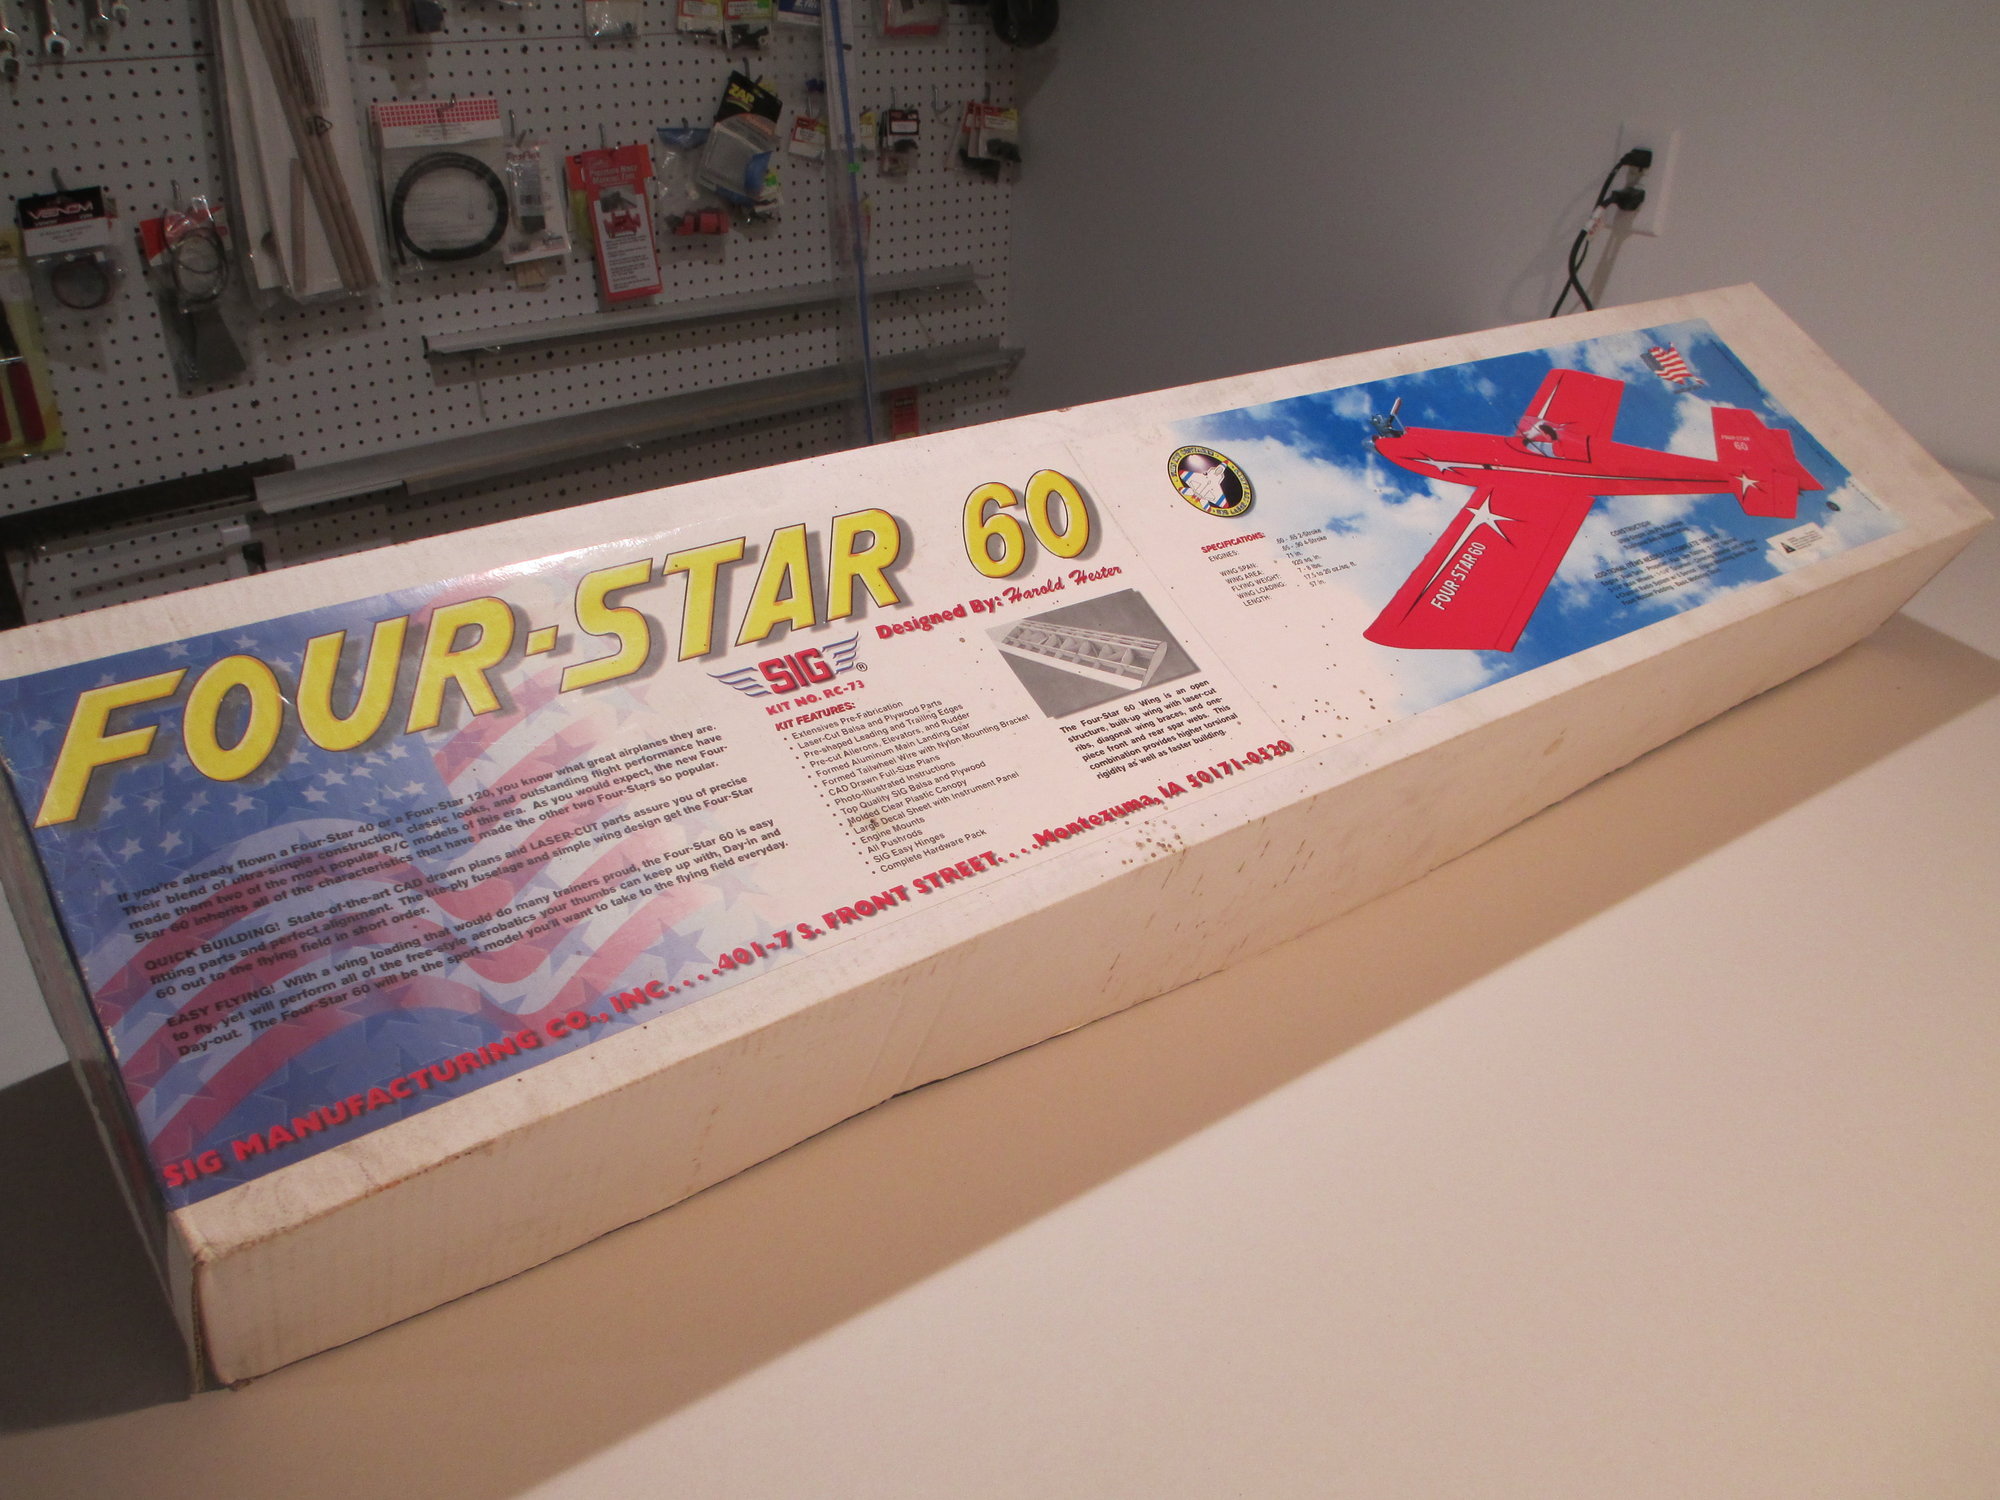
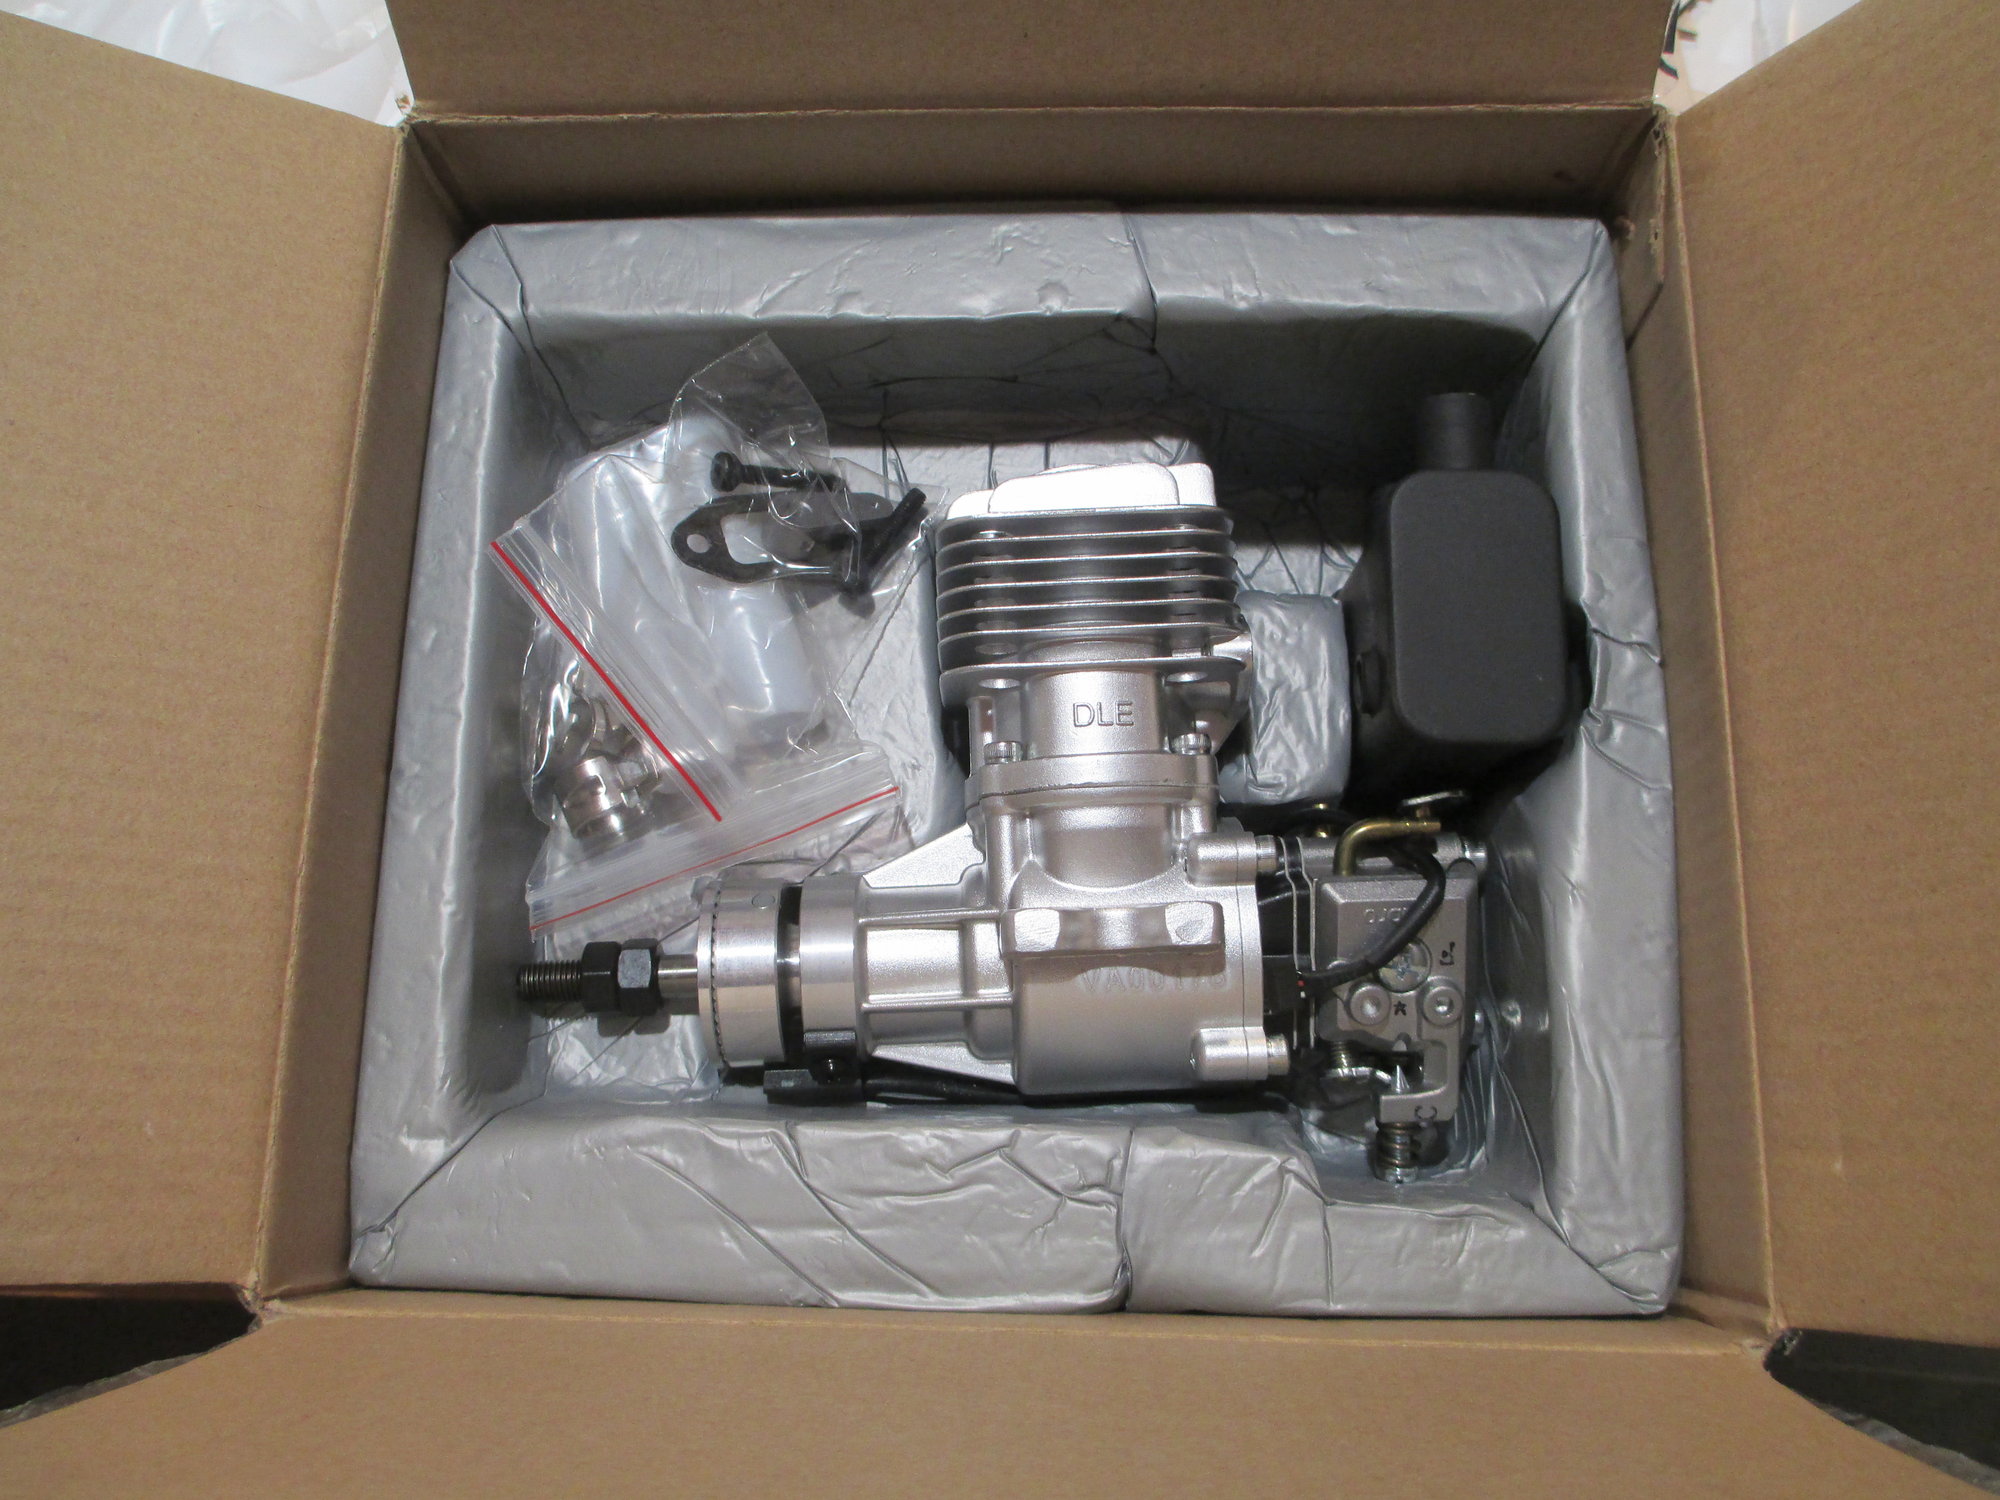
Selecting the plane that I wanted to build only required me to open my closet and select from among the many kits that I have stashed away over the years. As you can see by the photo, I selected a kit manufactured by Sig, the Four-Star 60. I actually bought this unopened kit from an auction my club had last summer. I'm almost embarrassed to say what I paid for this new unopened kit. The hammer dropped at 30 or 35 dollars!
Some of you may remember a few of my builds that I completed, such as the Sig Ryan ST-A, or the big Sig Morresey Bravo, Carl Golberg's Tiger 60, Sig Spacewalker, or my last build by Northeast Aerodynamics Sport-Air just to name a few. Each of these were fun and I hope informative for those following along. I hope to make some changes/improvements to this classic and I invite you to come along for the ride!
Last edited by VincentJ; 03-03-2019 at 10:48 AM.

The following 4 users liked this post by VincentJ:
03-02-2019, 01:21 PM
#2
Thread Starter
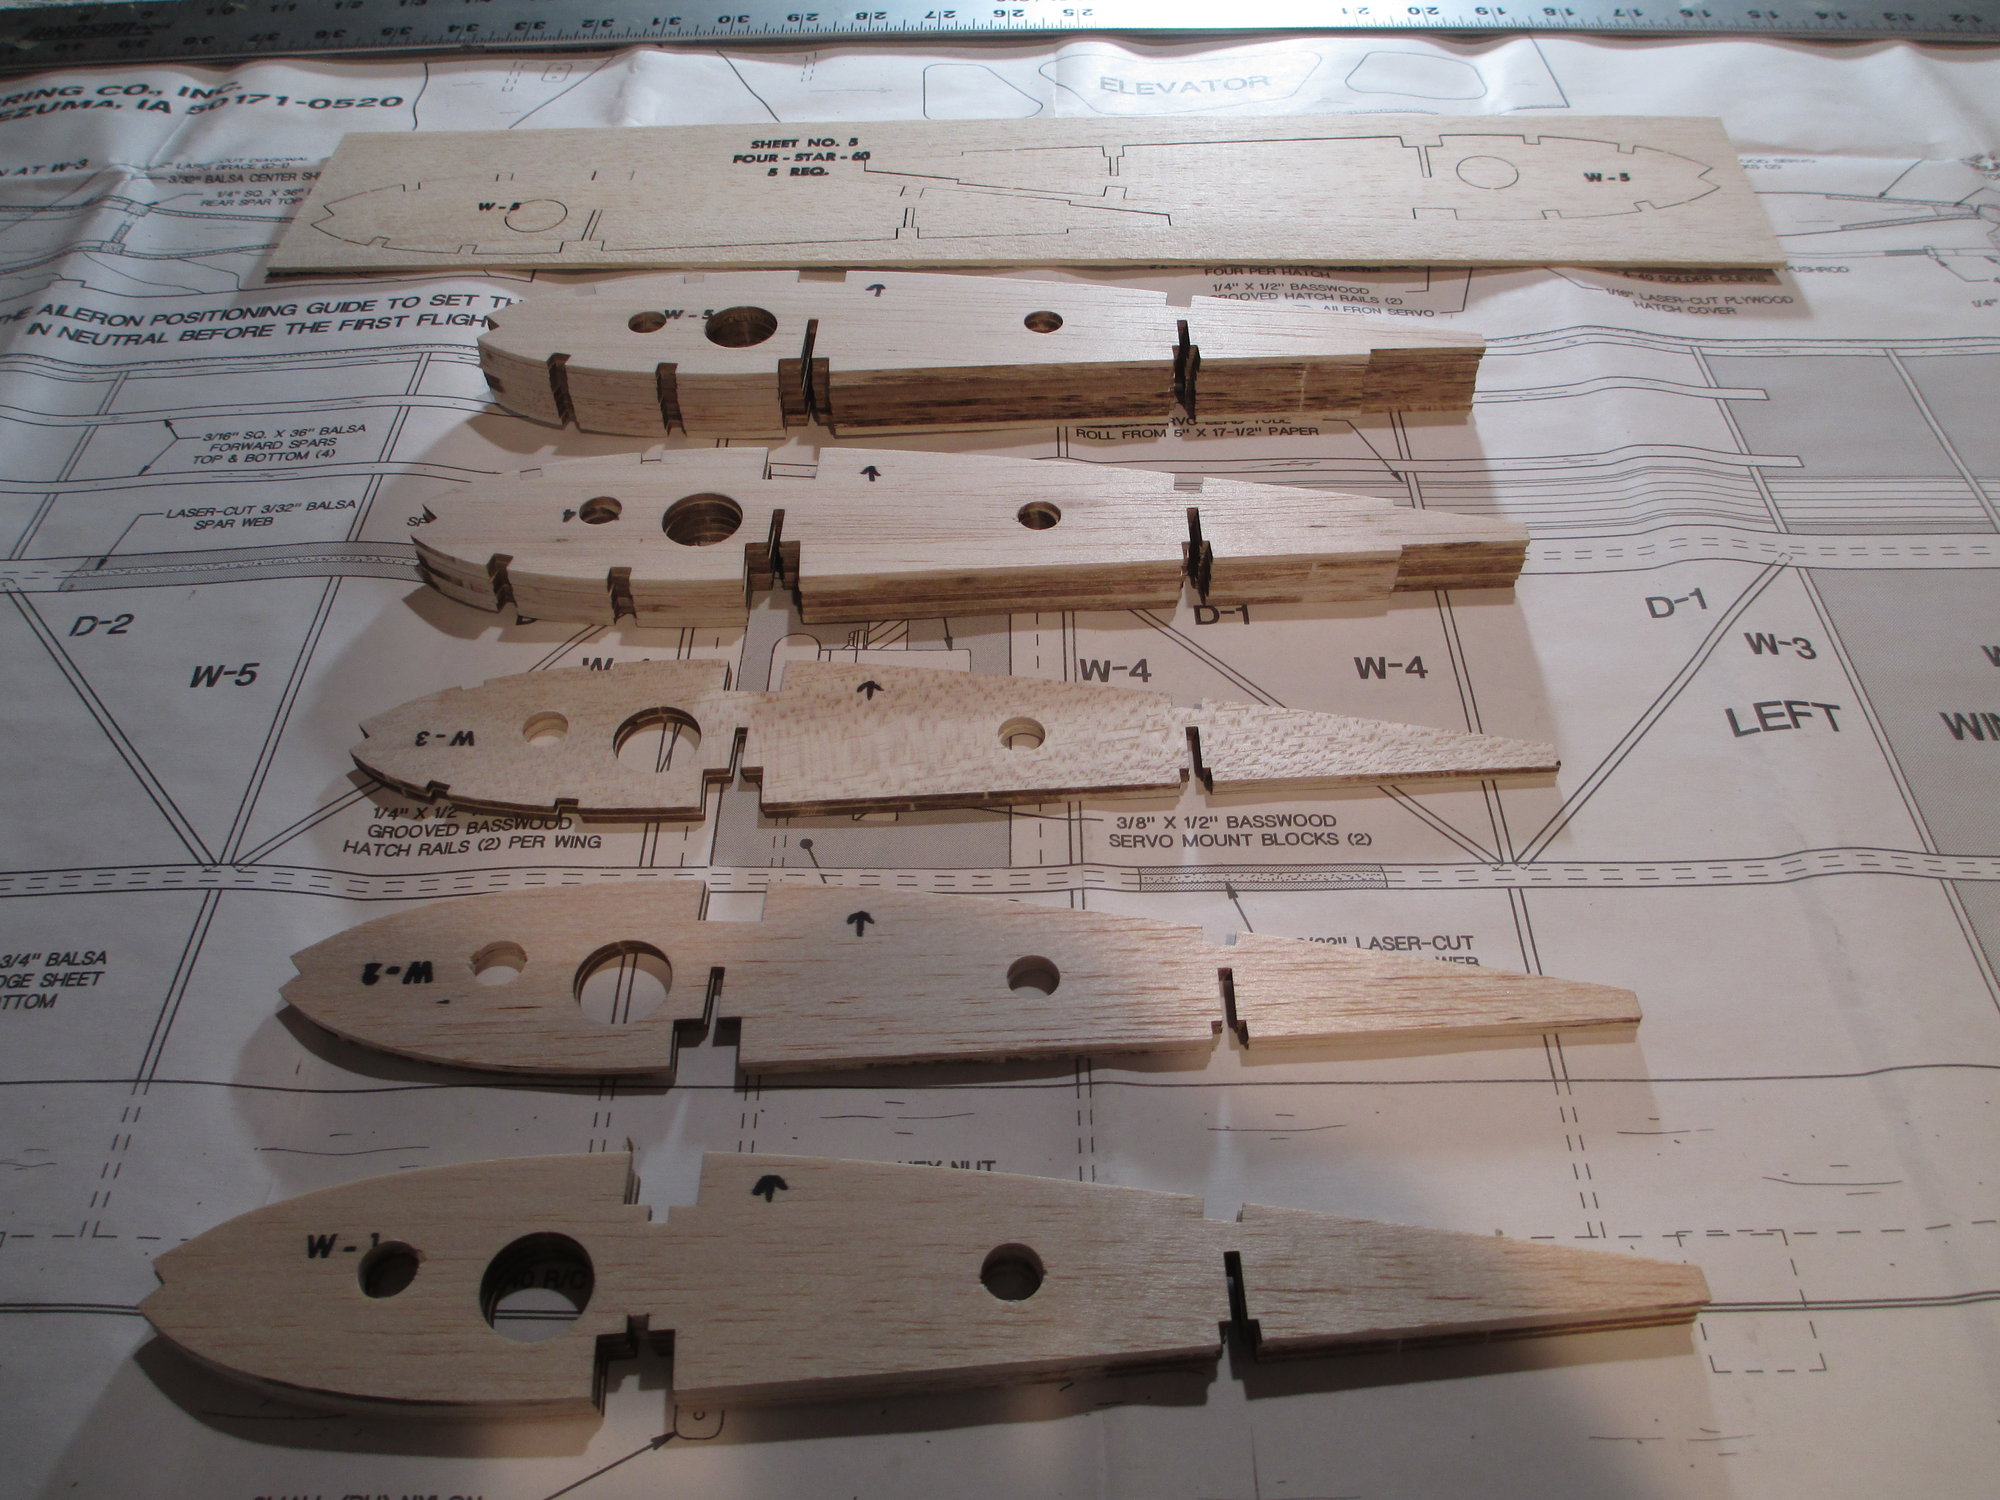
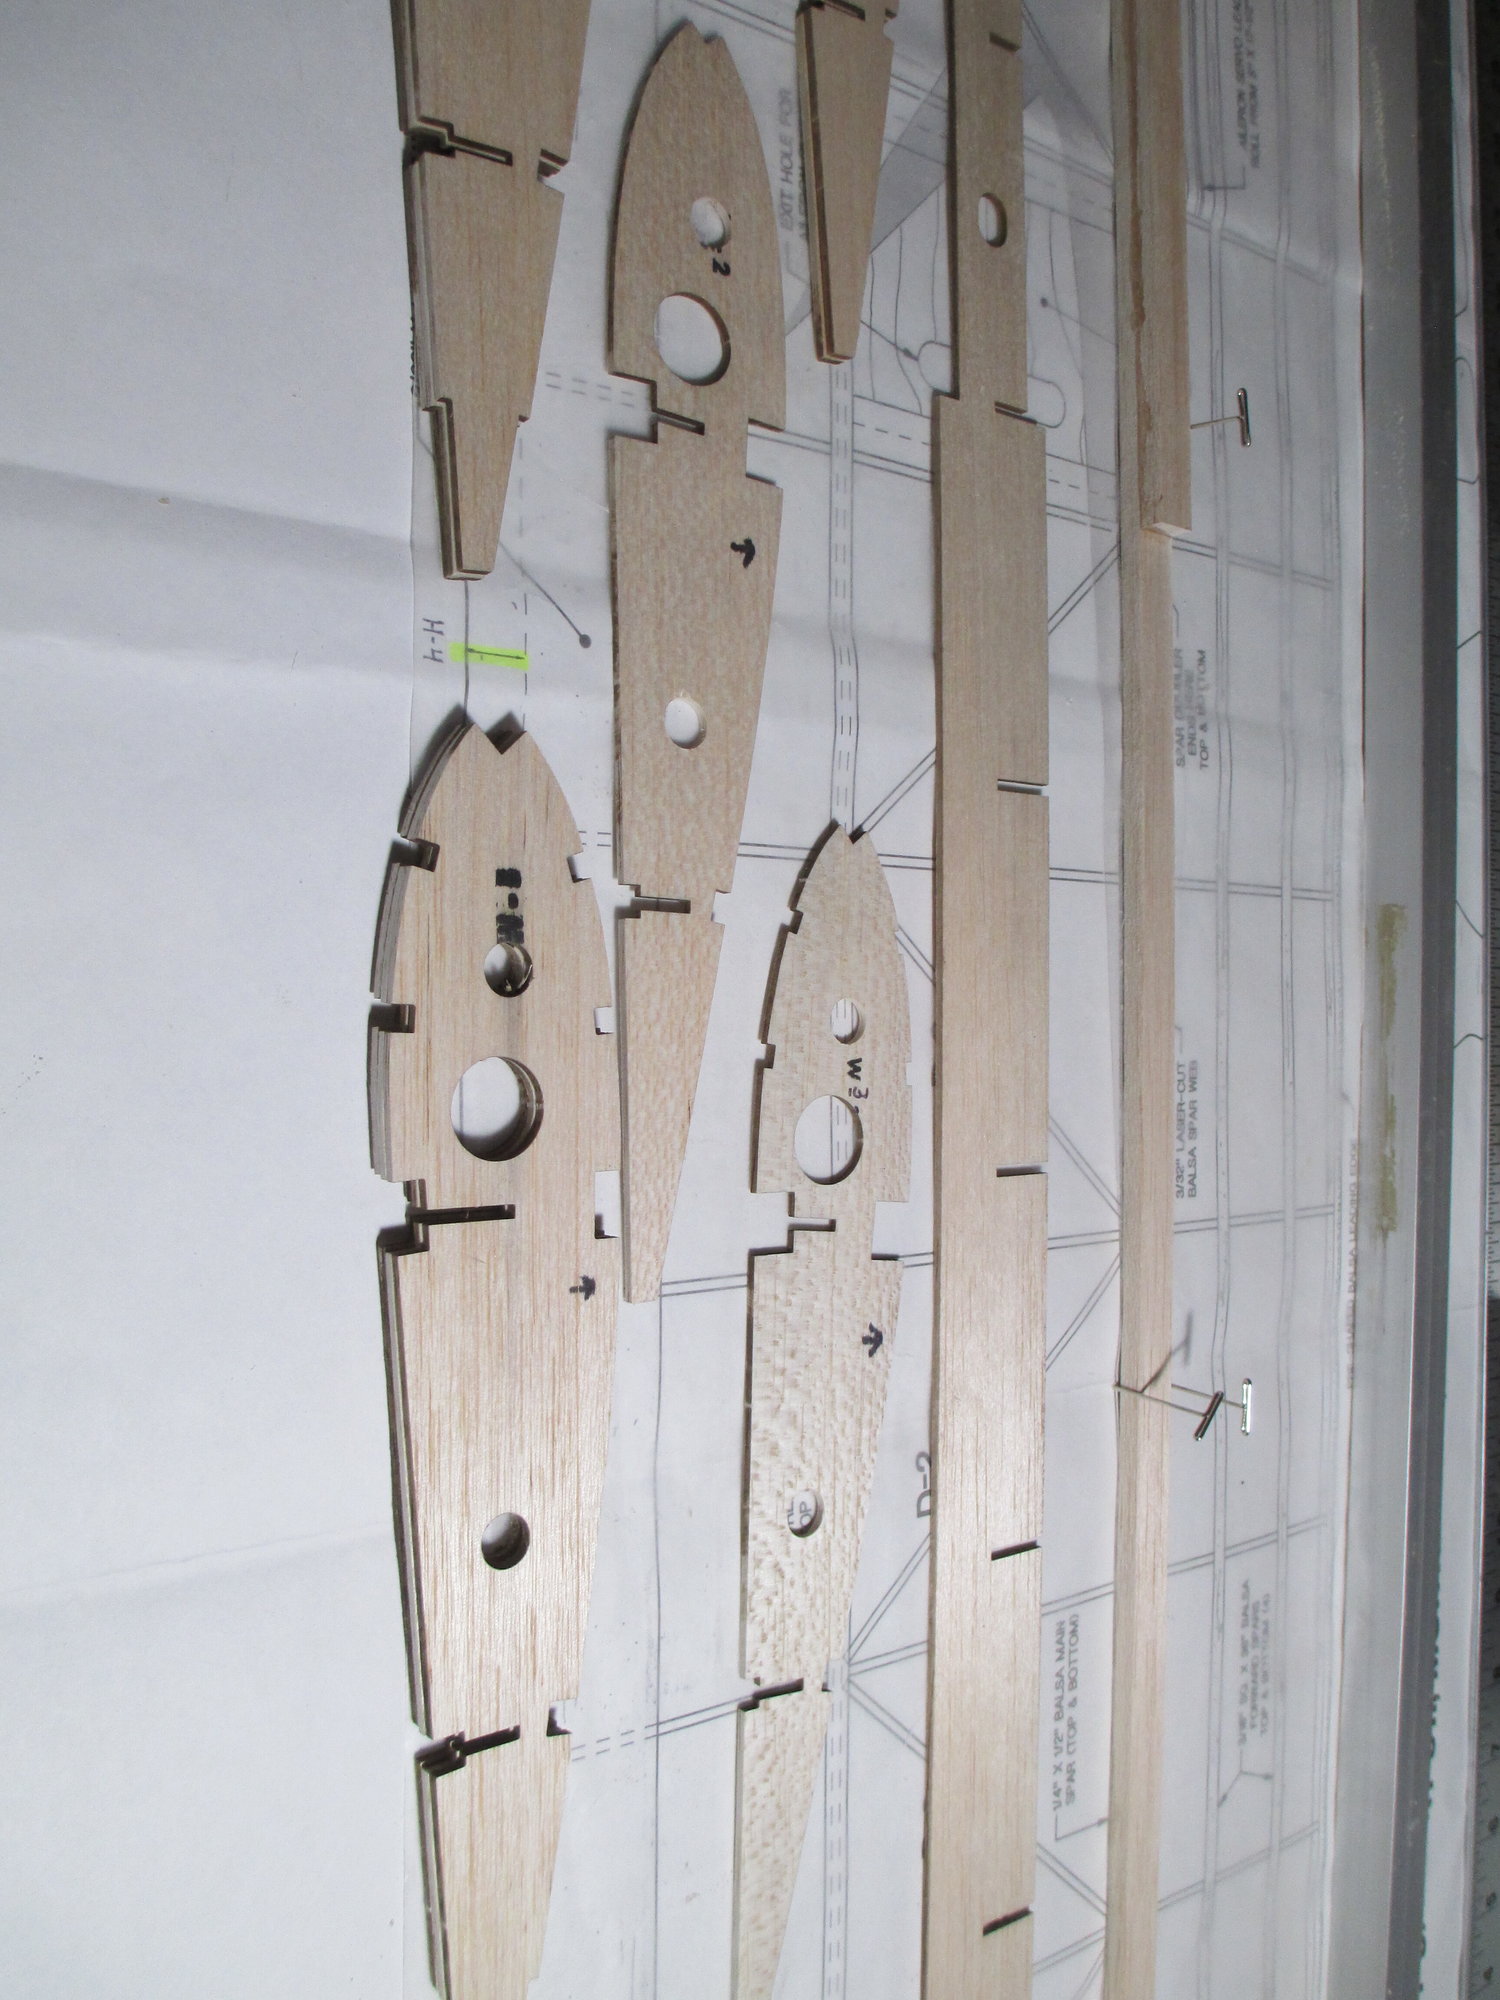
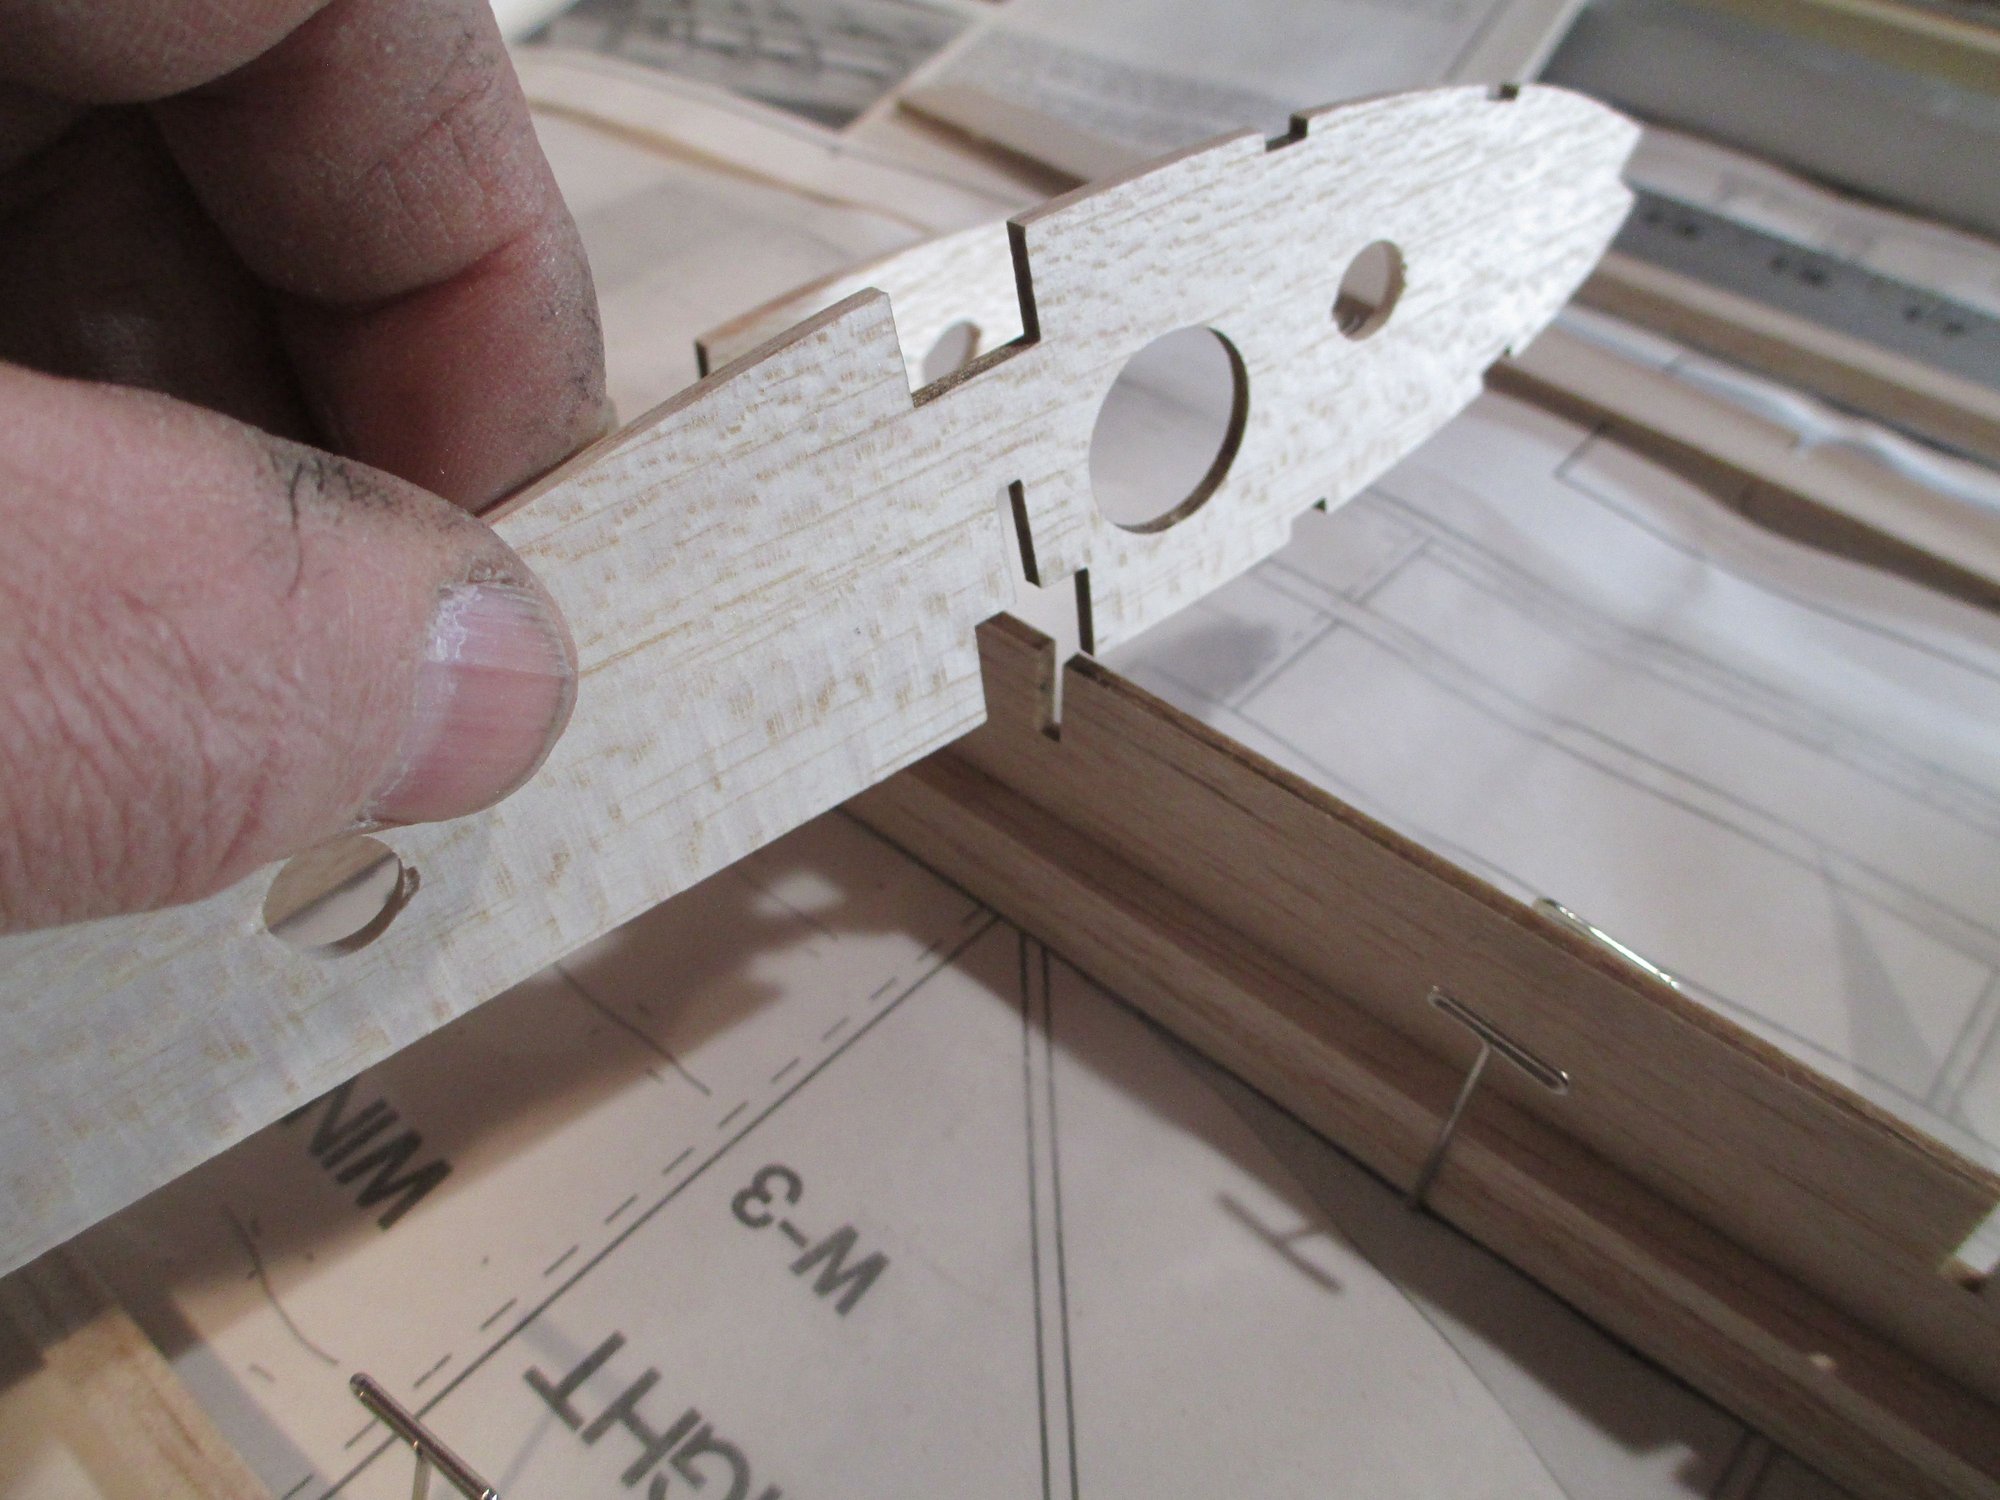
The wing ribs were neatly laser cut making the job of releasing the from their sheets an easy task. All were stacked with the exception of two W-5 ribs. These two ribs will not be needed as I am shortening each wing panel by one bay.
After all of the wing ribs were removed from their sheeting I was careful to draw an arrow on each rib indicating TOP. It is very easy to make an error and install a rib upside down as they are not fully symmetrical! There are five different wing ribs which are marked W1- W5, which is why I have five separated stacks. I made sure each rib was identical in size and shape by stacking them and sanding them as one ensuring uniformity...
Last edited by VincentJ; 03-03-2019 at 10:52 AM.
The following users liked this post:
Wully (12-21-2021)
03-04-2019, 10:53 AM
#3

Great to see another one of your builds on the board, I'll definitely be following along.
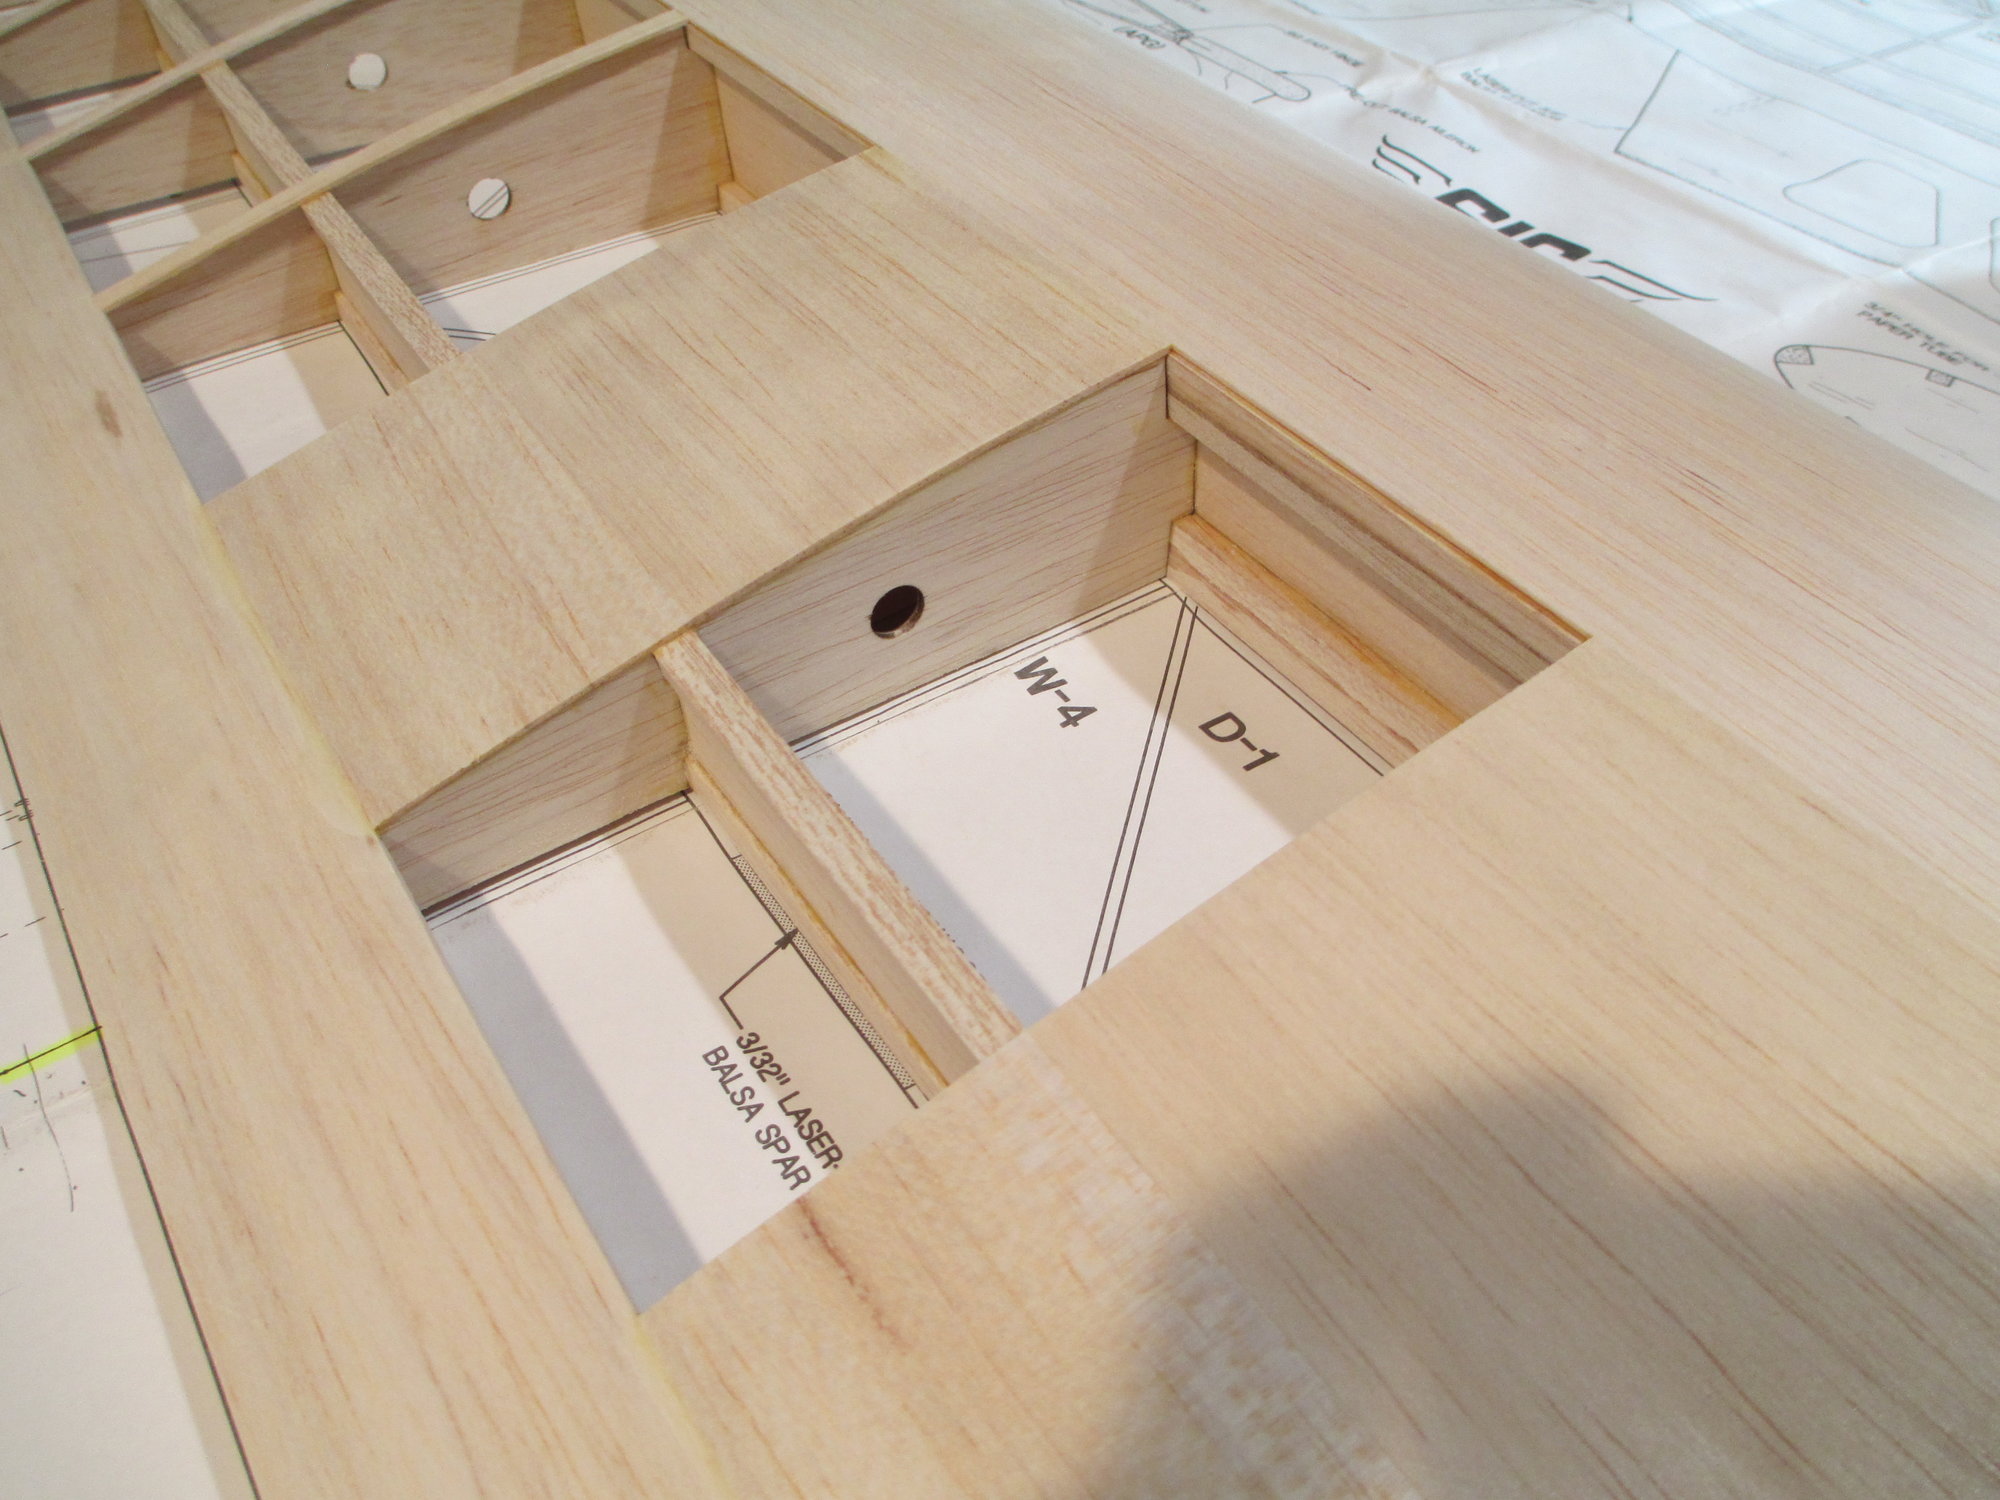
I'm already curious to see what those notches in the ribs are at each of the spar locations. The plans appear to call out "Laser cut 3/32" balsa spar web" so it must allow the shear webs to key into the ribs? No answer necessary now, I'm sure all will be made clear...
I'm already curious to see what those notches in the ribs are at each of the spar locations. The plans appear to call out "Laser cut 3/32" balsa spar web" so it must allow the shear webs to key into the ribs? No answer necessary now, I'm sure all will be made clear...
The following users liked this post:
Wully (12-21-2021)
03-04-2019, 02:30 PM
#4
Your work space is inspiring. I would post a pic of mine but people would likely start calling FEMA.
I've built 2 Sig kits over the last year. I loved em so much, I've been buying and stocking up for future fun just in case they ever cease production.
I've built 2 Sig kits over the last year. I loved em so much, I've been buying and stocking up for future fun just in case they ever cease production.
The following users liked this post:
Wully (12-21-2021)
03-05-2019, 04:47 AM
#5
Thread Starter
Great to see another one of your builds on the board, I'll definitely be following along.
I'm already curious to see what those notches in the ribs are at each of the spar locations. The plans appear to call out "Laser cut 3/32" balsa spar web" so it must allow the shear webs to key into the ribs? No answer necessary now, I'm sure all will be made clear...
I'm already curious to see what those notches in the ribs are at each of the spar locations. The plans appear to call out "Laser cut 3/32" balsa spar web" so it must allow the shear webs to key into the ribs? No answer necessary now, I'm sure all will be made clear...
Last edited by VincentJ; 03-05-2019 at 11:28 AM.
The following users liked this post:
Wully (12-21-2021)
03-05-2019, 04:50 AM
#6
Thread Starter
Thanks BalsaGhost. My work space is rather small so I have to keep things neat and organized!
The following users liked this post:
Wully (12-21-2021)
03-05-2019, 04:08 PM
#8
Thread Starter
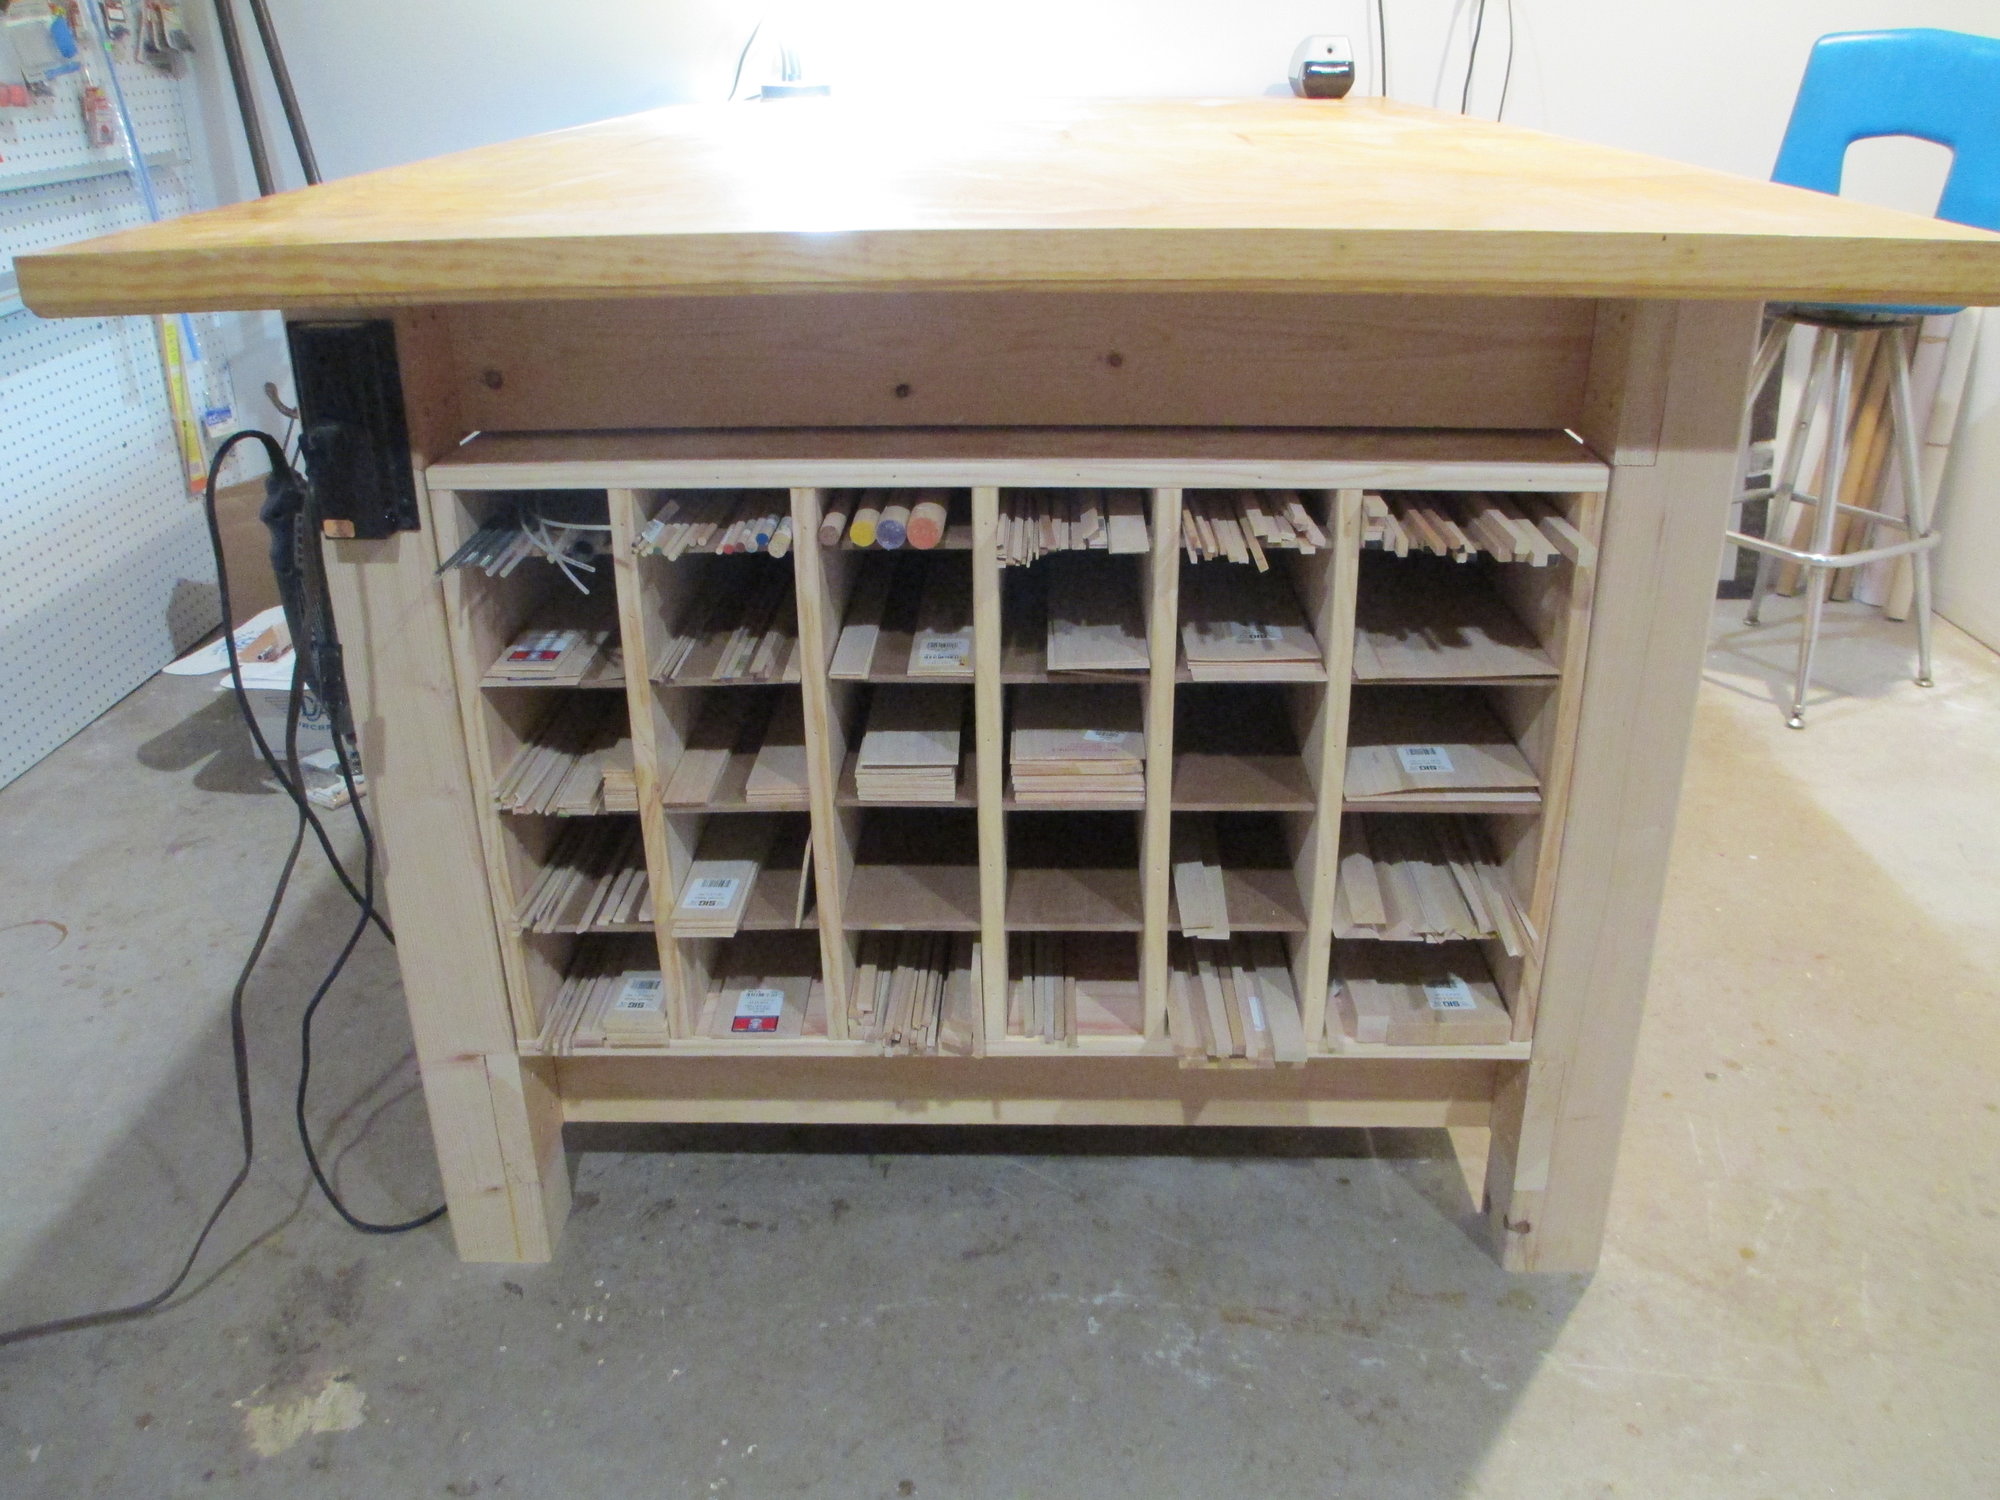
Welcome ExtraCGScott. I designed that build table about two years ago and in my design was a Balsa storage bin which I just recently completed. I have been procrastinating to build it because I knew it would be a pain (and it was). It makes my wood storage very efficient and I now know what I have in stock and what I need to order to be more efficient while building.
Last edited by VincentJ; 03-05-2019 at 04:20 PM.
The following users liked this post:
Wully (12-21-2021)
The following users liked this post:
Wully (12-21-2021)
03-05-2019, 04:20 PM
#10
Welcome ExtraCGScott. I designed that build table about two years ago and in my design was a Balsa storage bin which I just recently completed. I have been procrastinating to build it because I knew it would be a pain (and it was). It makes my wood storage very efficient and I now know what I have in stock and what I need to order to be more efficient.

The following users liked this post:
Wully (12-21-2021)
03-05-2019, 04:31 PM
#11
Thread Starter
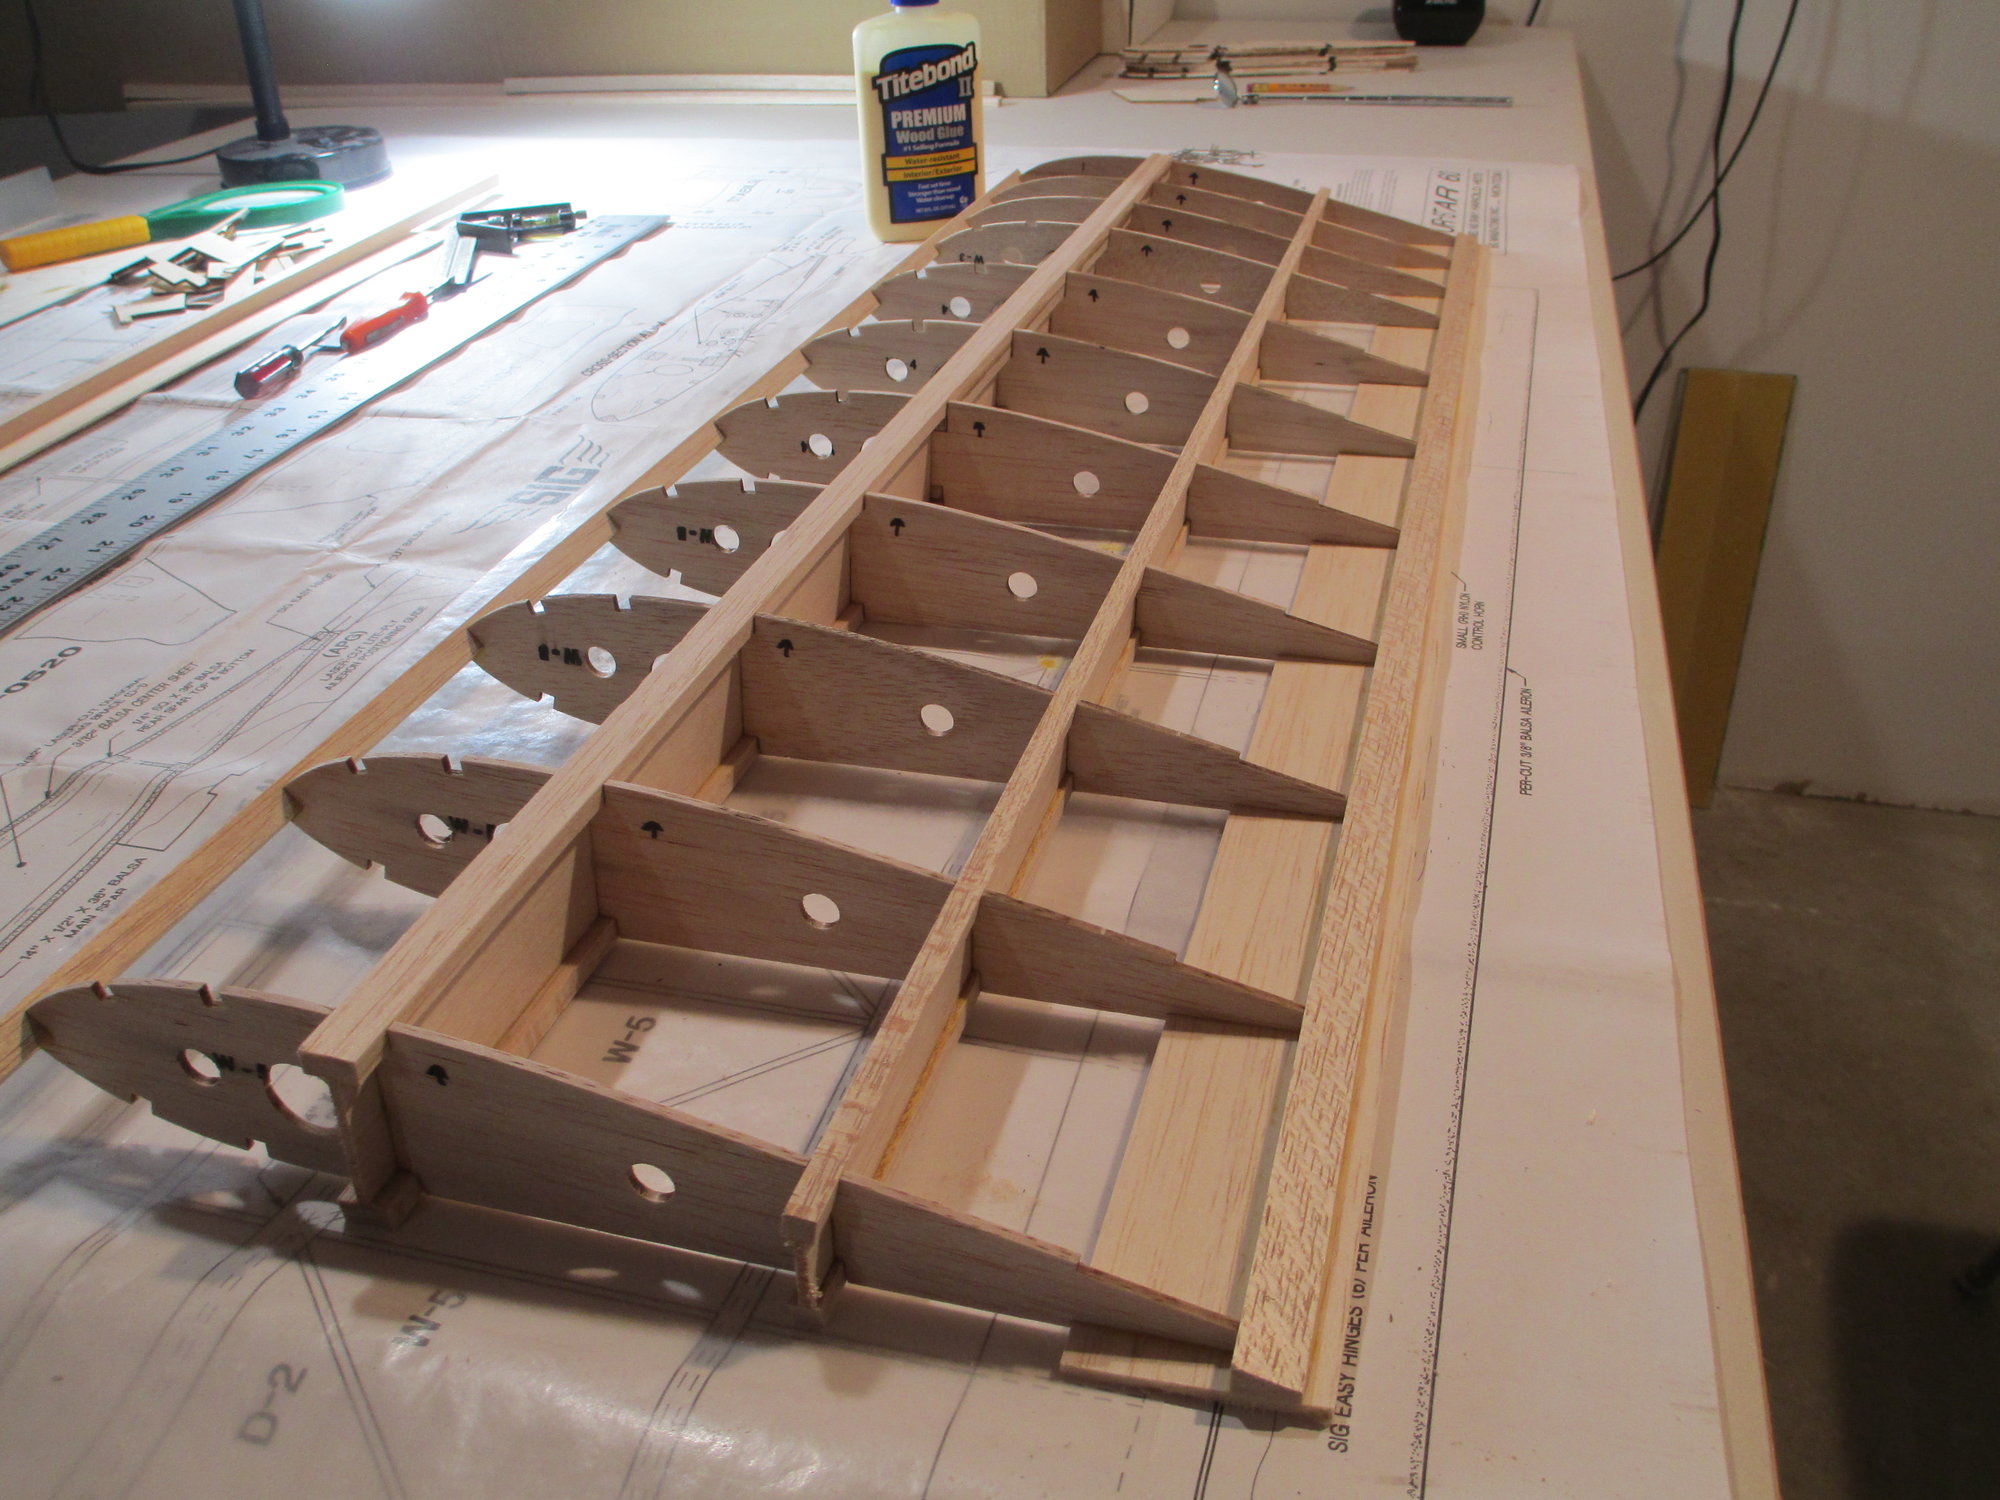
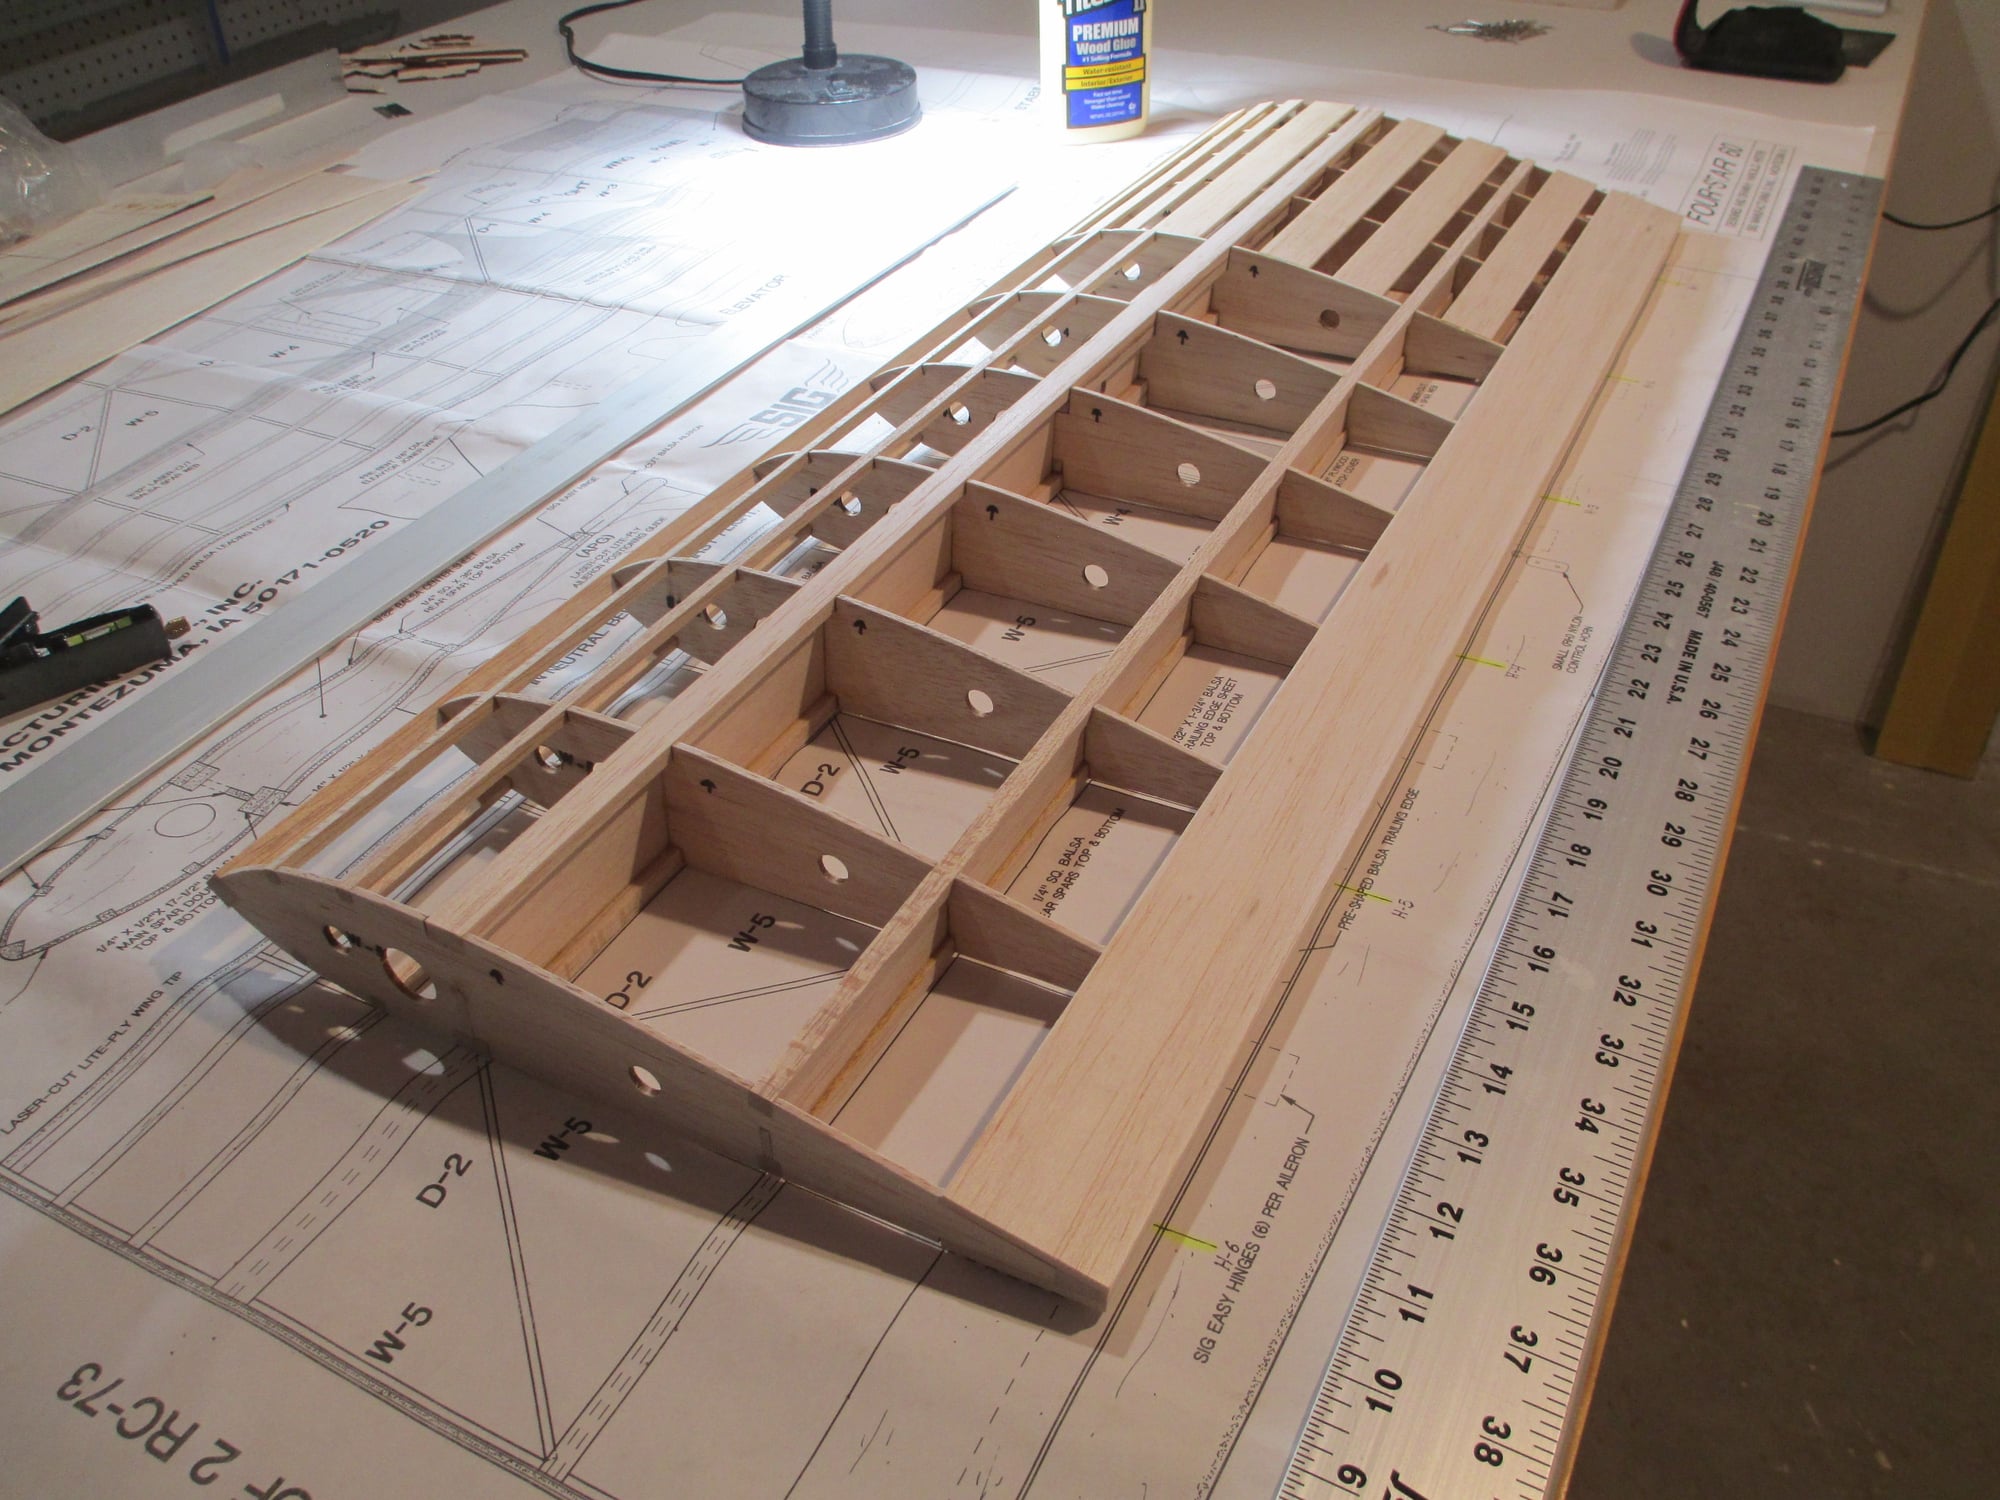
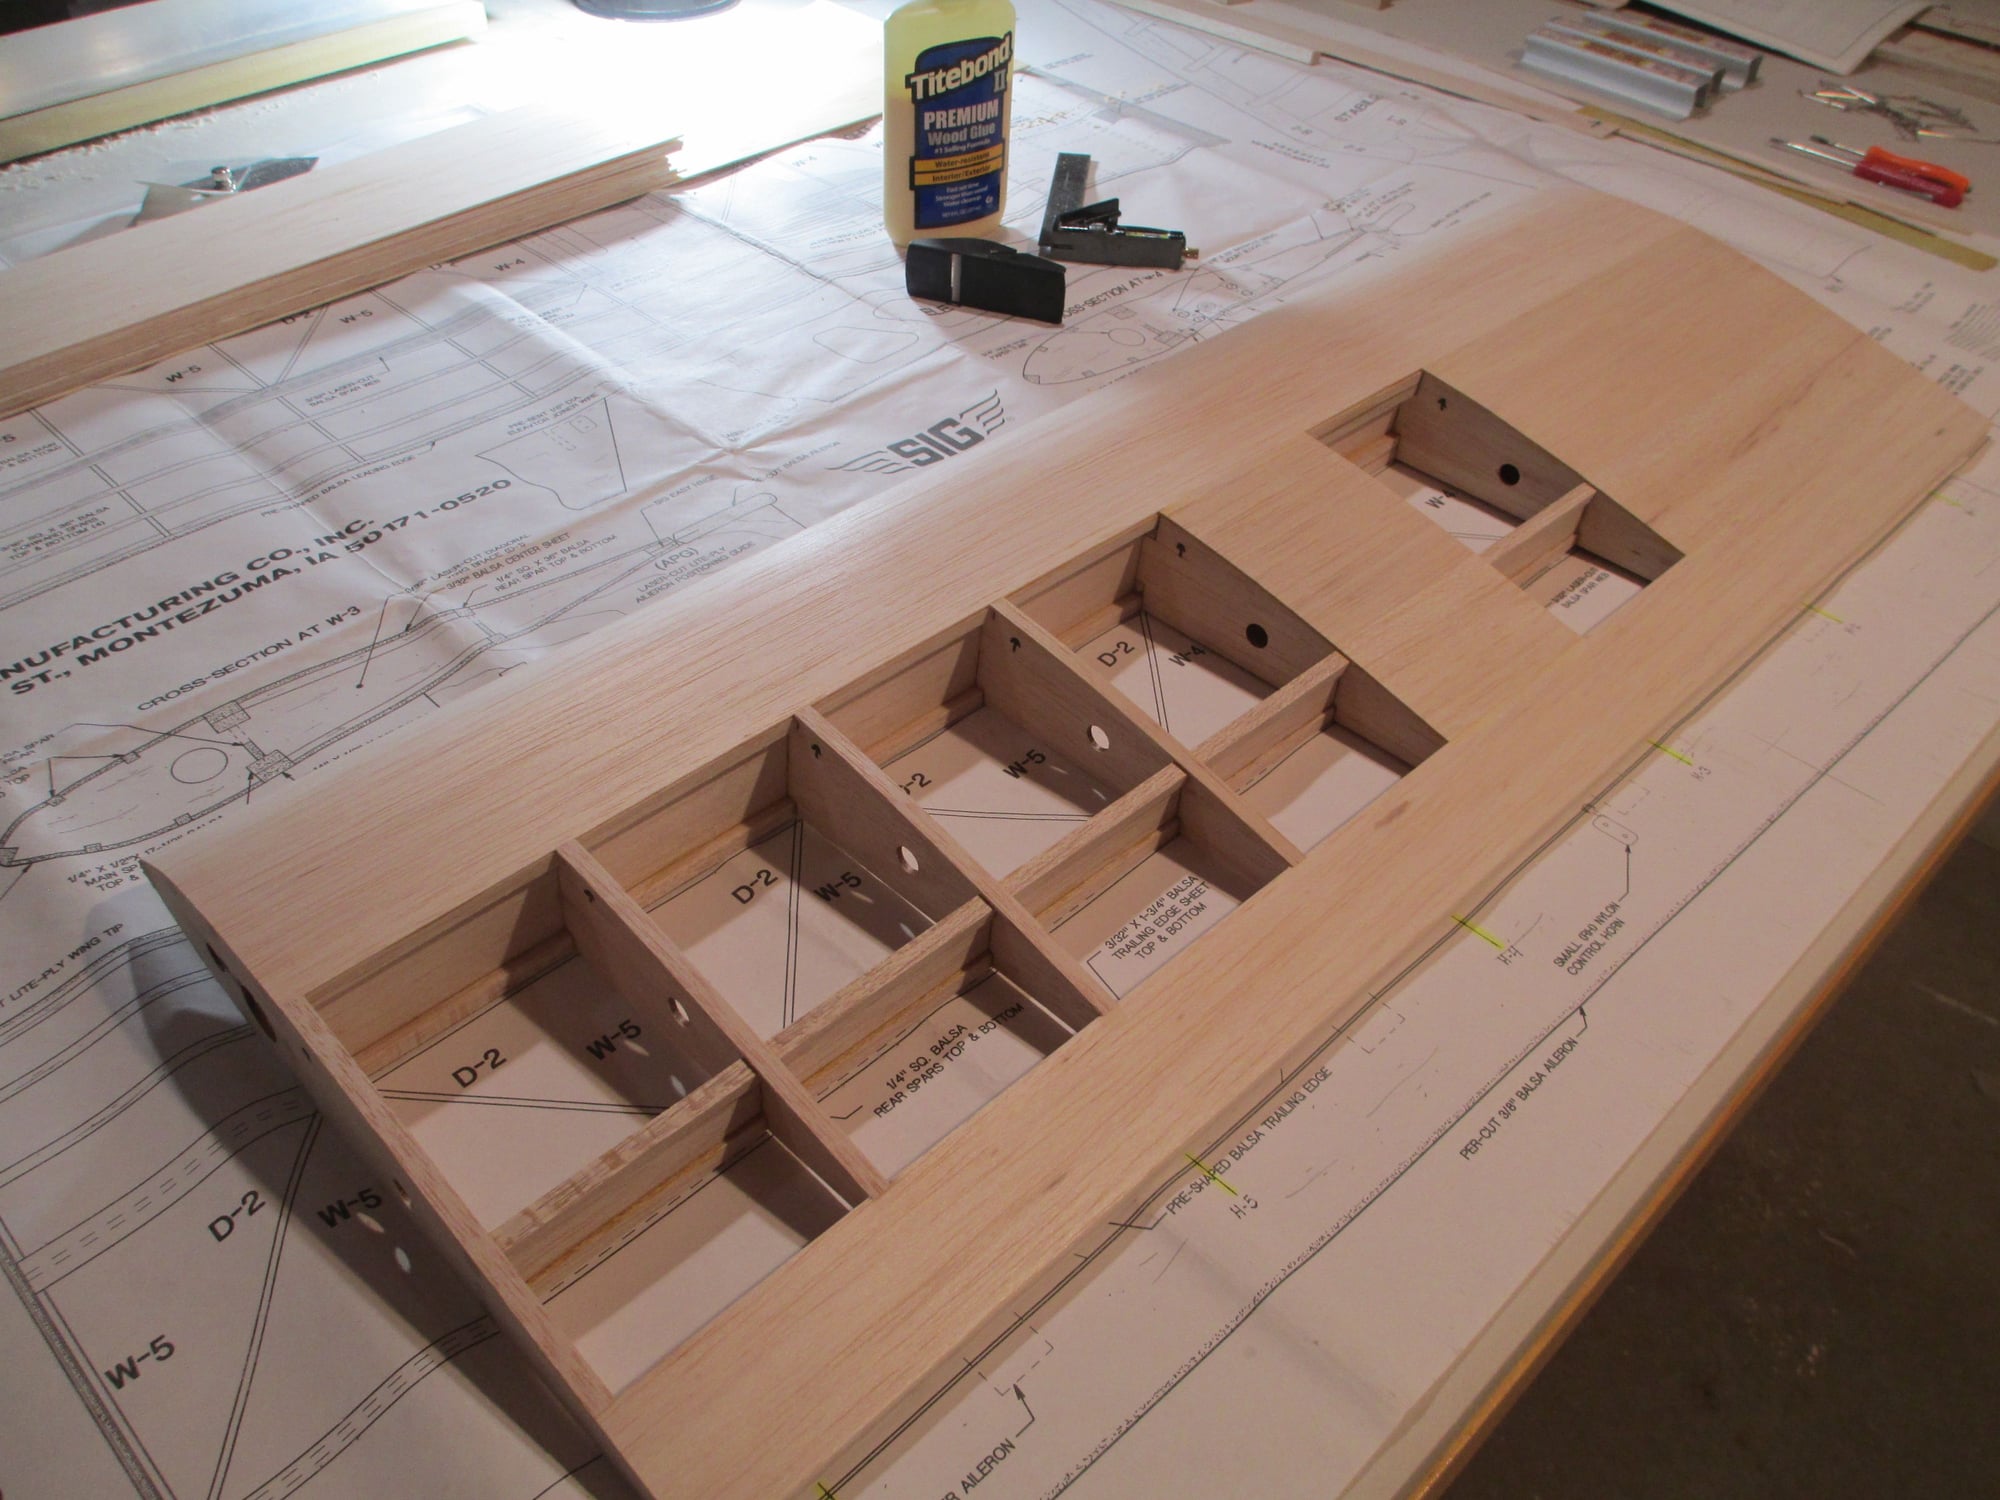
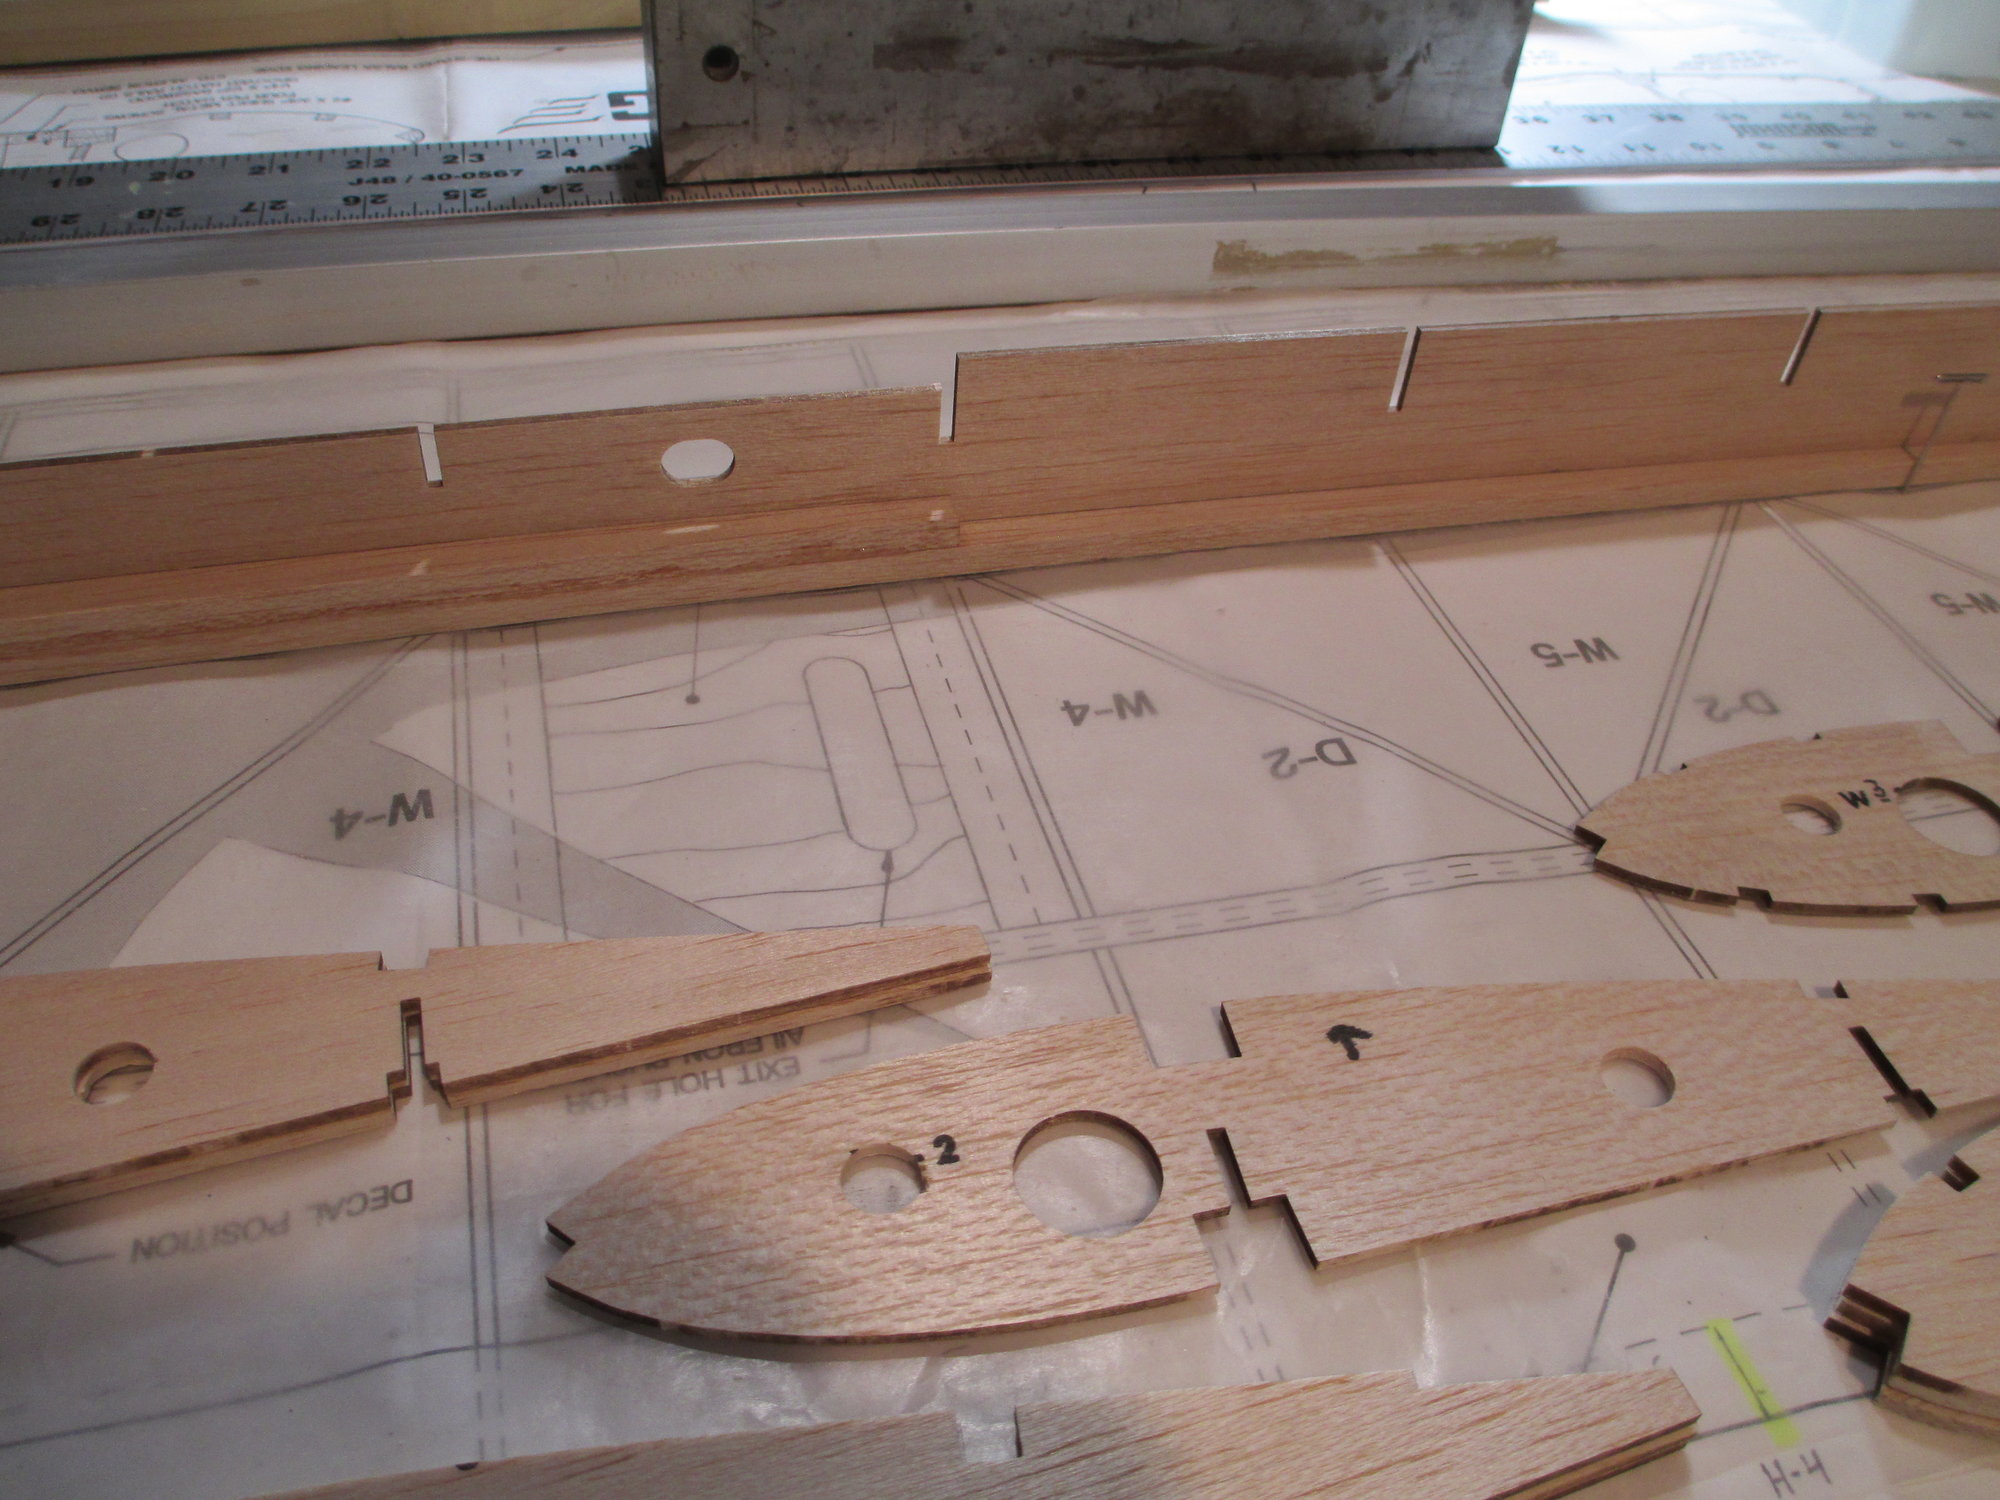
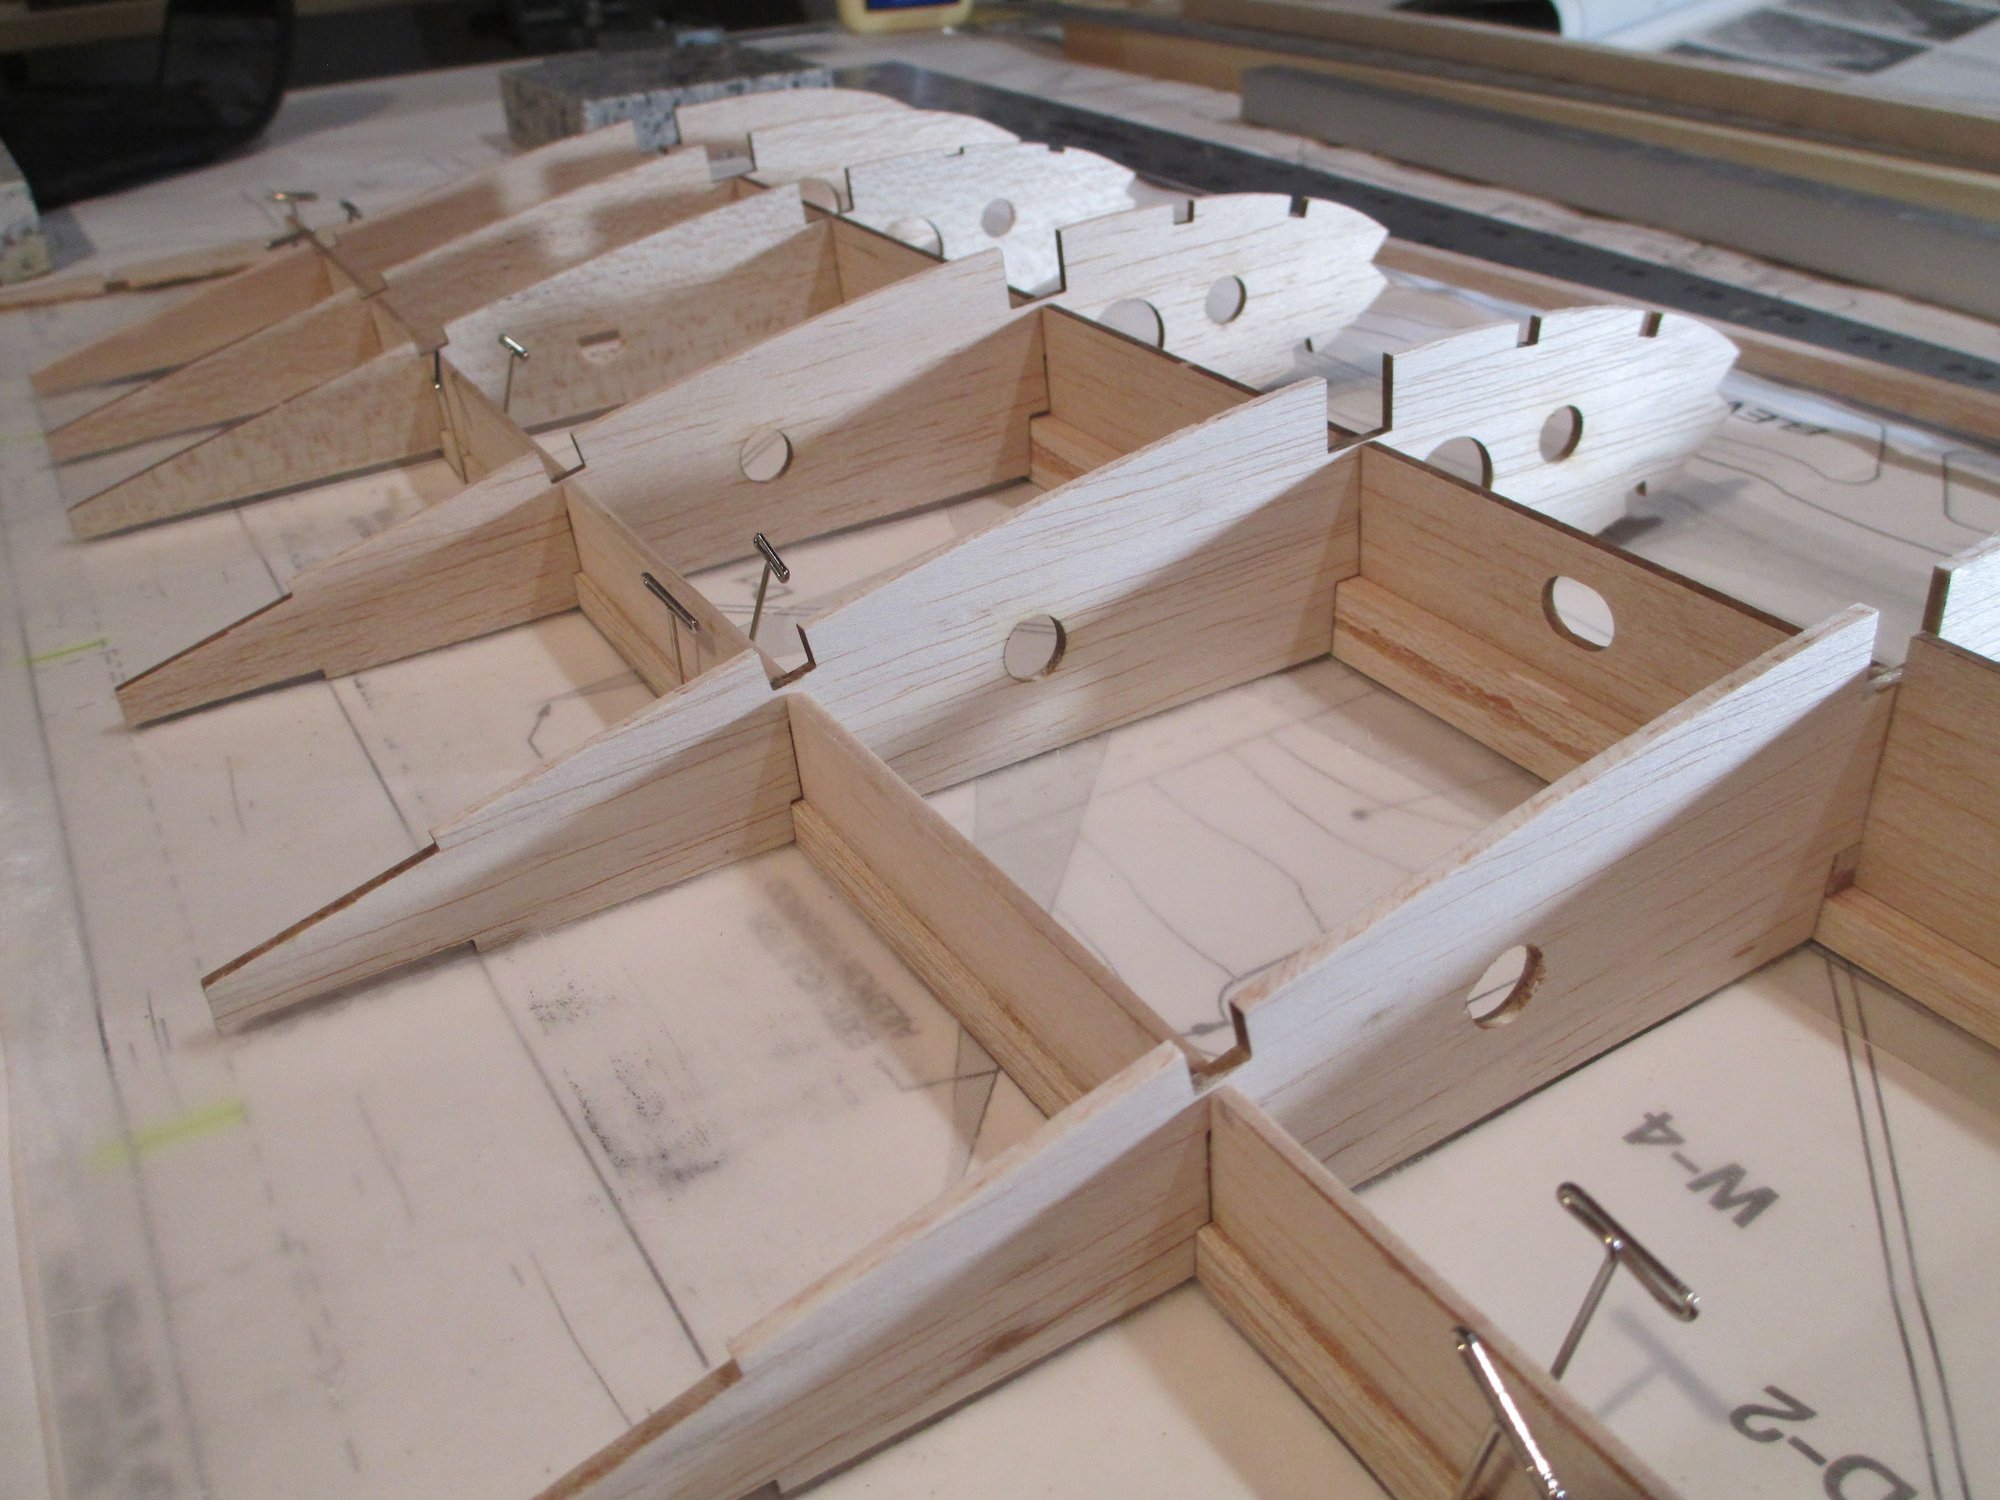
I started on the left wing panel. I am not installing the diagonal bracing shown on plans. I will be instead sheeting the top and bottom of the leading edge using 1/16" Balsa which will give it plenty of strength. The sheeting will terminate at the spar.
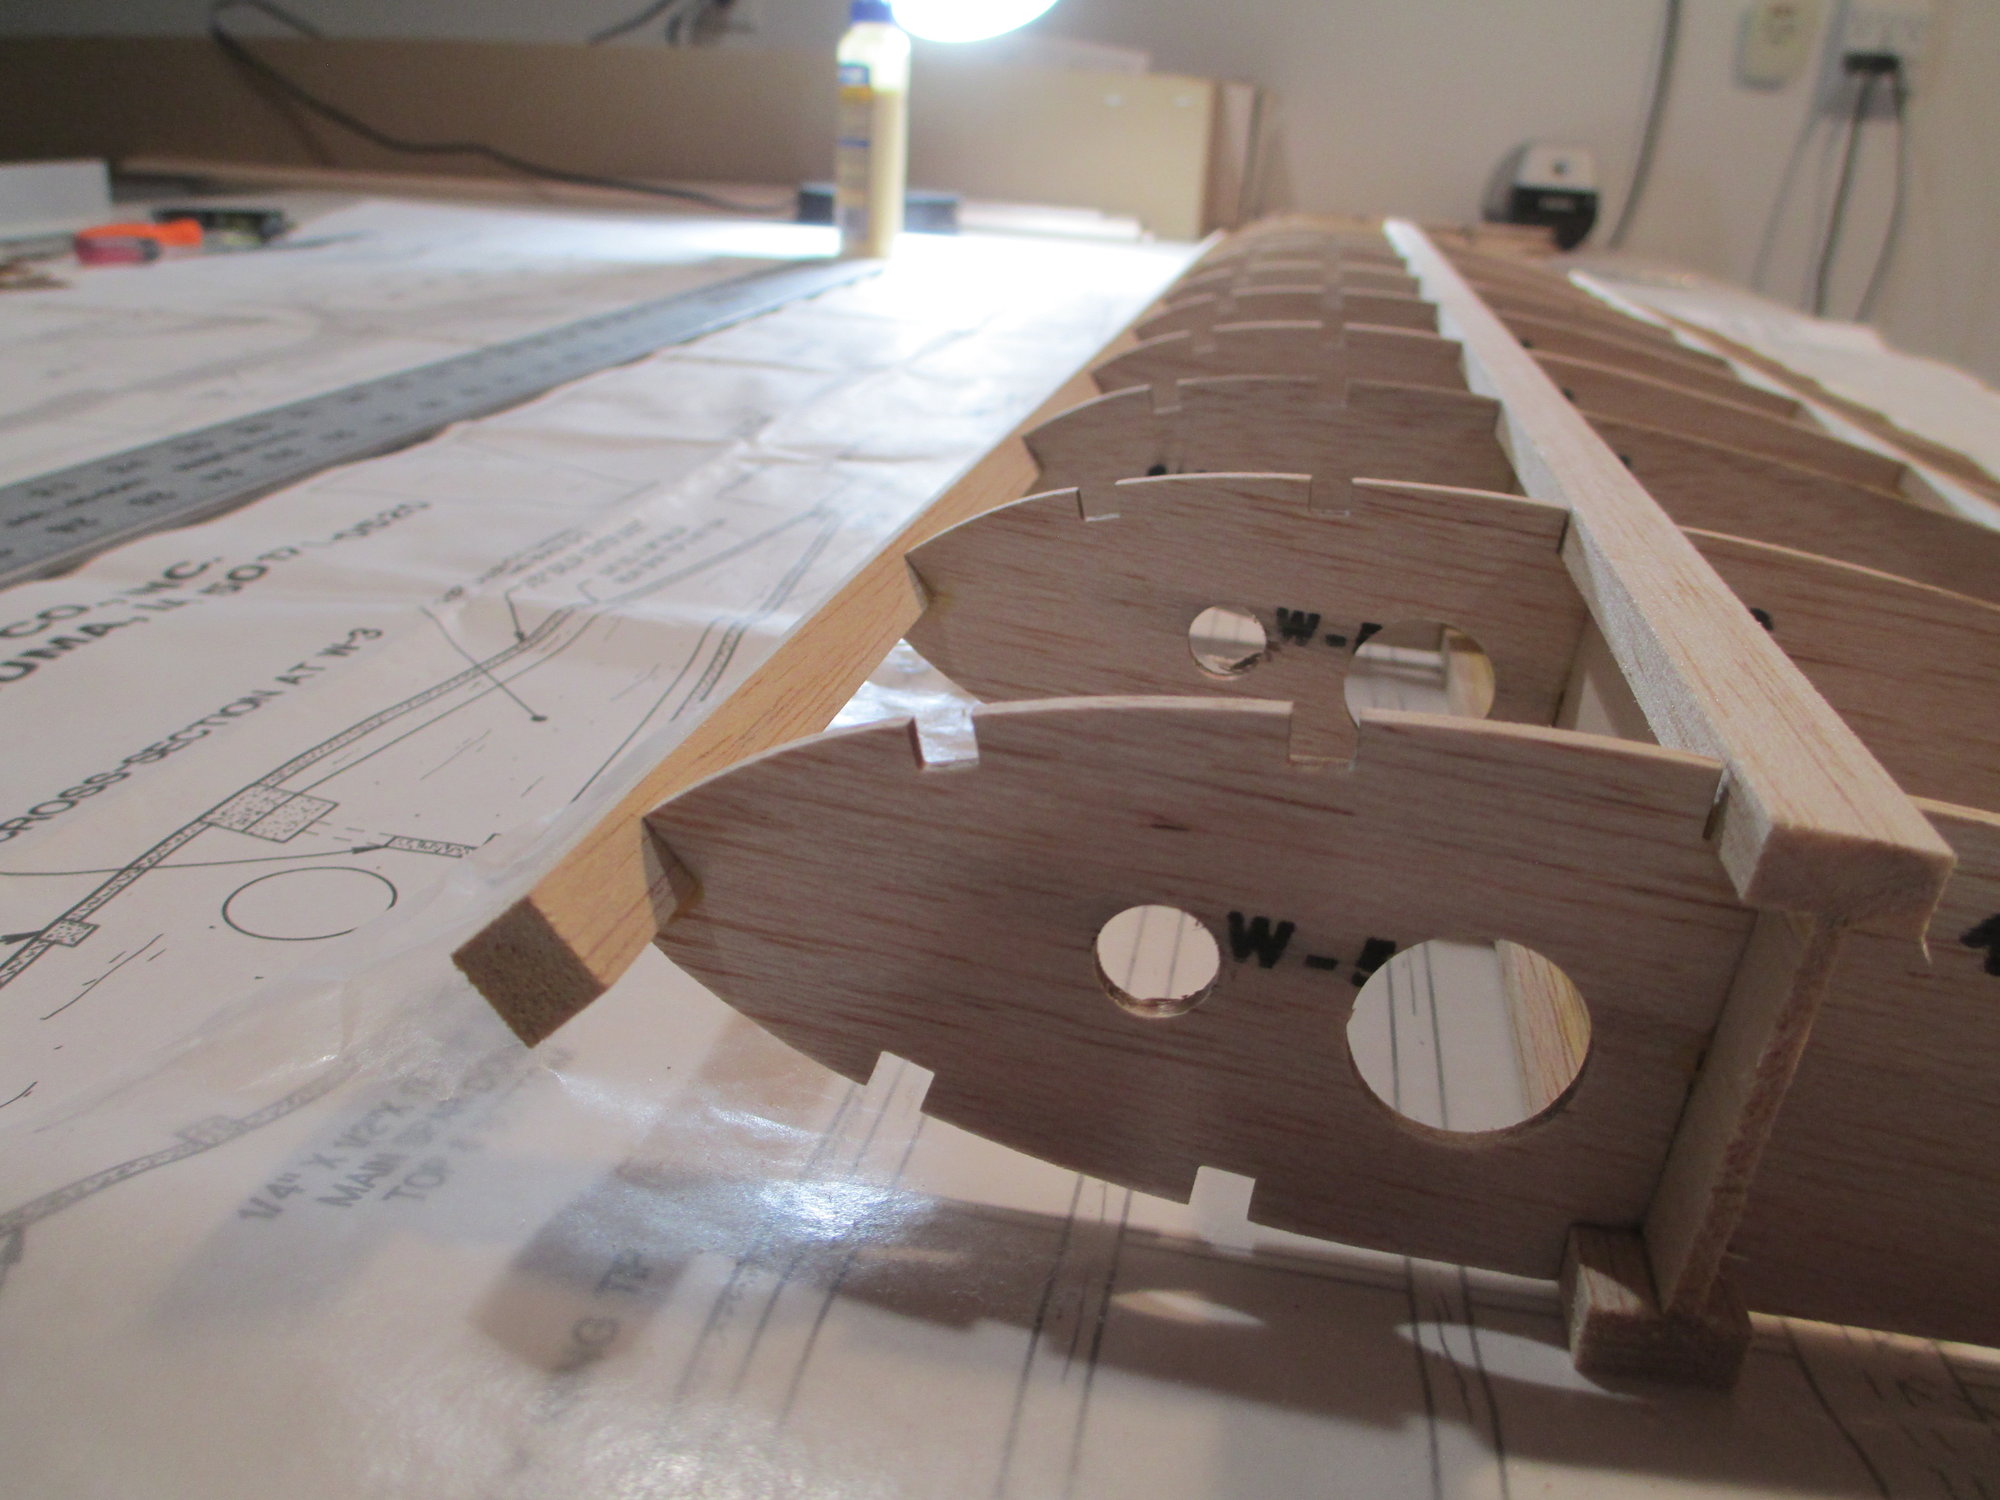
Notice that I am in no hurry to trim off the stock that overhangs the first rib. It will get removed once the entire wing is completed. I substituted the leading edge stock with 3/8" square stock. The additional thickness from the supplied wood is perfect for me to butt the 1/16" sheeting against it and be flush. The trailing edge stock was also replaced with thicker sheeting to accommodate 1/16" rib caps that I am adding which will terminate flush at the trailing edge.
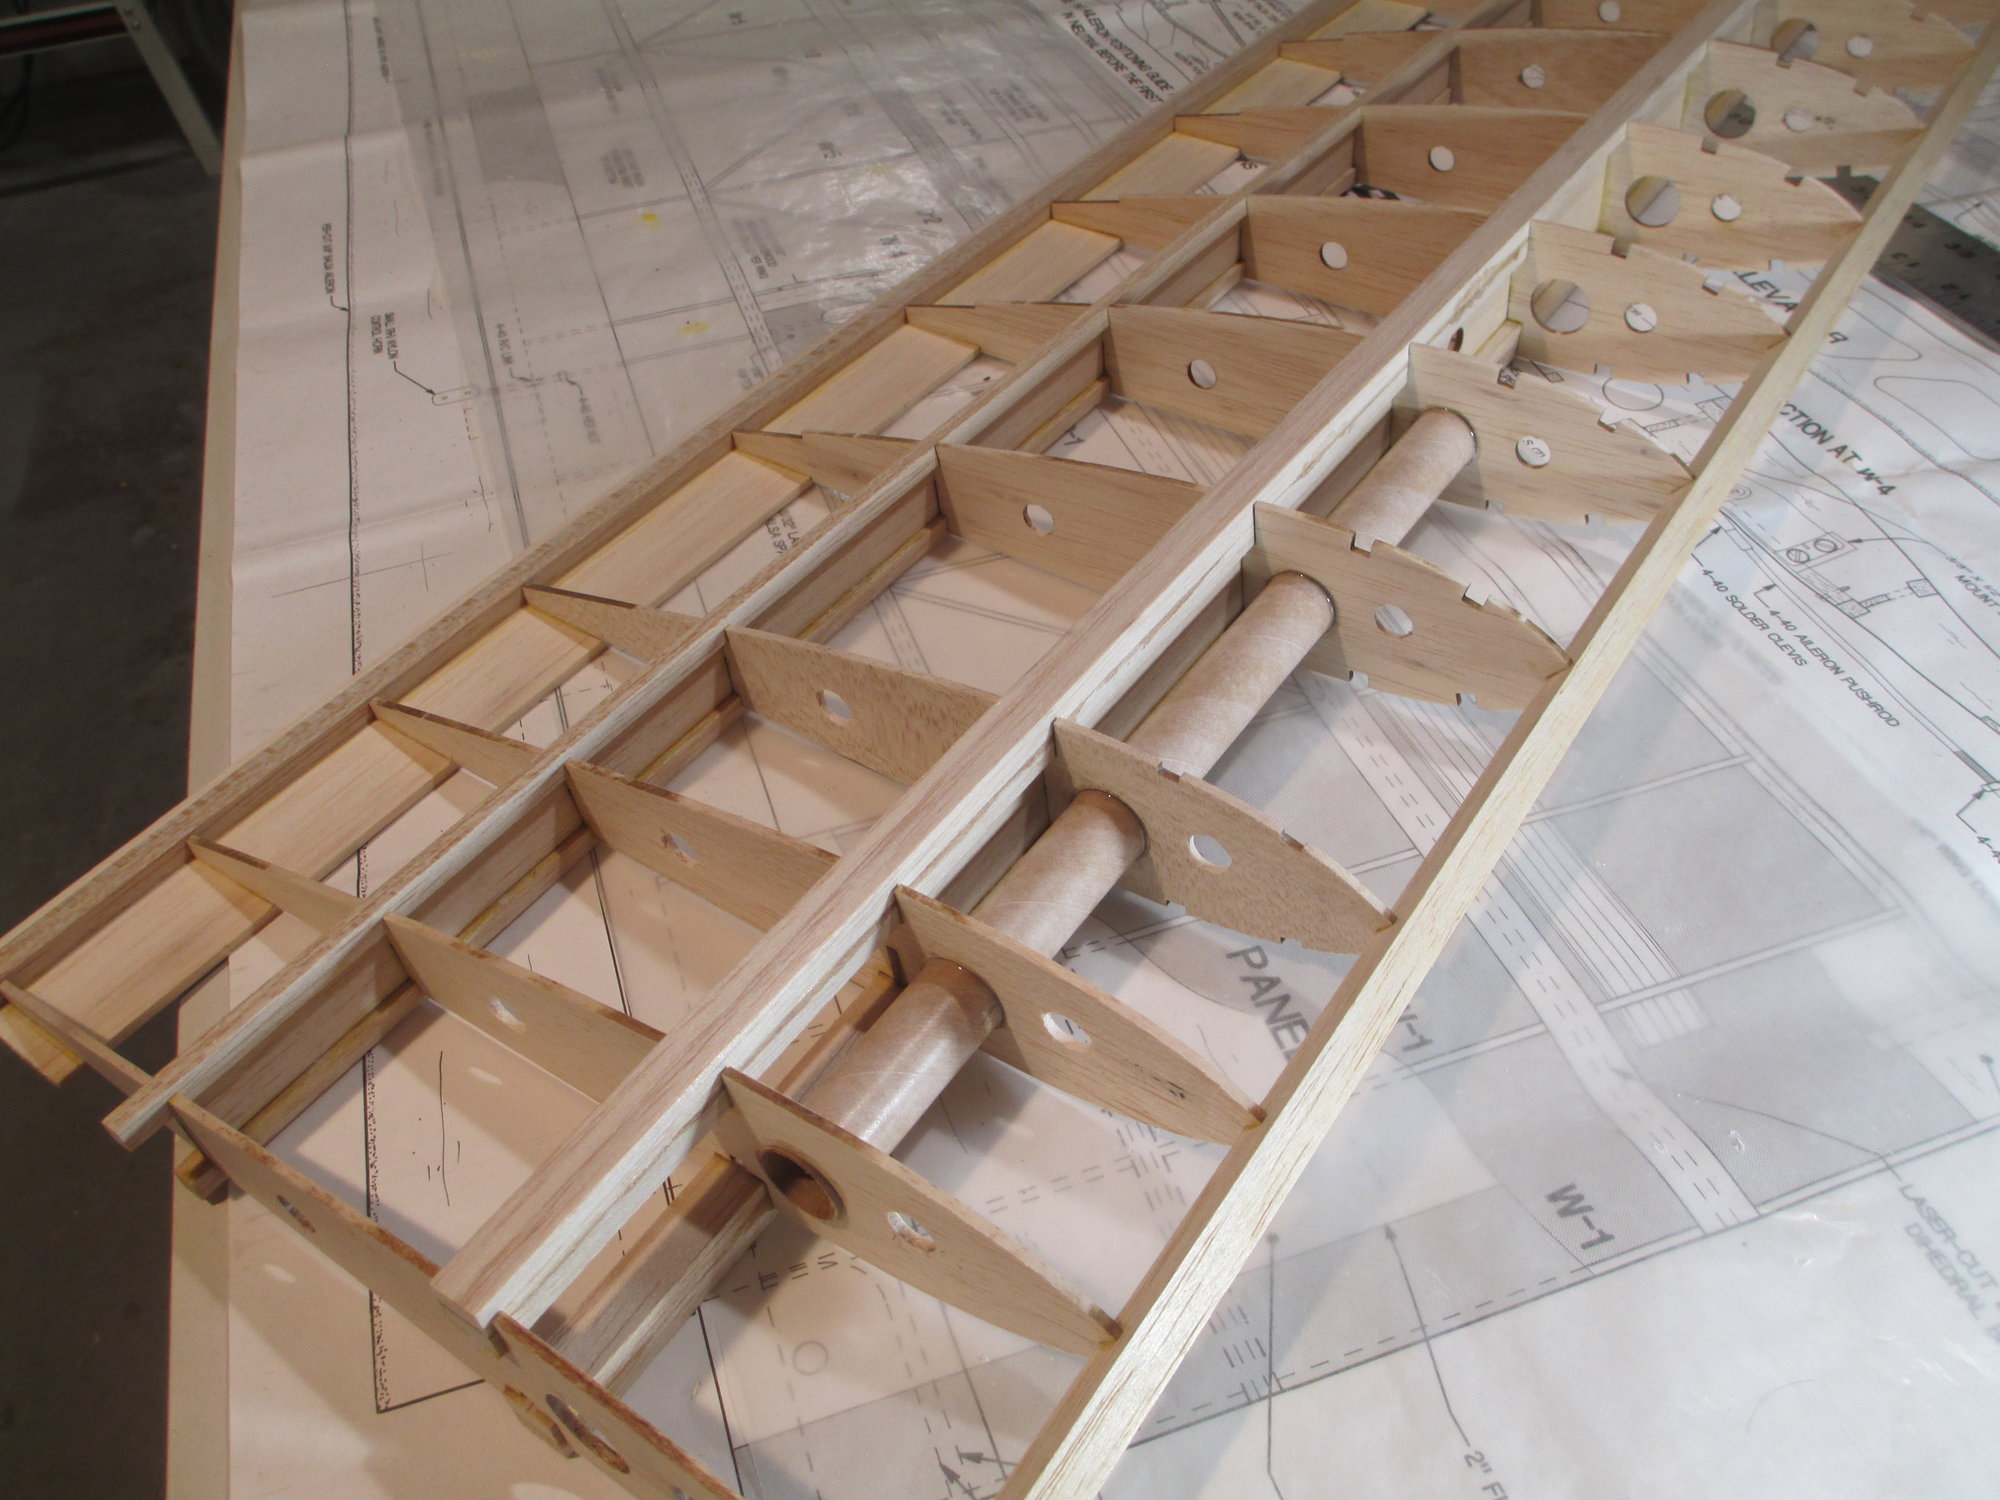
I substituted the paper servo tube as called for in the plans for a much more stout rocket tube that fits perfectly in the rib openings. The rocket tubes will also give additional strength to the wing ribs...the weight penalty is negligible. You may have also noticed that I have added two lightening holes in each of the wing ribs, this along with the elimination of the diagonal bracing will help offset the additional weight of the sheeting that I will be adding.
Note:The first rib is glued into place at a slight angle giving the wing its dihedral when mated to the other wing panel. The stock dihedral for this plane is 2 degrees (per panel) which I have re-adjusted to 1 degree.
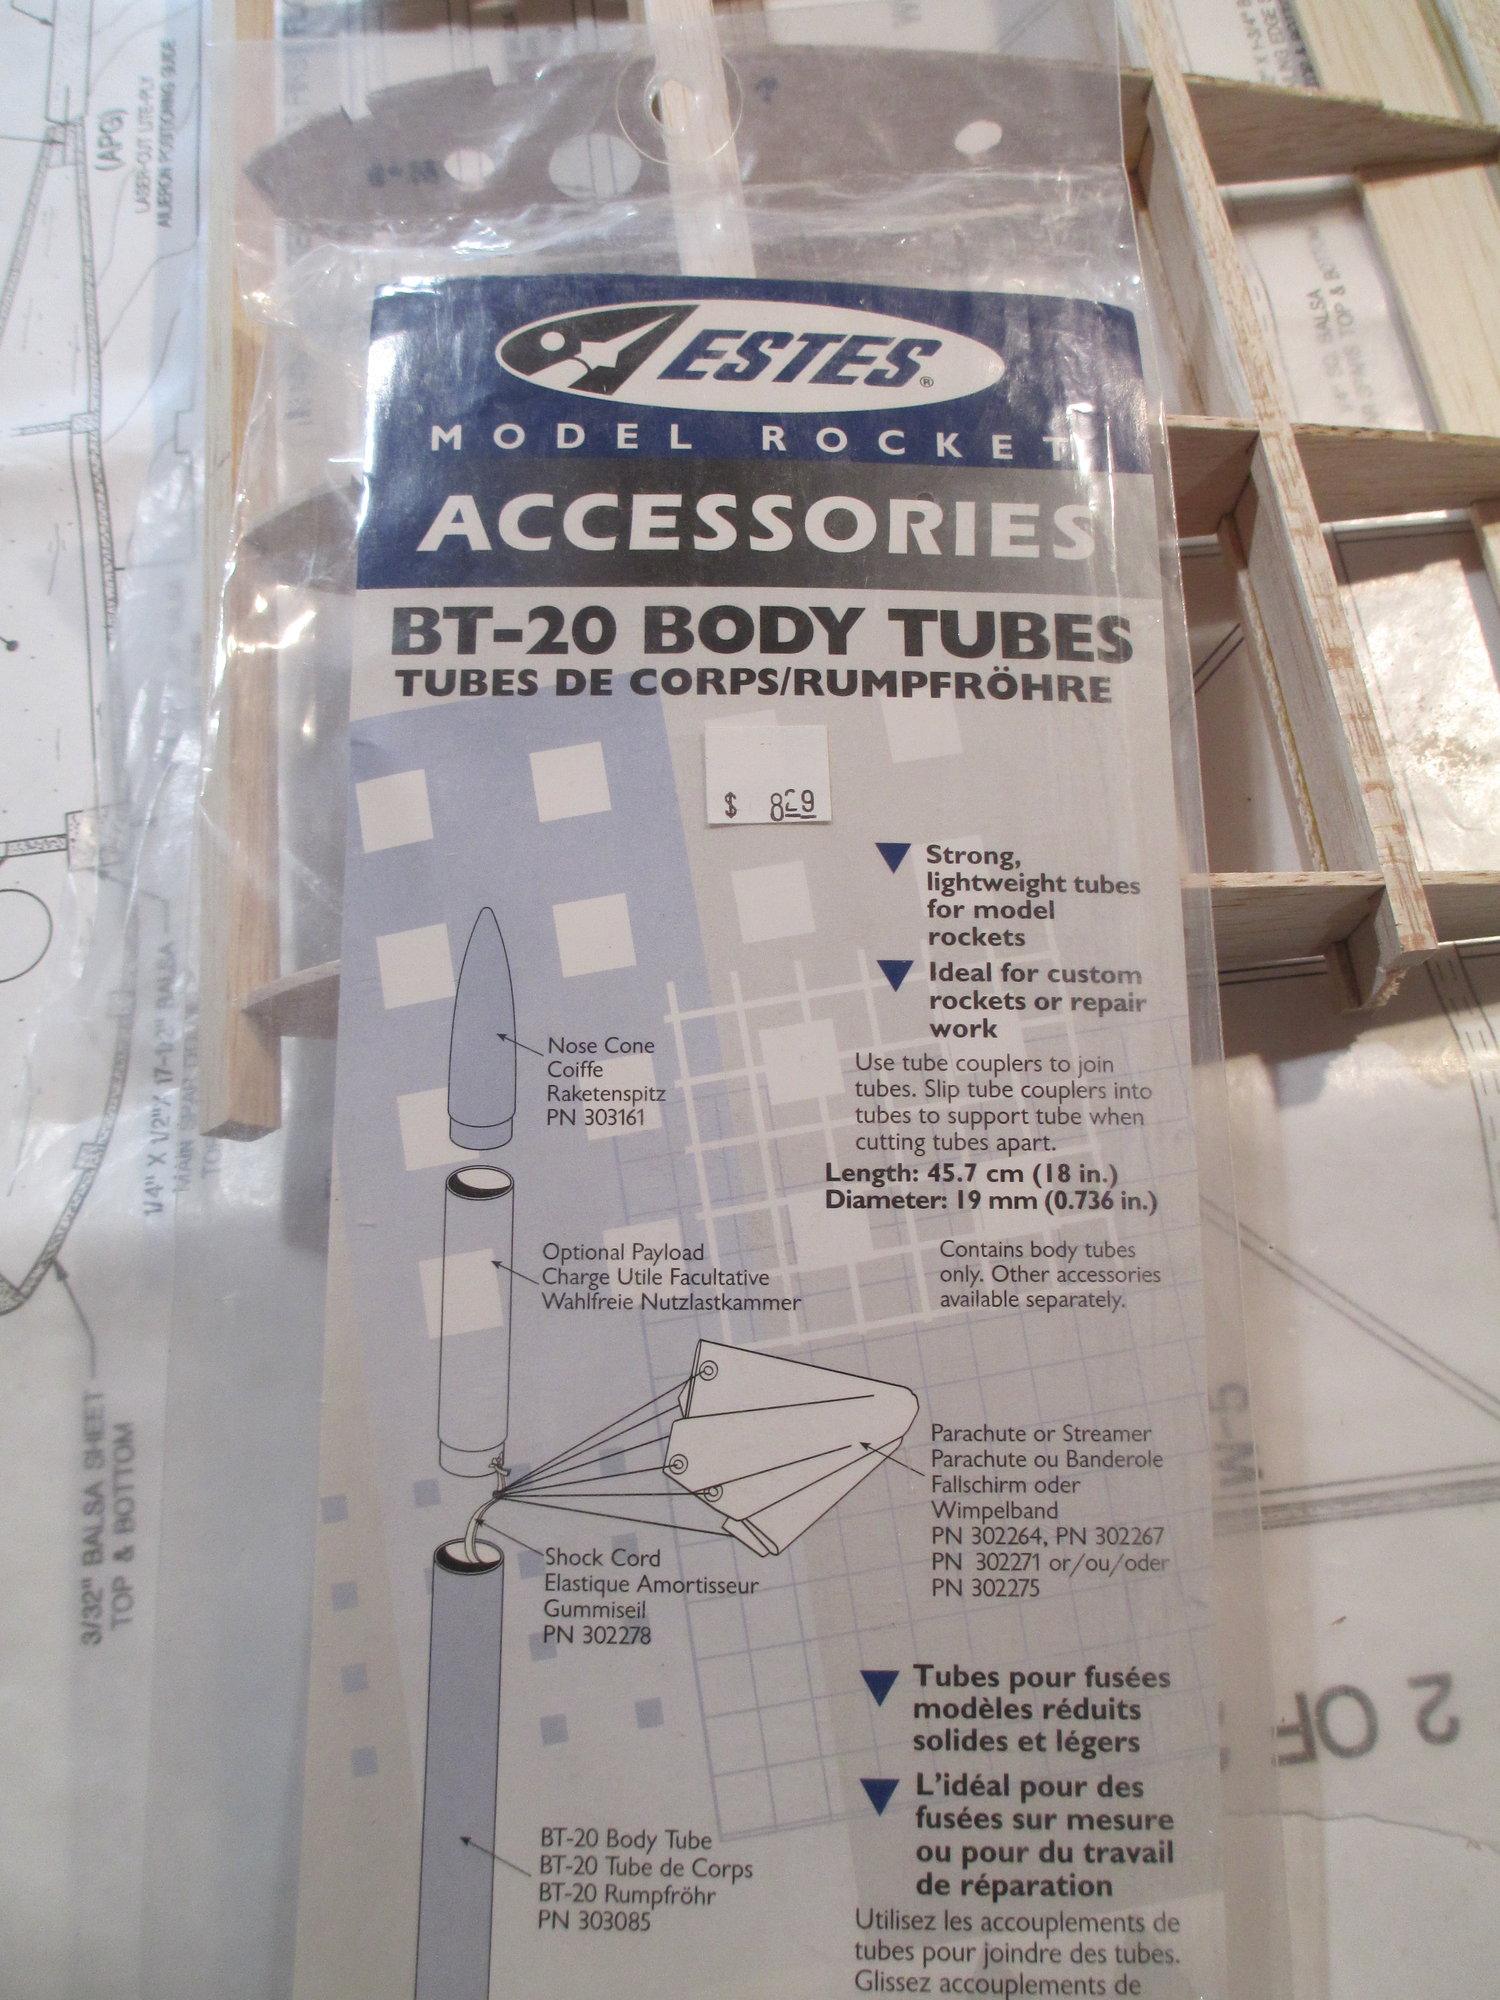
Rocket tubes come in a variety of different diameters.
Last edited by VincentJ; 03-06-2019 at 07:55 AM.
The following users liked this post:
Wully (12-21-2021)
03-05-2019, 05:03 PM
#12
Thread Starter
That's a Jet air filter that I also mounted under my build table. I have a wireless remote for it that I keep next to me. It does a great job of keeping the dust out of my lungs when I am sanding.
https://www.jettools.com/us/en/p/afs...ontrol/708620B
https://www.jettools.com/us/en/p/afs...ontrol/708620B
Last edited by VincentJ; 03-05-2019 at 05:05 PM.
The following users liked this post:
Wully (12-21-2021)
The following users liked this post:
Wully (12-21-2021)
03-06-2019, 01:38 AM
#14
Thread Starter
Thanks Truckracer and welcome back! I'll be checking in with TNT soon, thanks for the tip, sometimes I need tubes that are longer than the rocket tubes...
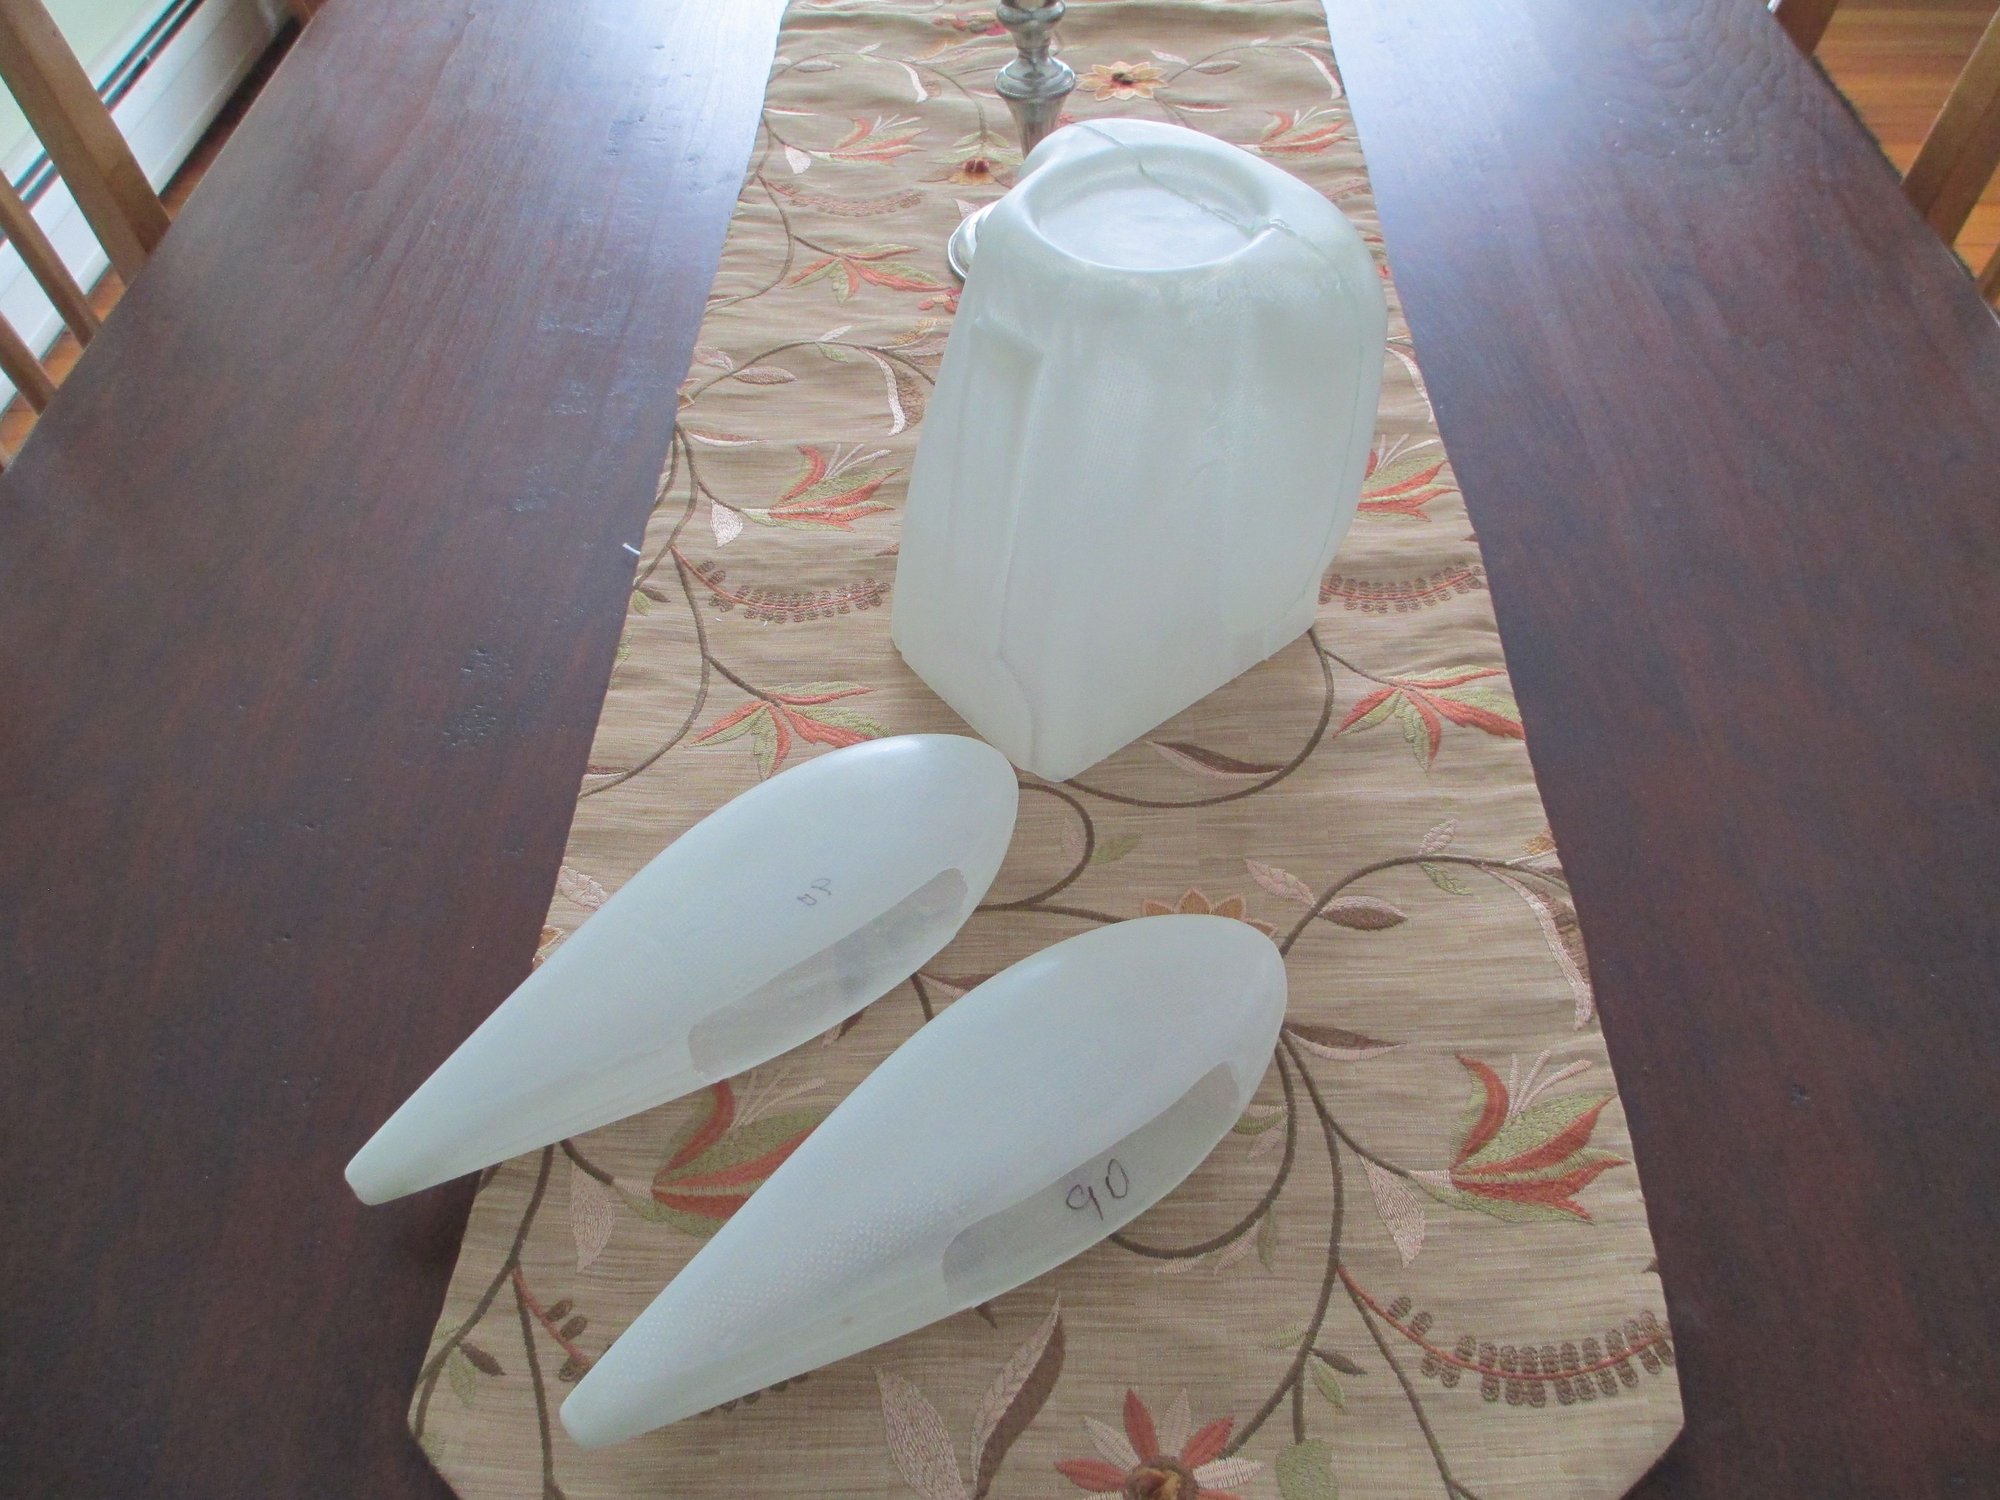
On another note, I never mentioned what engine I plan on using for this project. After checking the measurements, I will be using a DLE-20RA which should fit nicely and have more than enough power. I'll be picking it up from my not so near hobby store tomorrow. I also purchased a fiberglass cowl and wheel pants from Fiberglass Specialties. Enclosing the engine with a proper cowl will improve the looks to the front of this plane. Both engine and cowl will require the firewall to be relocated and adequately braced. Exciting things to come!!!
On another note, I never mentioned what engine I plan on using for this project. After checking the measurements, I will be using a DLE-20RA which should fit nicely and have more than enough power. I'll be picking it up from my not so near hobby store tomorrow. I also purchased a fiberglass cowl and wheel pants from Fiberglass Specialties. Enclosing the engine with a proper cowl will improve the looks to the front of this plane. Both engine and cowl will require the firewall to be relocated and adequately braced. Exciting things to come!!!
Last edited by VincentJ; 03-06-2019 at 01:45 AM.
The following users liked this post:
Wully (12-21-2021)
03-06-2019, 08:58 AM
#15

My Feedback: (19)
Dang, that will be a rocket ship with a DLE20! A 20 pulls a Four Star 120 along pretty well with close to unlimited vertical. Are you going to use a custom LG for prop clearance? Sounds like fun. I always thought the Four Star 60 was the best of the series.
The following users liked this post:
Wully (12-21-2021)
03-06-2019, 10:42 AM
#16
Thread Starter
Truckracer, I haven't done anything stupid in a while so why not...lol
The following users liked this post:
Wully (12-21-2021)
The following users liked this post:
Wully (12-21-2021)
03-08-2019, 05:03 PM
#18
Thread Starter
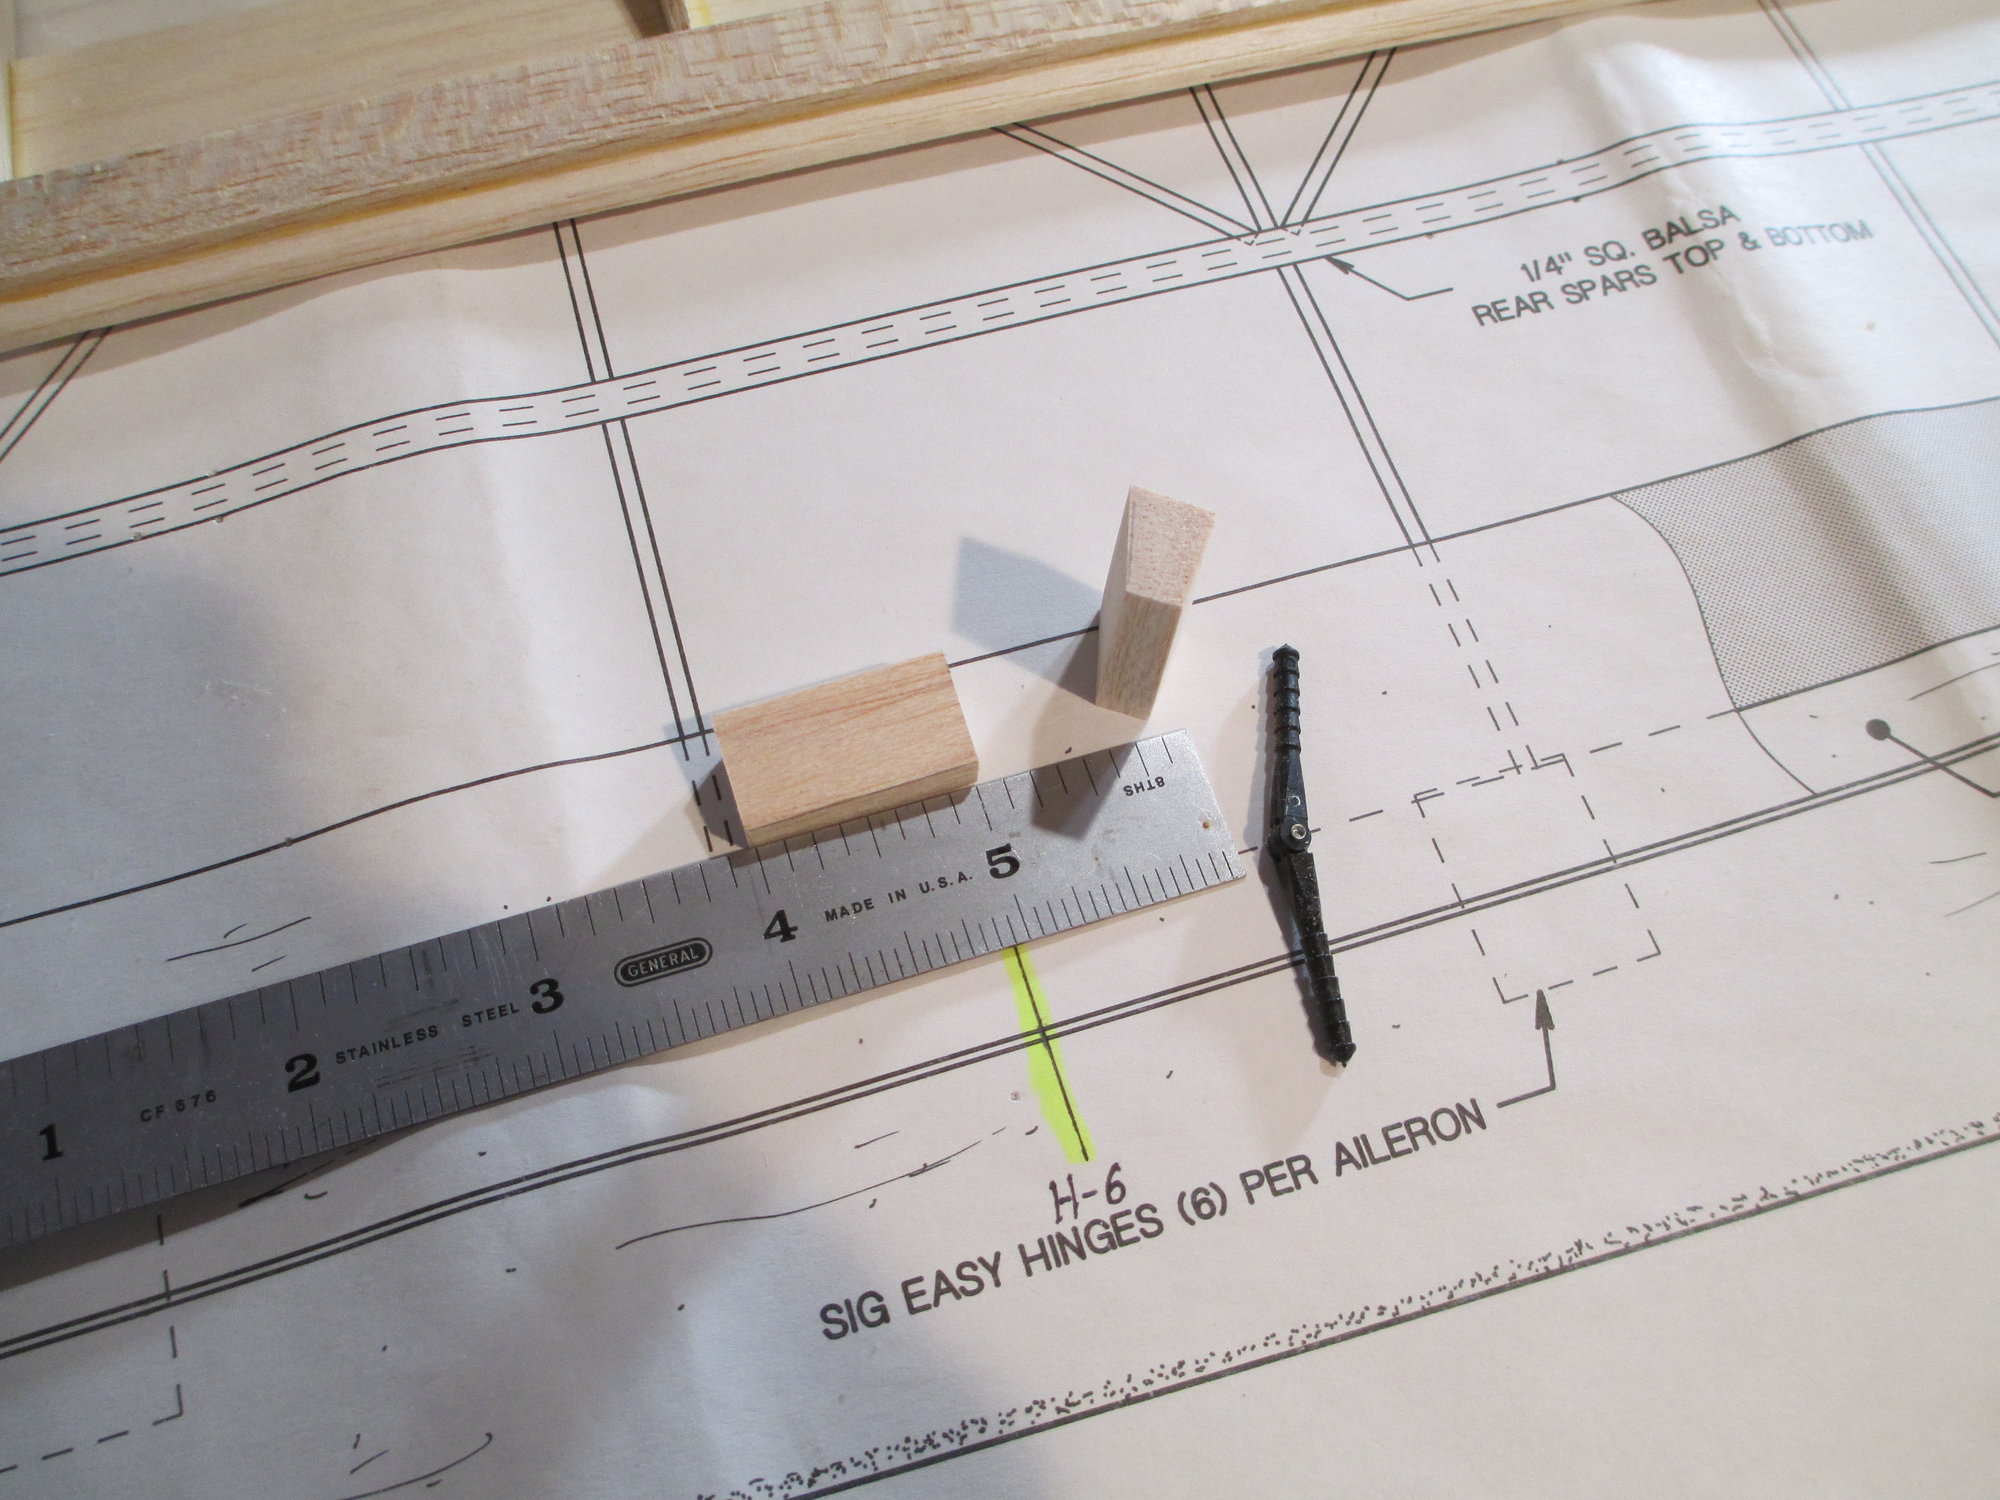
I made six hinge blocks for the 1/8" Robart steel pin hinge points that I am using, these will make sure that each hinge point is locked into the LE. Each block is glued into its proper location.
The six hinge blocks are spaced roughly 5-1/2" apart. This should be more than adequate.
Last edited by VincentJ; 03-09-2019 at 01:54 AM.
The following users liked this post:
Wully (12-21-2021)
03-10-2019, 07:46 AM
#19
Thread Starter
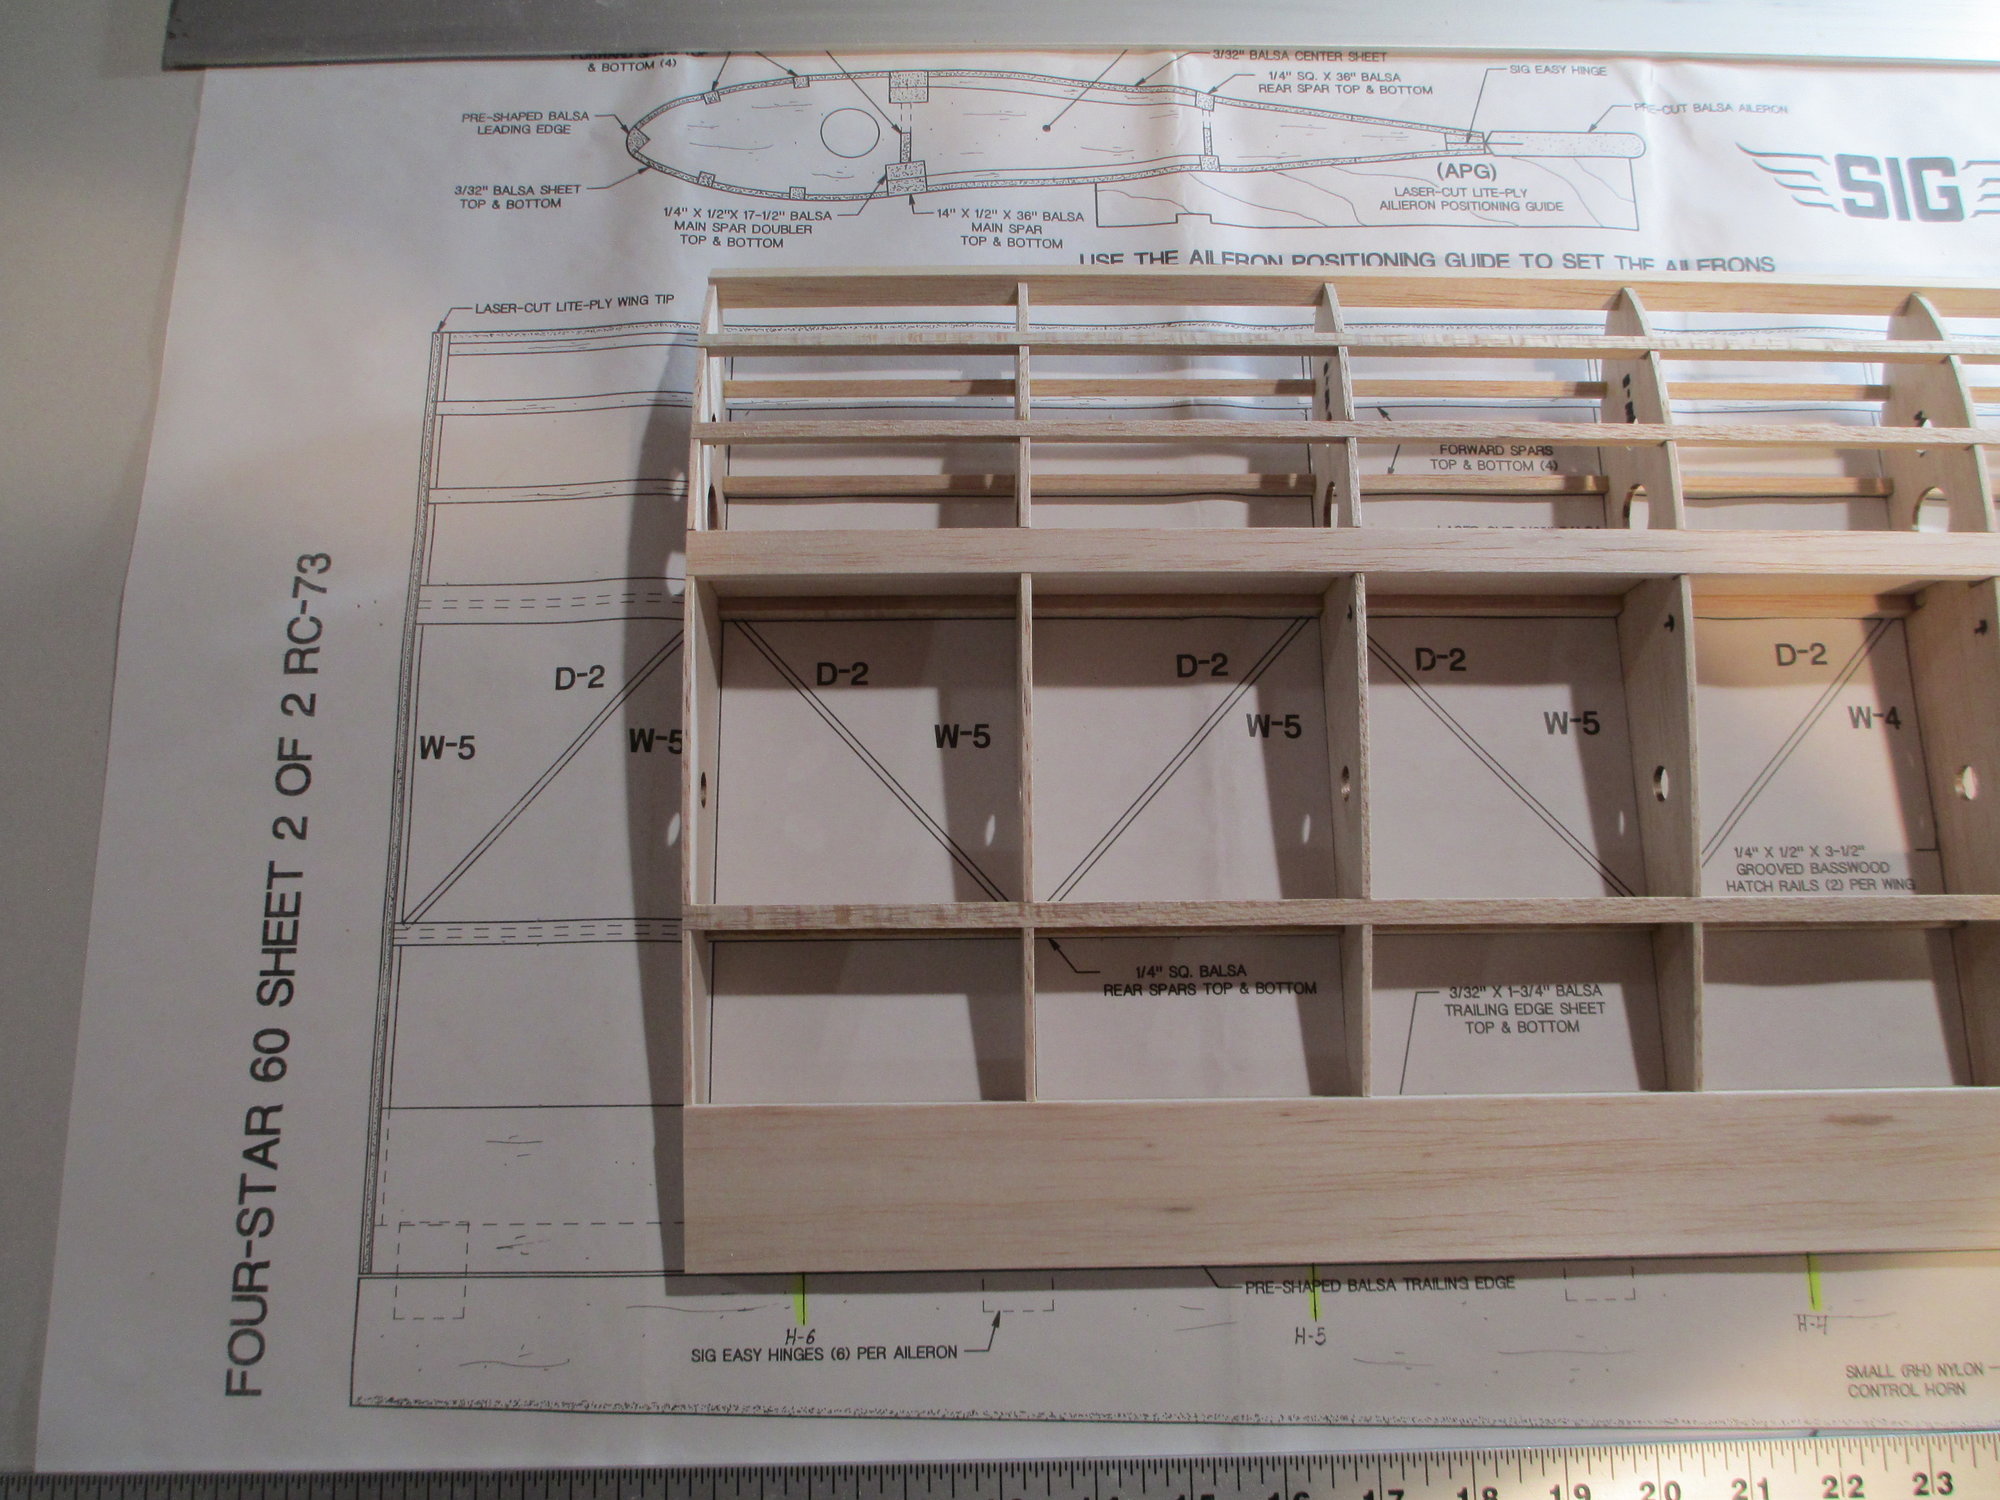
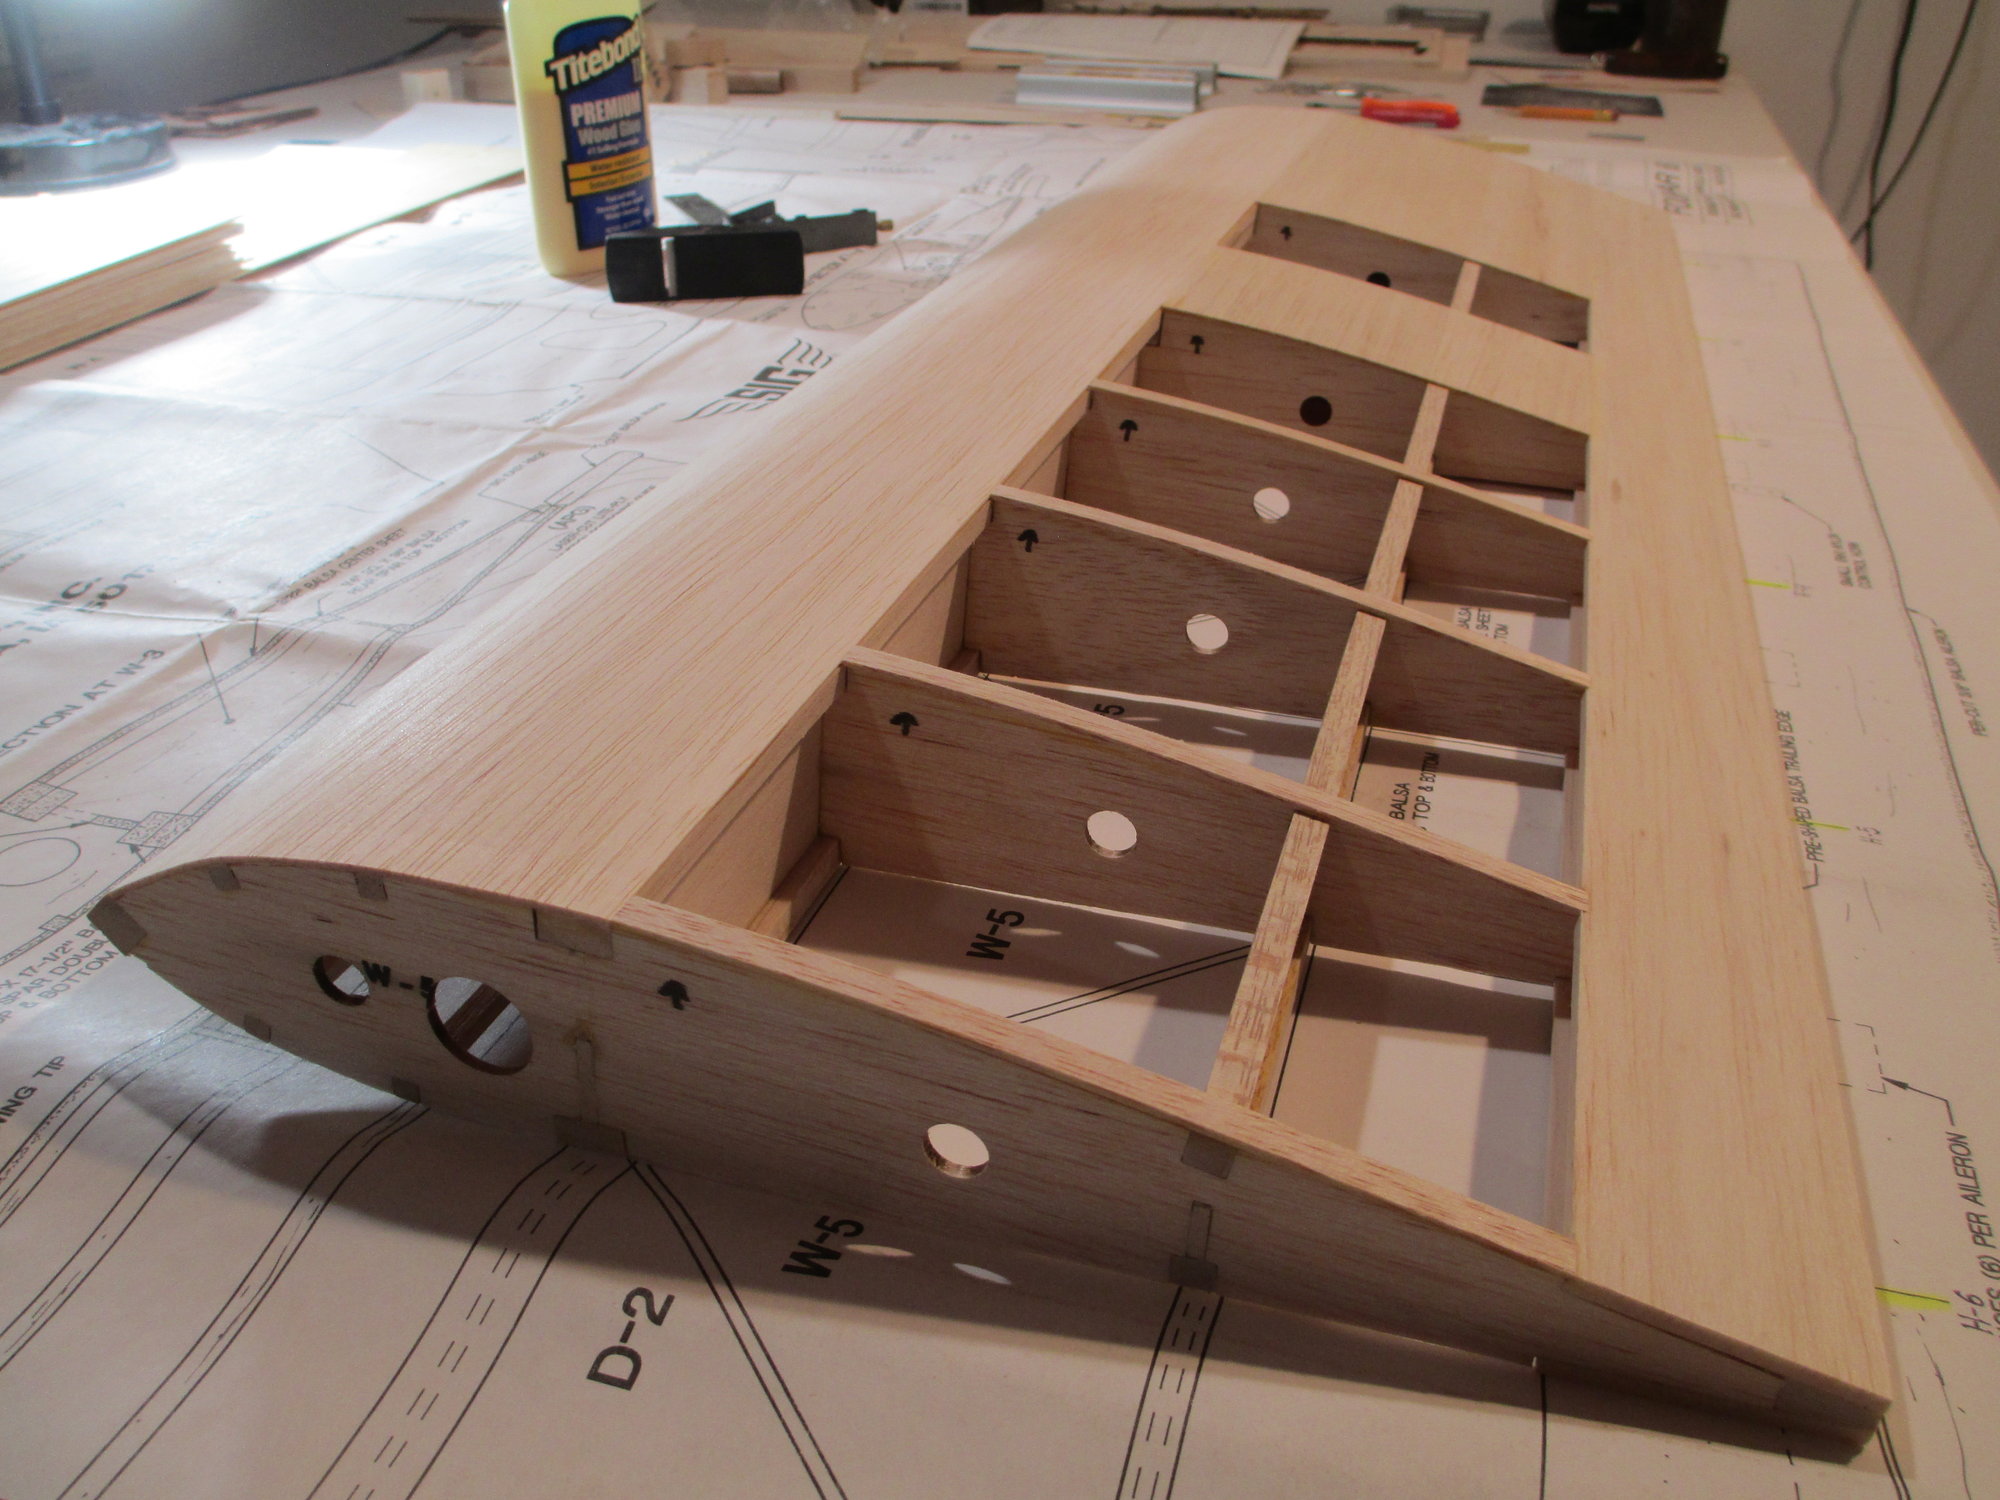
You can see in this photo the outer wing bay has been eliminated as well as all the diagonal bracing.
The left wing is ready to be partially sheeted using 1/16" stock.
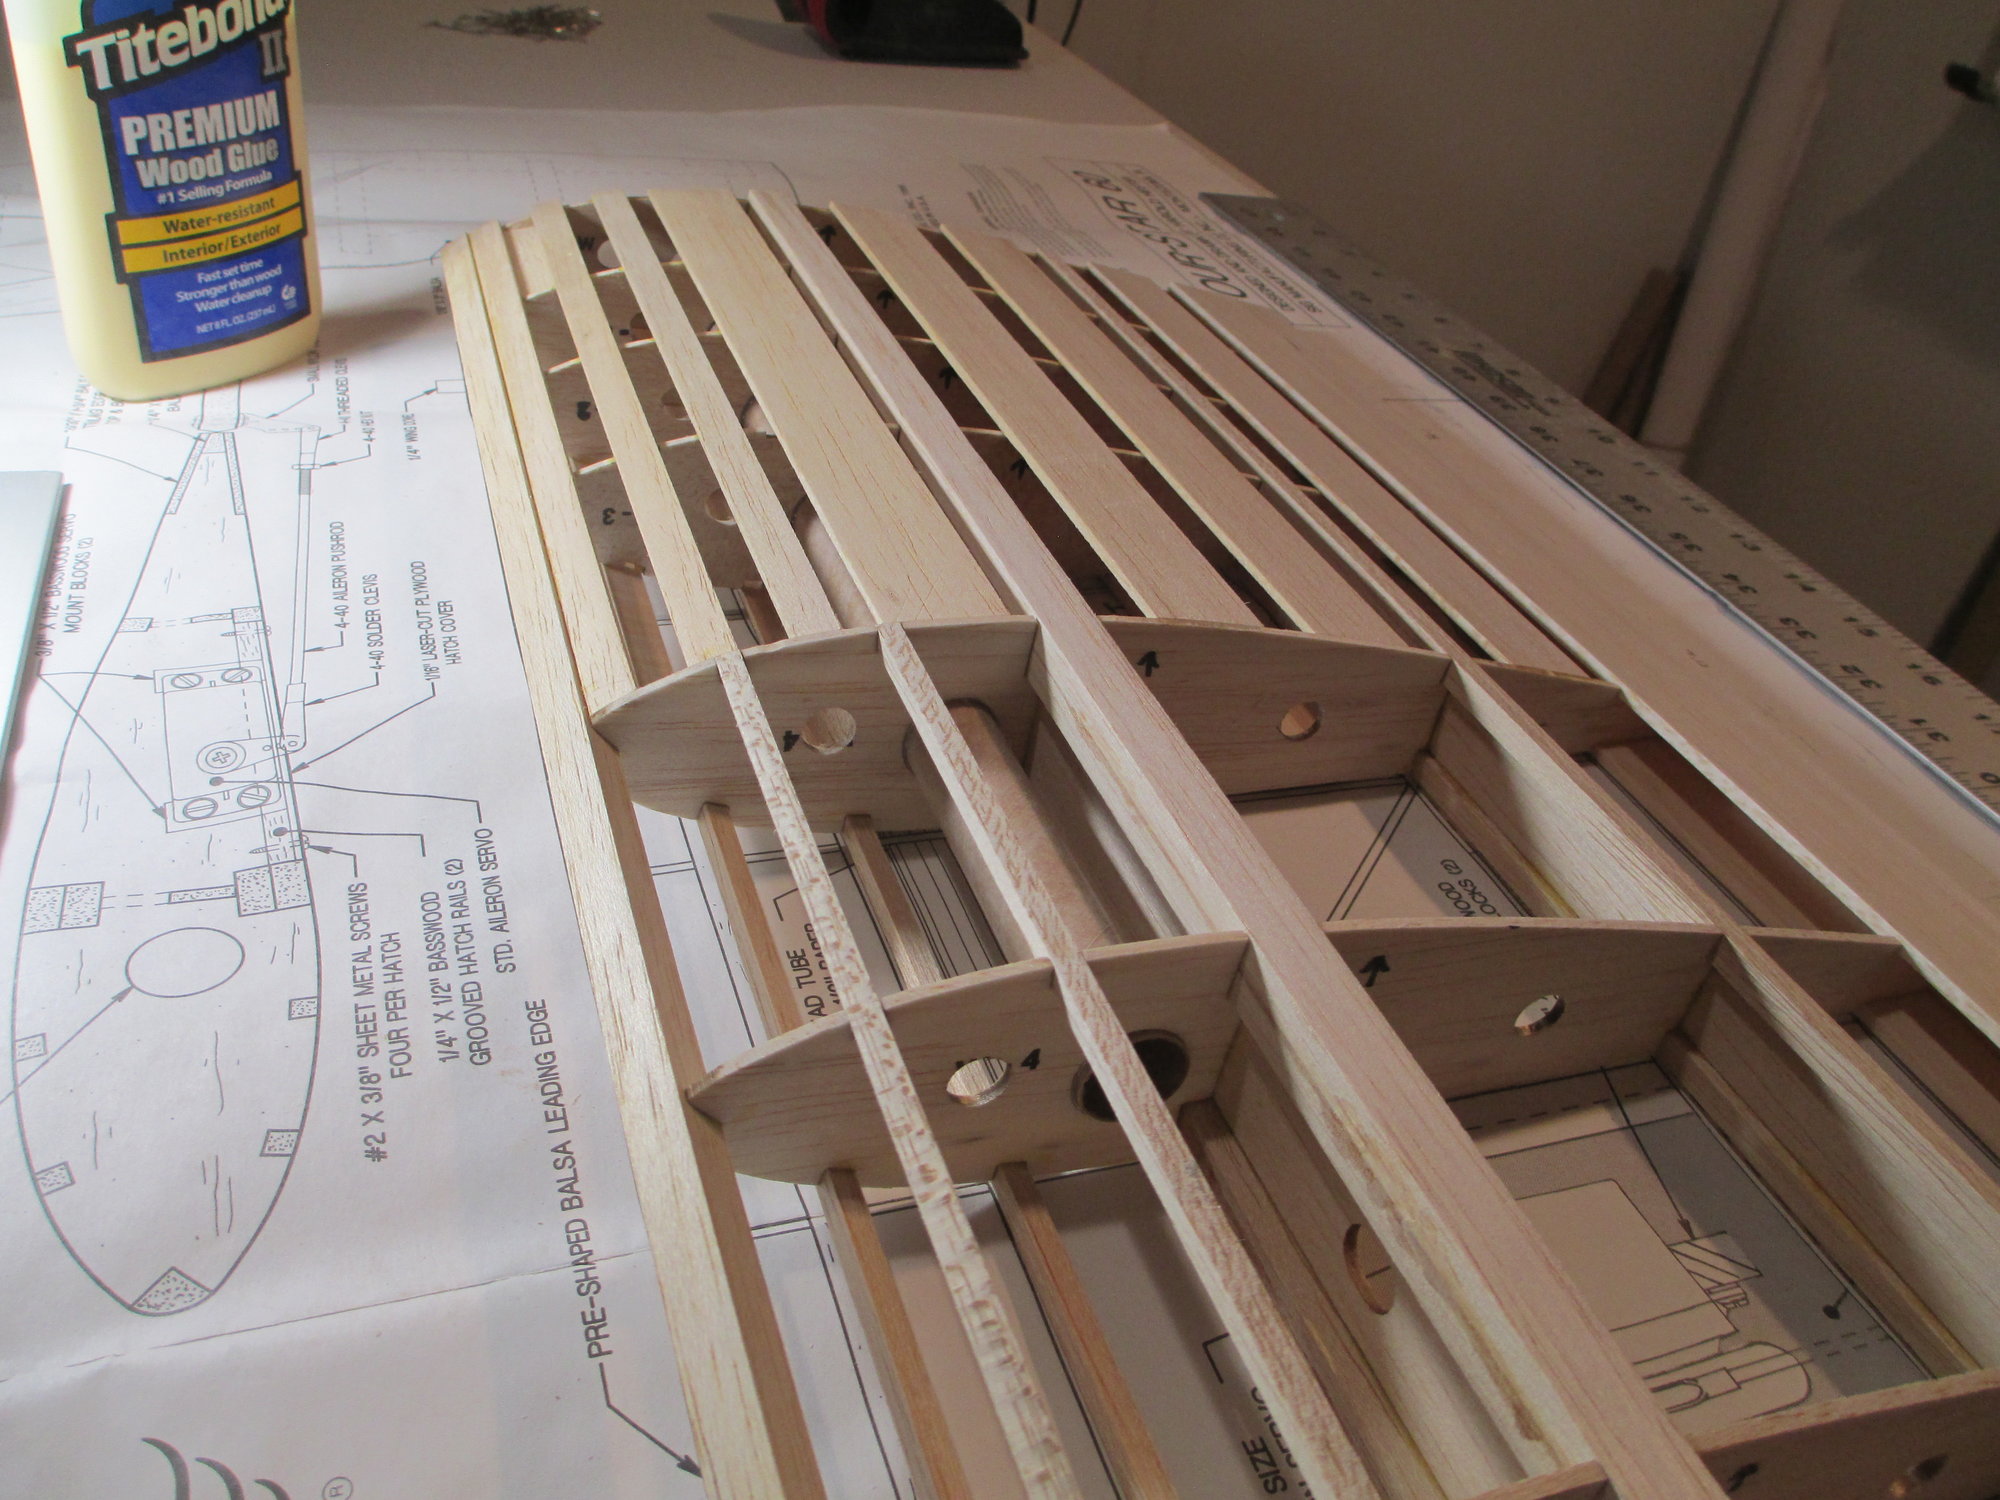
I chose to plank the first four bays leaving gaps between the planking to help minimize weight.
I could have just cut four ribs larger and swapped them out for what was supplied eliminating the planking...your call.

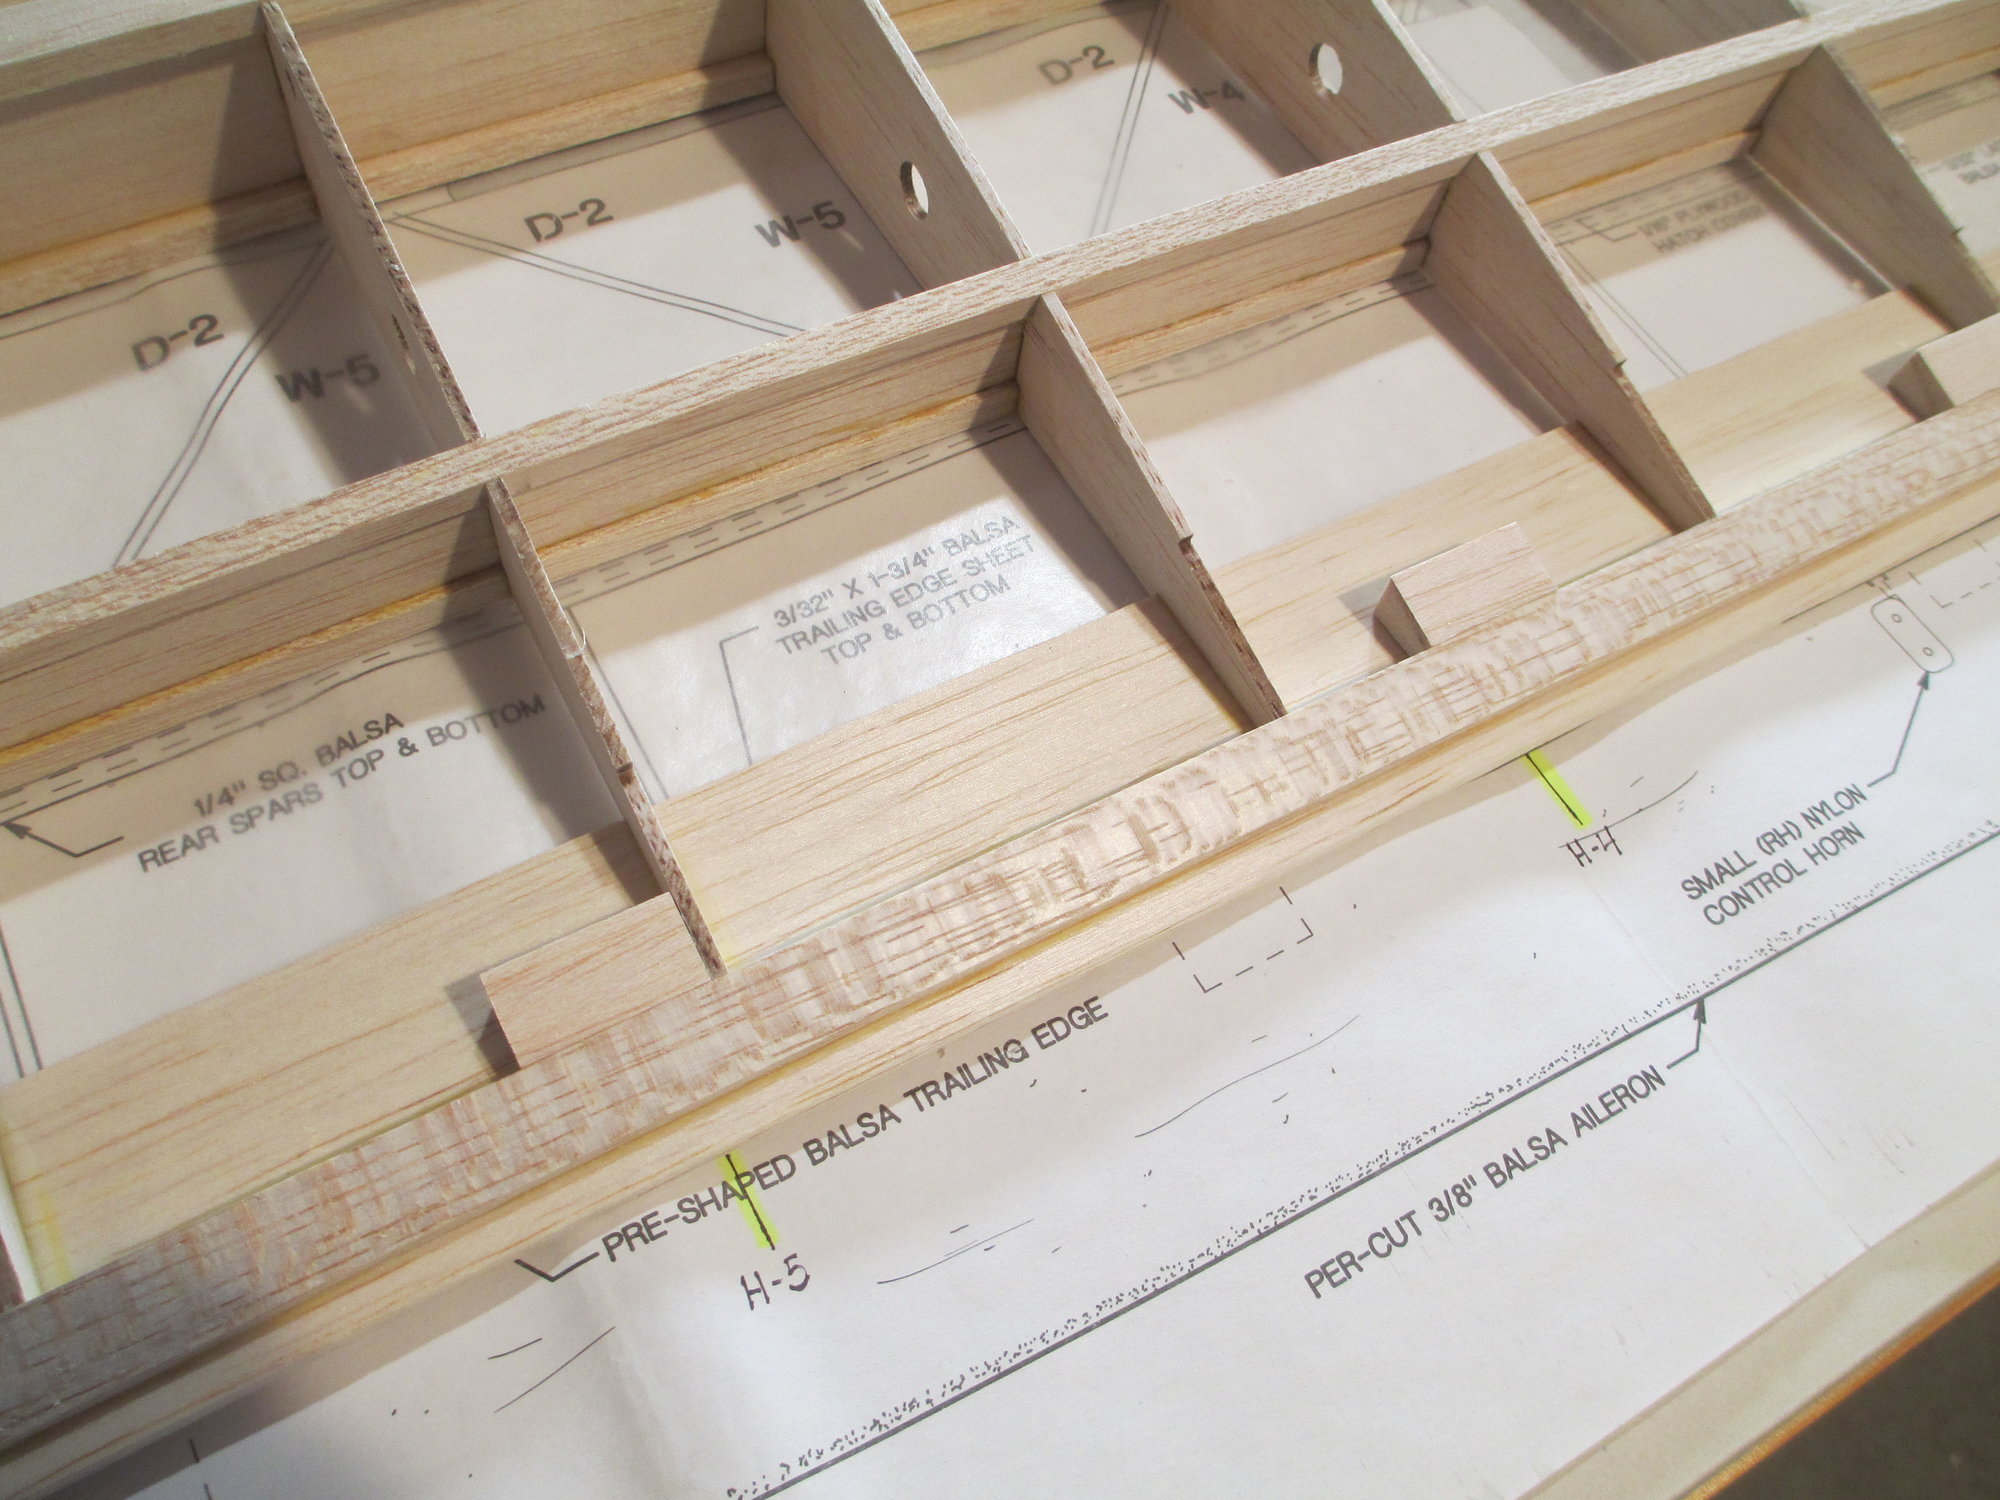
The trailing edge came out straight and true.. Inboard #1 rib which is set at 1 degree for the wing's dihedral, still needs to be sanded flush. It's also easy to see here how the TE sheet stock (1/8") is thicker than the planking which is 3/32". The difference will allow the final sheeting to be near flush with the TE.
Last edited by VincentJ; 03-11-2019 at 02:55 AM.
The following users liked this post:
Wully (12-21-2021)
03-10-2019, 02:58 PM
#20
Thread Starter
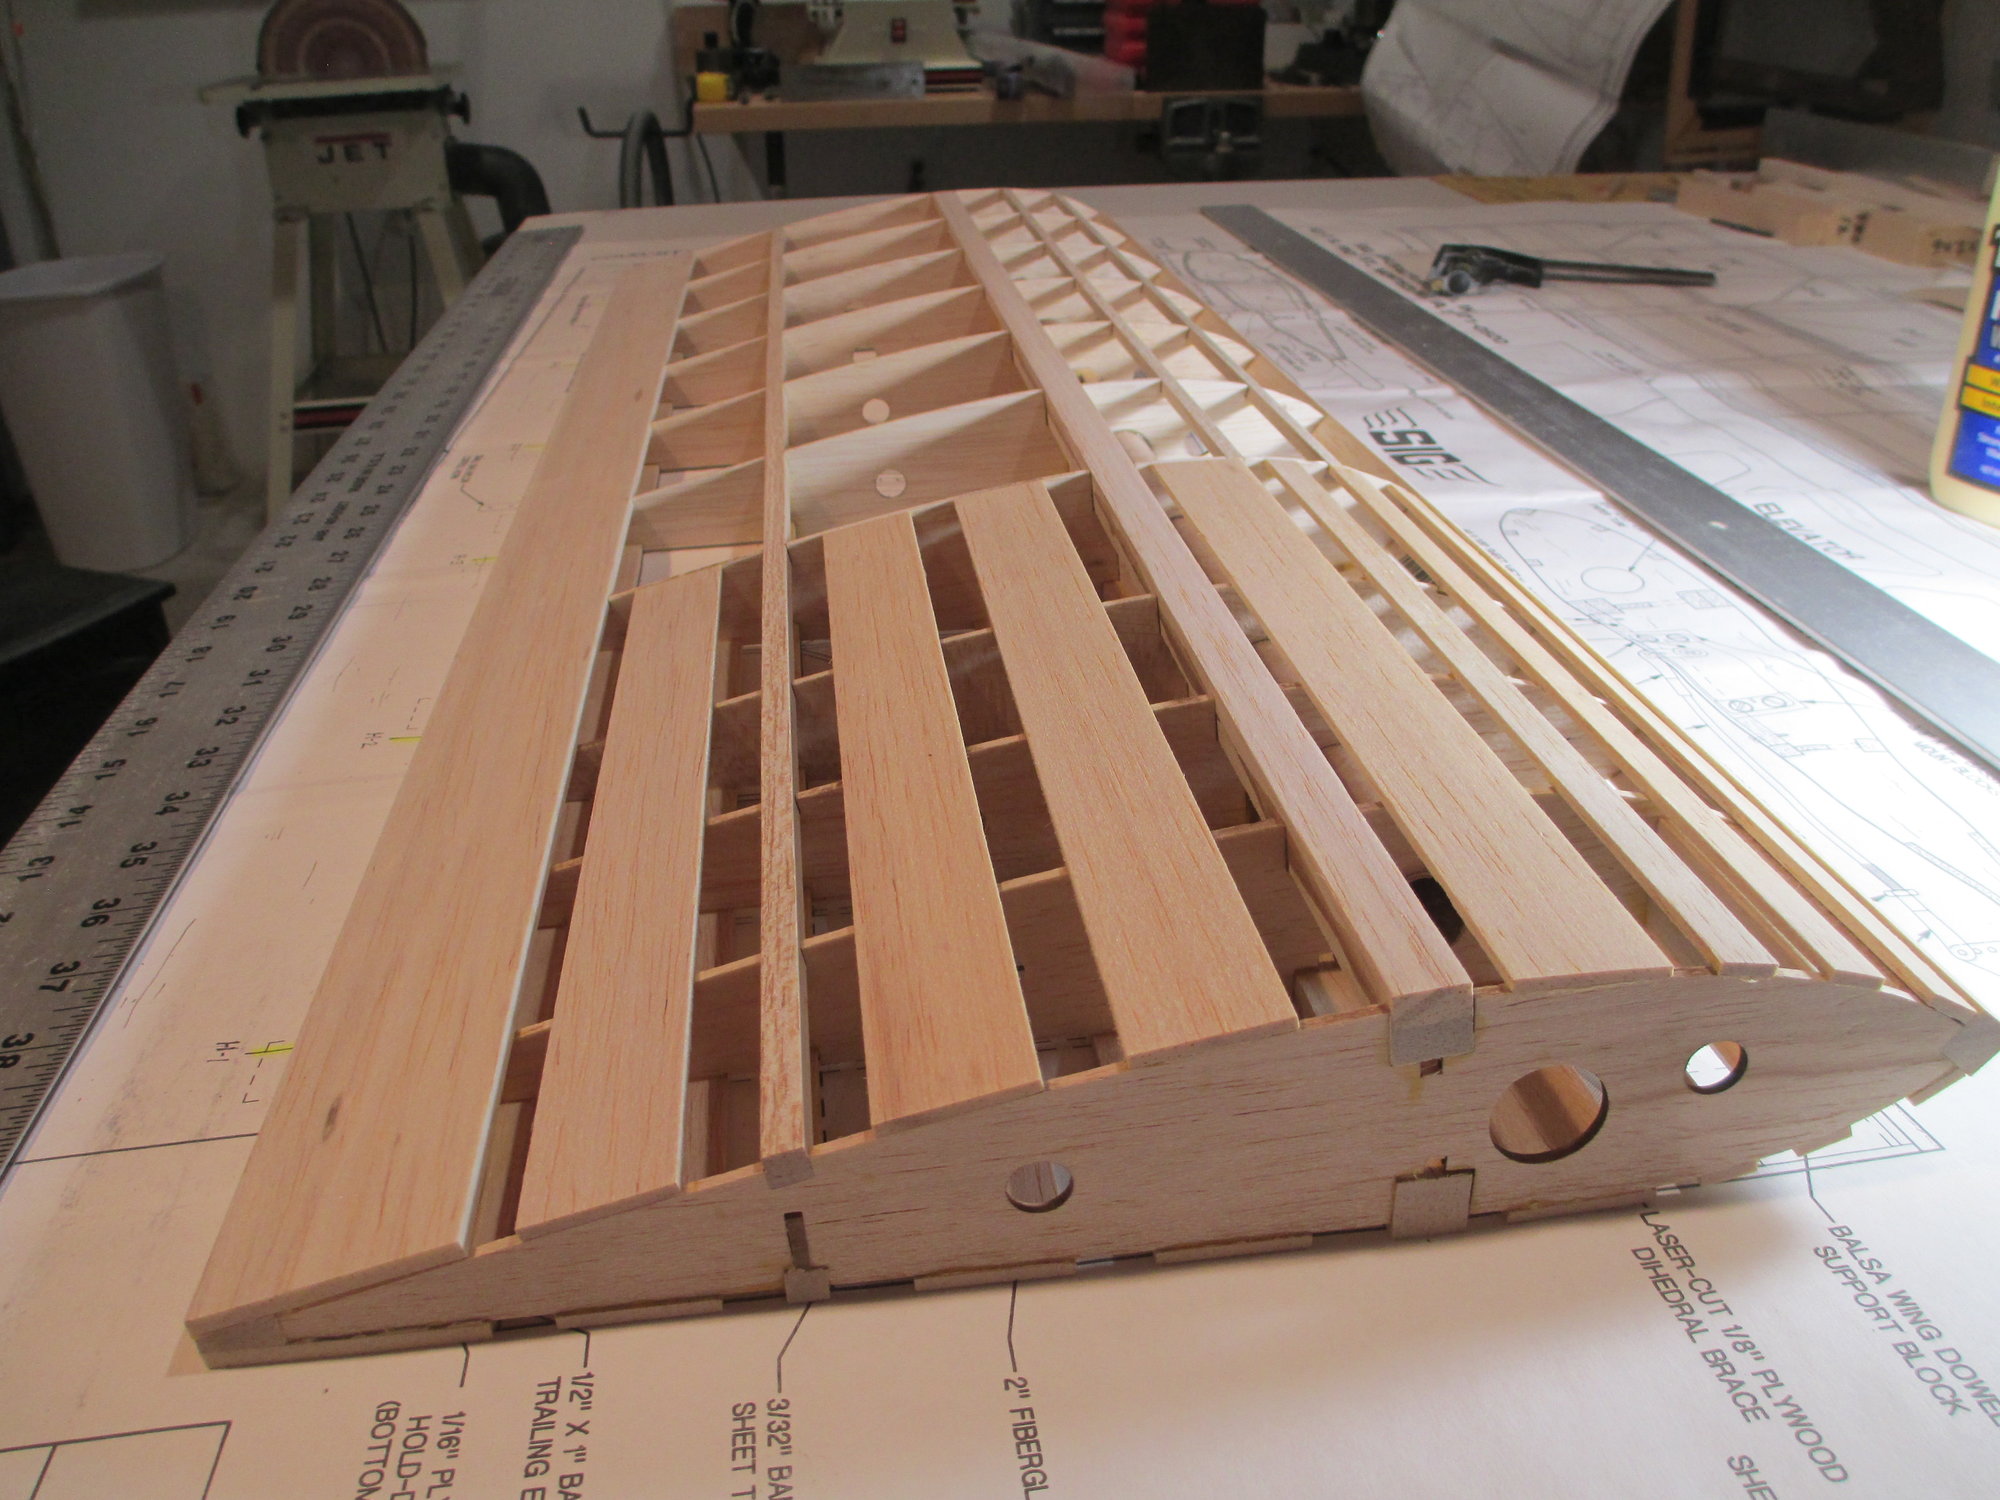
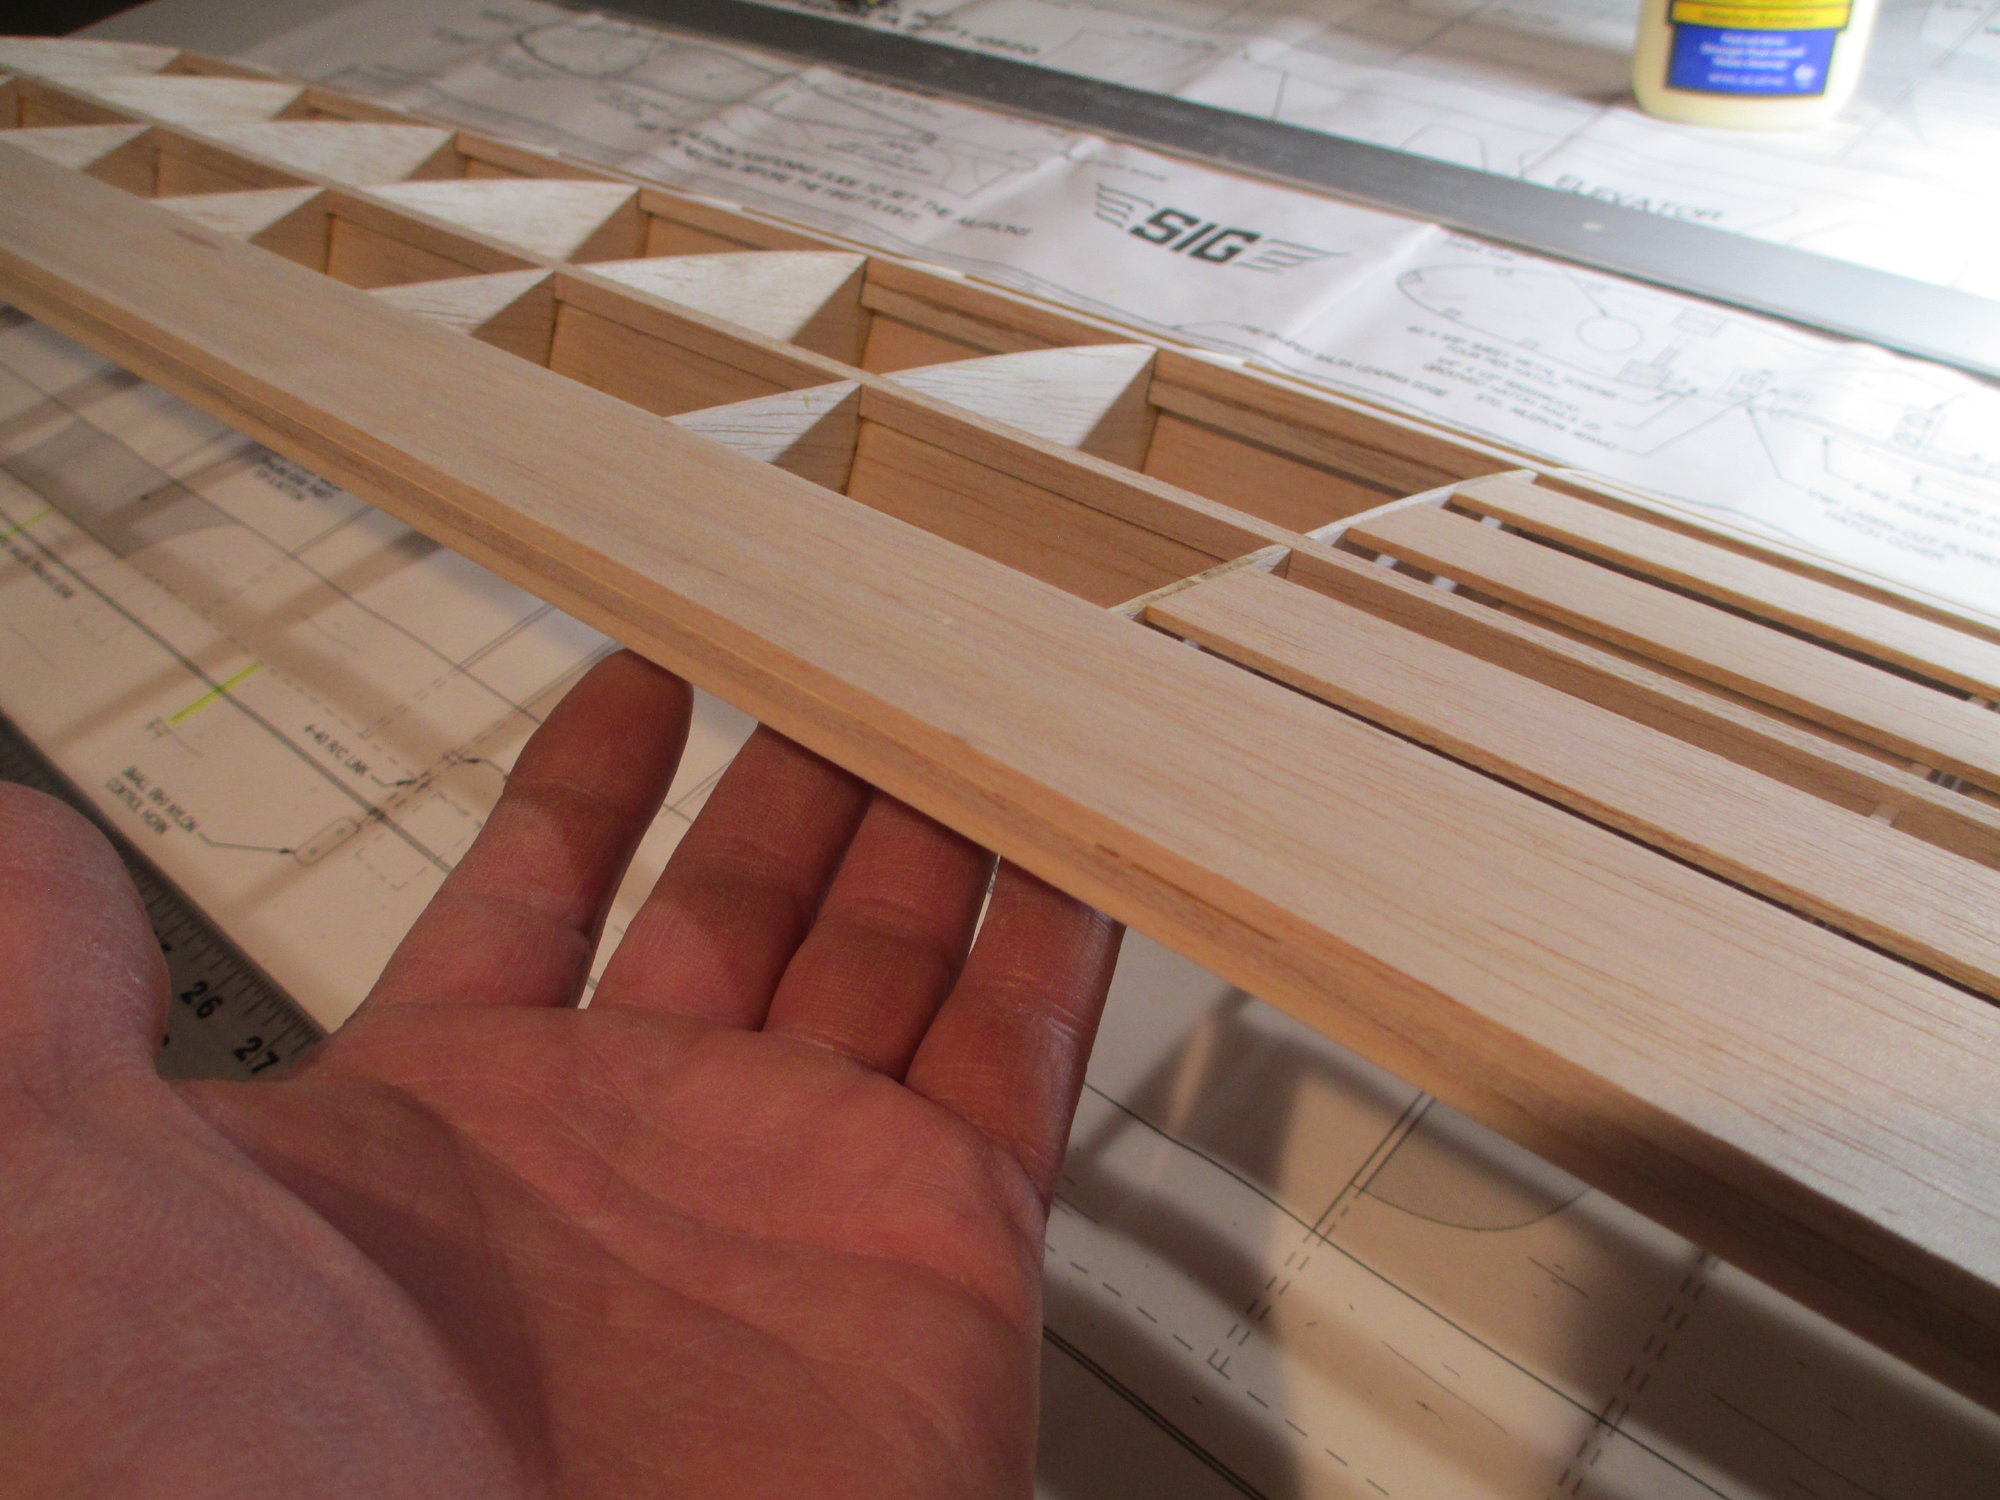
Top of the left wing has been sheeted. Cap strips were also glued over each rib.
You may be wondering why I sheeted the one center bay. This is the bay where the aileron servo will be attached. Sheeting the top and bottom of the bay will eliminate any flexing of the ribs by the action of the servo. The bottom will have a 3/32" Birch plywood removable hatch. A custom aluminum servo bracket will hold the servo to the hatch cover...
Close-up of the rib cap strip detail.
Last edited by VincentJ; 03-11-2019 at 06:33 AM.
The following users liked this post:
Wully (12-21-2021)
03-12-2019, 02:53 PM
#21
Thread Starter
Even though the bottom of the left wing has yet to be sheeted, I've gone as far as I can on it. Construction of the right wing panel will now begin. Once the right wing panel is at the same stage as its opposite twin, the two panels will be permanently joined together. You may wonder why not fully sheet each wing panel then join them? By having access to the unsheeted bottom center section of the wing panels, I can better control the epoxy joint on the center plywood wing joiner at the wings center. Now you know...
I'll try not to duplicate what I've already shown you on the left wing panel, but instead try and highlight other details not covered...

The process starts by epoxying two 1/4"x 1/2" balsa sticks together. Once cured, it will become one of two wing spars.

The key to getting a nice and straight spar is to make sure that they are clamped to something that is straight and flat. (In this case I used aluminum square stock and the cast iron base of my disc sander.)
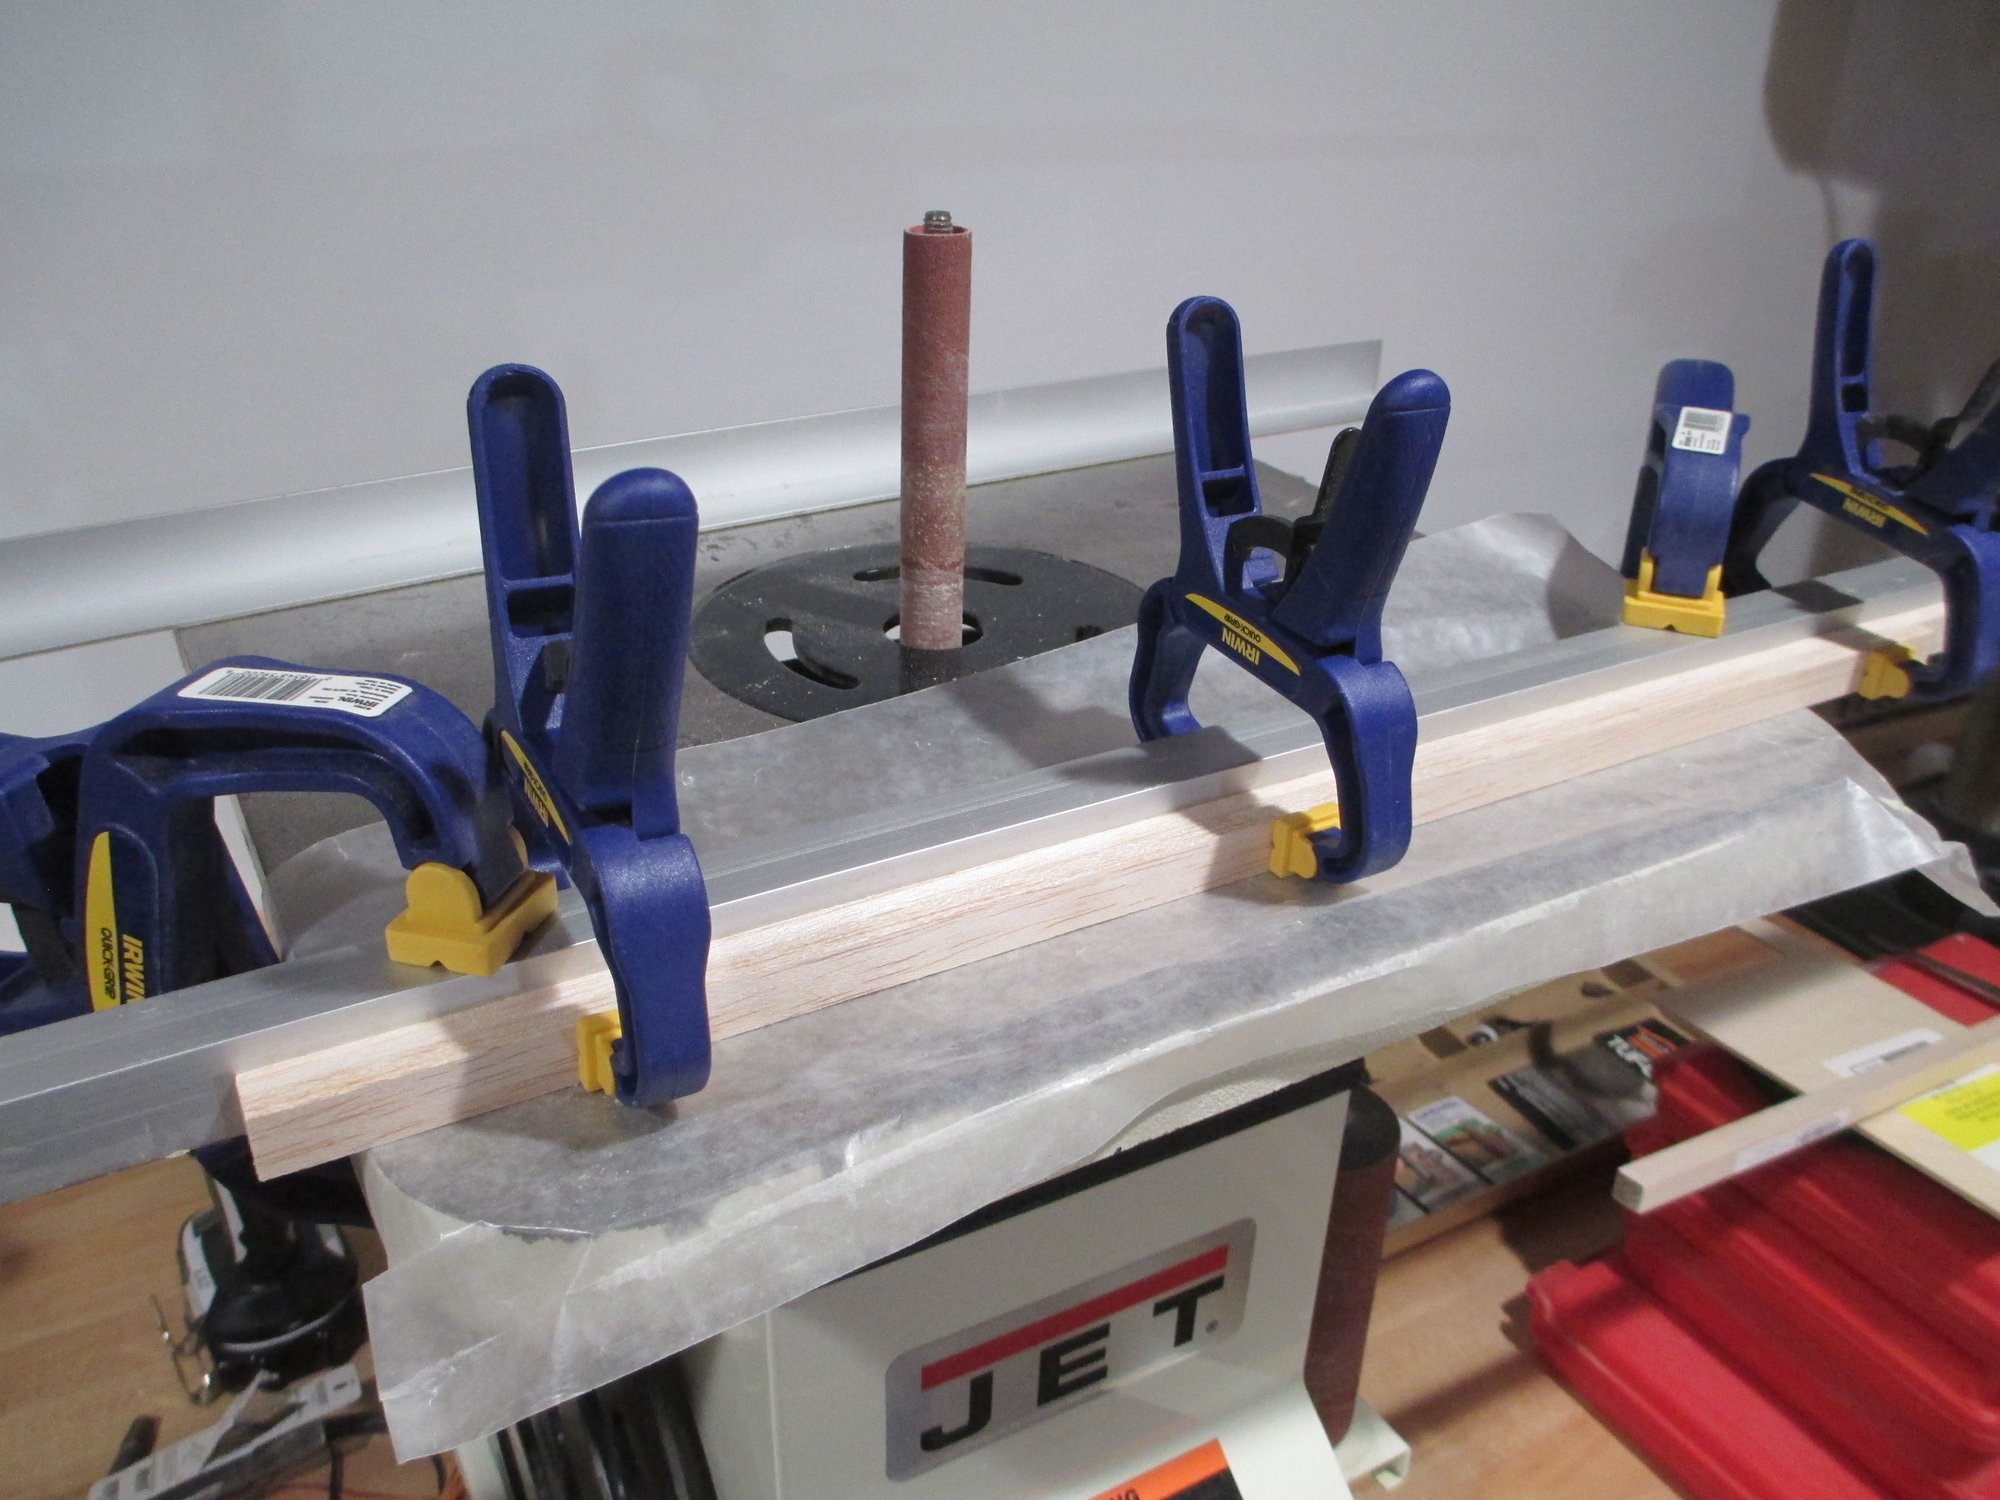
Here's a builders tip: Clamp everything dry first, that way you won't have any surprises once you apply the epoxy. Maybe the set-up that you thought would work won't, leaving you to quickly come up with a better solution rushing against the epoxy curing time. Better to find out dry first!
I'll try not to duplicate what I've already shown you on the left wing panel, but instead try and highlight other details not covered...
The process starts by epoxying two 1/4"x 1/2" balsa sticks together. Once cured, it will become one of two wing spars.
The key to getting a nice and straight spar is to make sure that they are clamped to something that is straight and flat. (In this case I used aluminum square stock and the cast iron base of my disc sander.)
Here's a builders tip: Clamp everything dry first, that way you won't have any surprises once you apply the epoxy. Maybe the set-up that you thought would work won't, leaving you to quickly come up with a better solution rushing against the epoxy curing time. Better to find out dry first!
Last edited by VincentJ; 03-13-2019 at 09:12 AM.
The following users liked this post:
Wully (12-21-2021)
The following users liked this post:
Wully (12-21-2021)
03-14-2019, 03:30 PM
#23
Thread Starter
This way of building is conducive to using CA. Since I don't use CA this type of construction is a real PITA...
All the pieces laid out.
With the bottom main spar pinned into position, the one piece shear web is placed on top. (This is the first time I've seen the grain in the shear webbing running in that direction. I always orientate the grain vertically for strength.)
All of the ribs simply interlock together. A very easy way to construct a wing if it's your first build. (I apologize how my hands look, working on cars for a living make them look that way, they really are clean...)

Double bonus building tip for tonight! Tip #1- The 1/4" x 1/4" square stock shown is the bottom rear wing spar (no that's not the tip). Notice how I've pushed the spar tight against the aluminum square tubing. This is a good way to ensure that the spar is pinned straight over the plans. Don't trust the lines on your plans to be straight and true, especially if your plans don't lay flat as is most of the case with folded plans.
Tip #2-You may think that your balsa square stock is dimensionally equal. It probably isn't, so before you pin your stock down find which side fits tighter in the notch of the rib. You will see and feel the difference.
All the pieces laid out.
With the bottom main spar pinned into position, the one piece shear web is placed on top. (This is the first time I've seen the grain in the shear webbing running in that direction. I always orientate the grain vertically for strength.)
All of the ribs simply interlock together. A very easy way to construct a wing if it's your first build. (I apologize how my hands look, working on cars for a living make them look that way, they really are clean...)
Double bonus building tip for tonight! Tip #1- The 1/4" x 1/4" square stock shown is the bottom rear wing spar (no that's not the tip). Notice how I've pushed the spar tight against the aluminum square tubing. This is a good way to ensure that the spar is pinned straight over the plans. Don't trust the lines on your plans to be straight and true, especially if your plans don't lay flat as is most of the case with folded plans.
Tip #2-You may think that your balsa square stock is dimensionally equal. It probably isn't, so before you pin your stock down find which side fits tighter in the notch of the rib. You will see and feel the difference.
Last edited by VincentJ; 03-15-2019 at 01:37 AM.
The following users liked this post:
Wully (12-21-2021)
03-15-2019, 07:57 AM
#24
Thread Starter
Time to install the wing's leading edge. Here's how I do it.
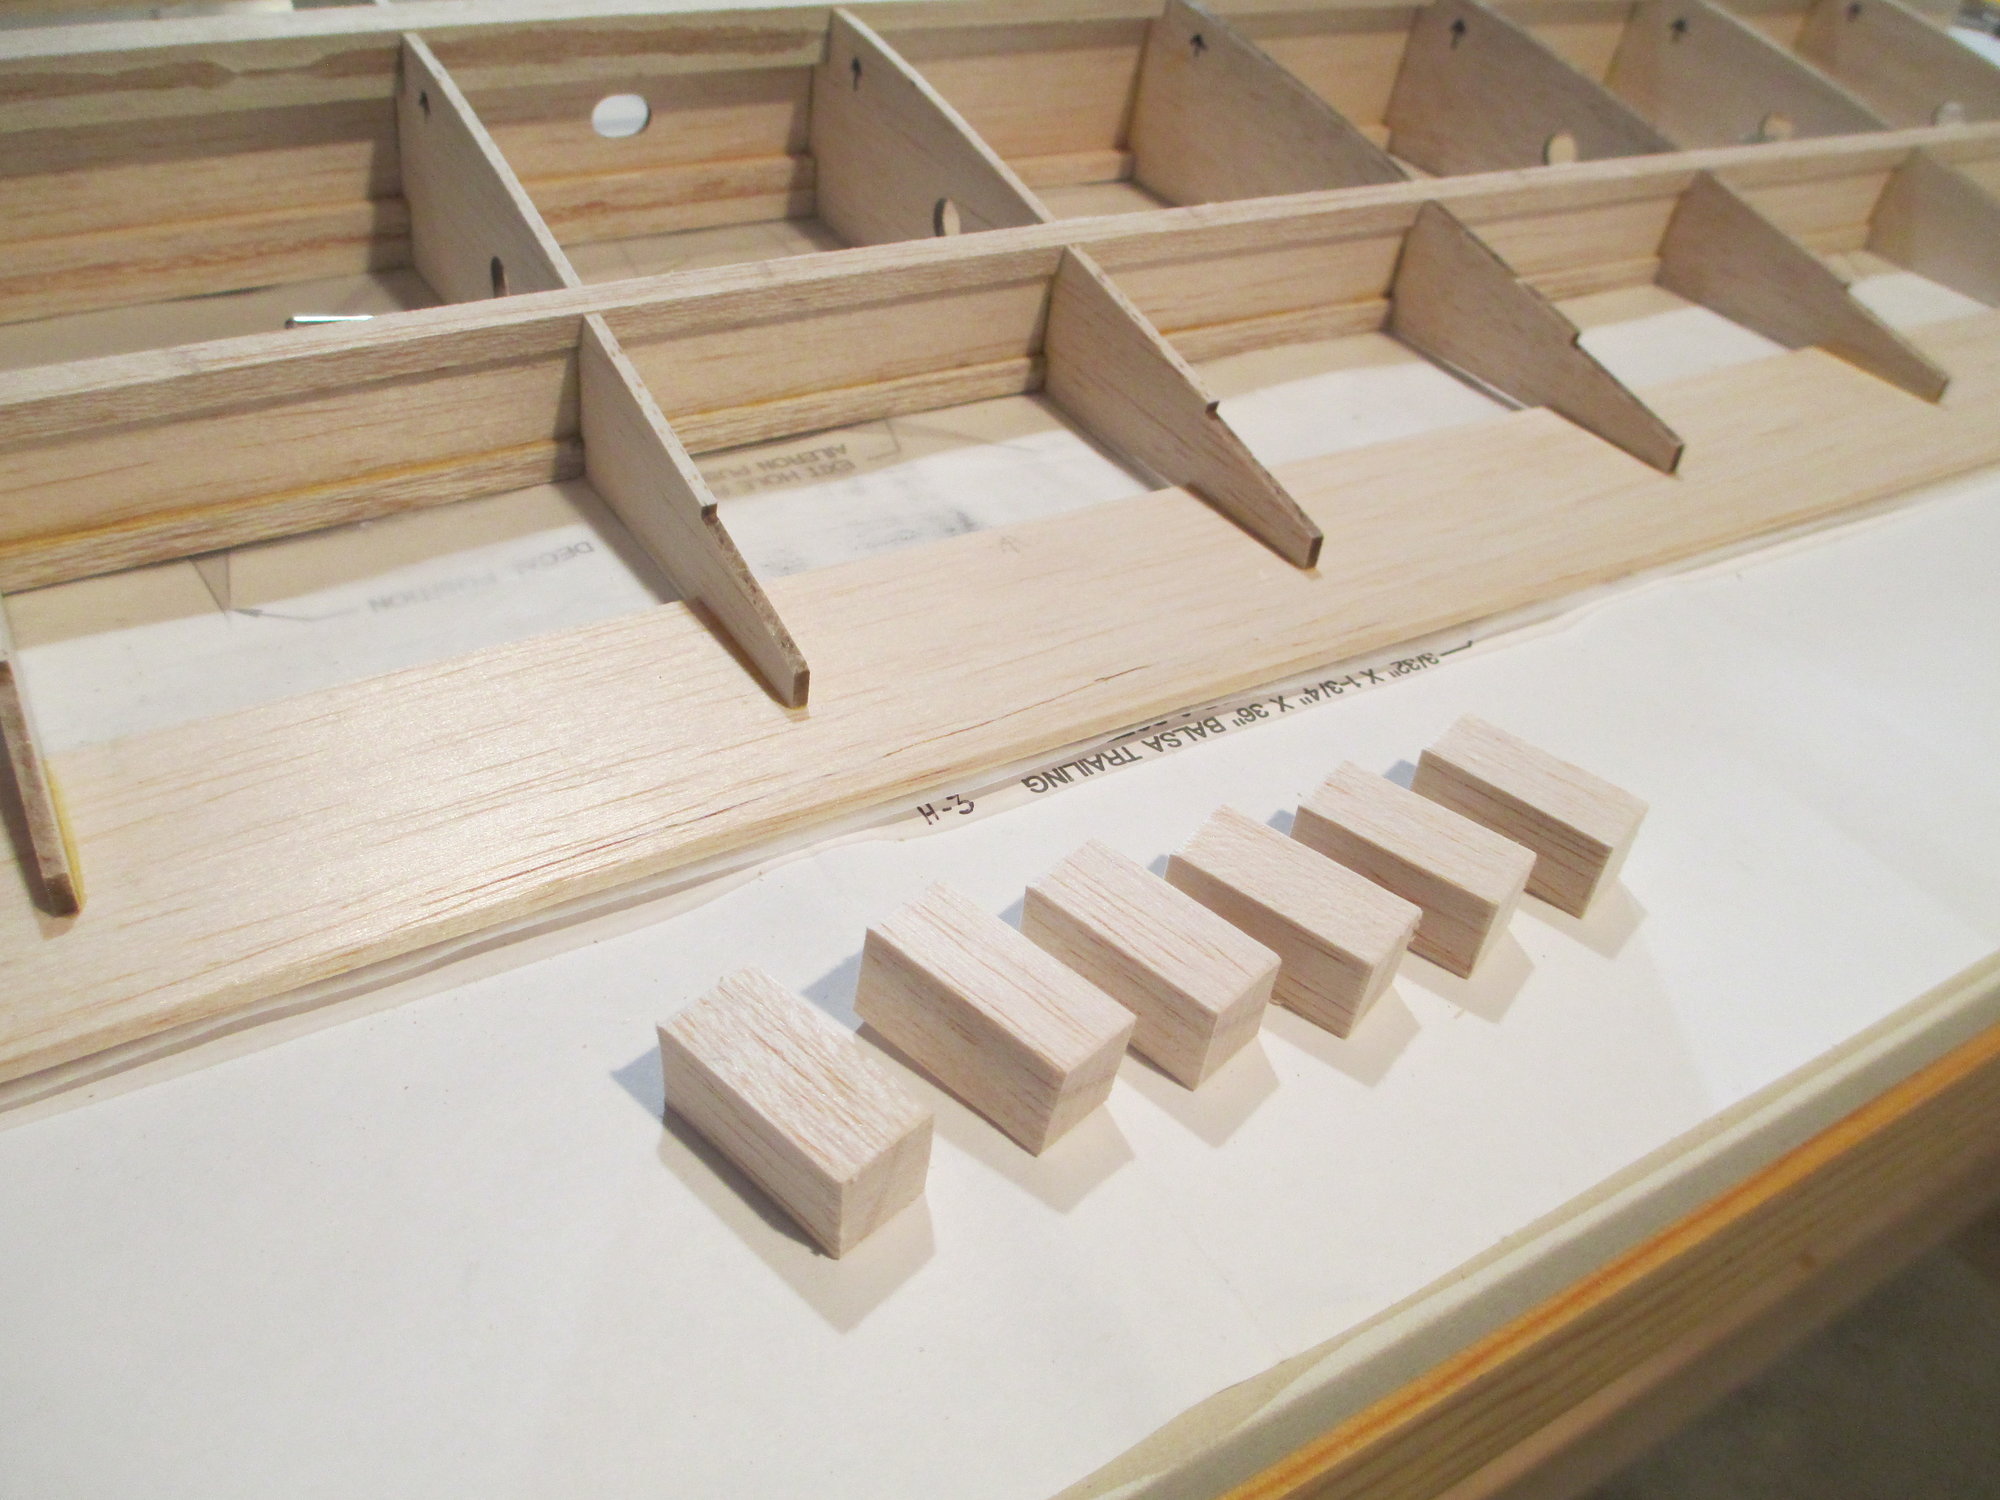
Six hinge blocks which need to be shaped then glued into the TE.
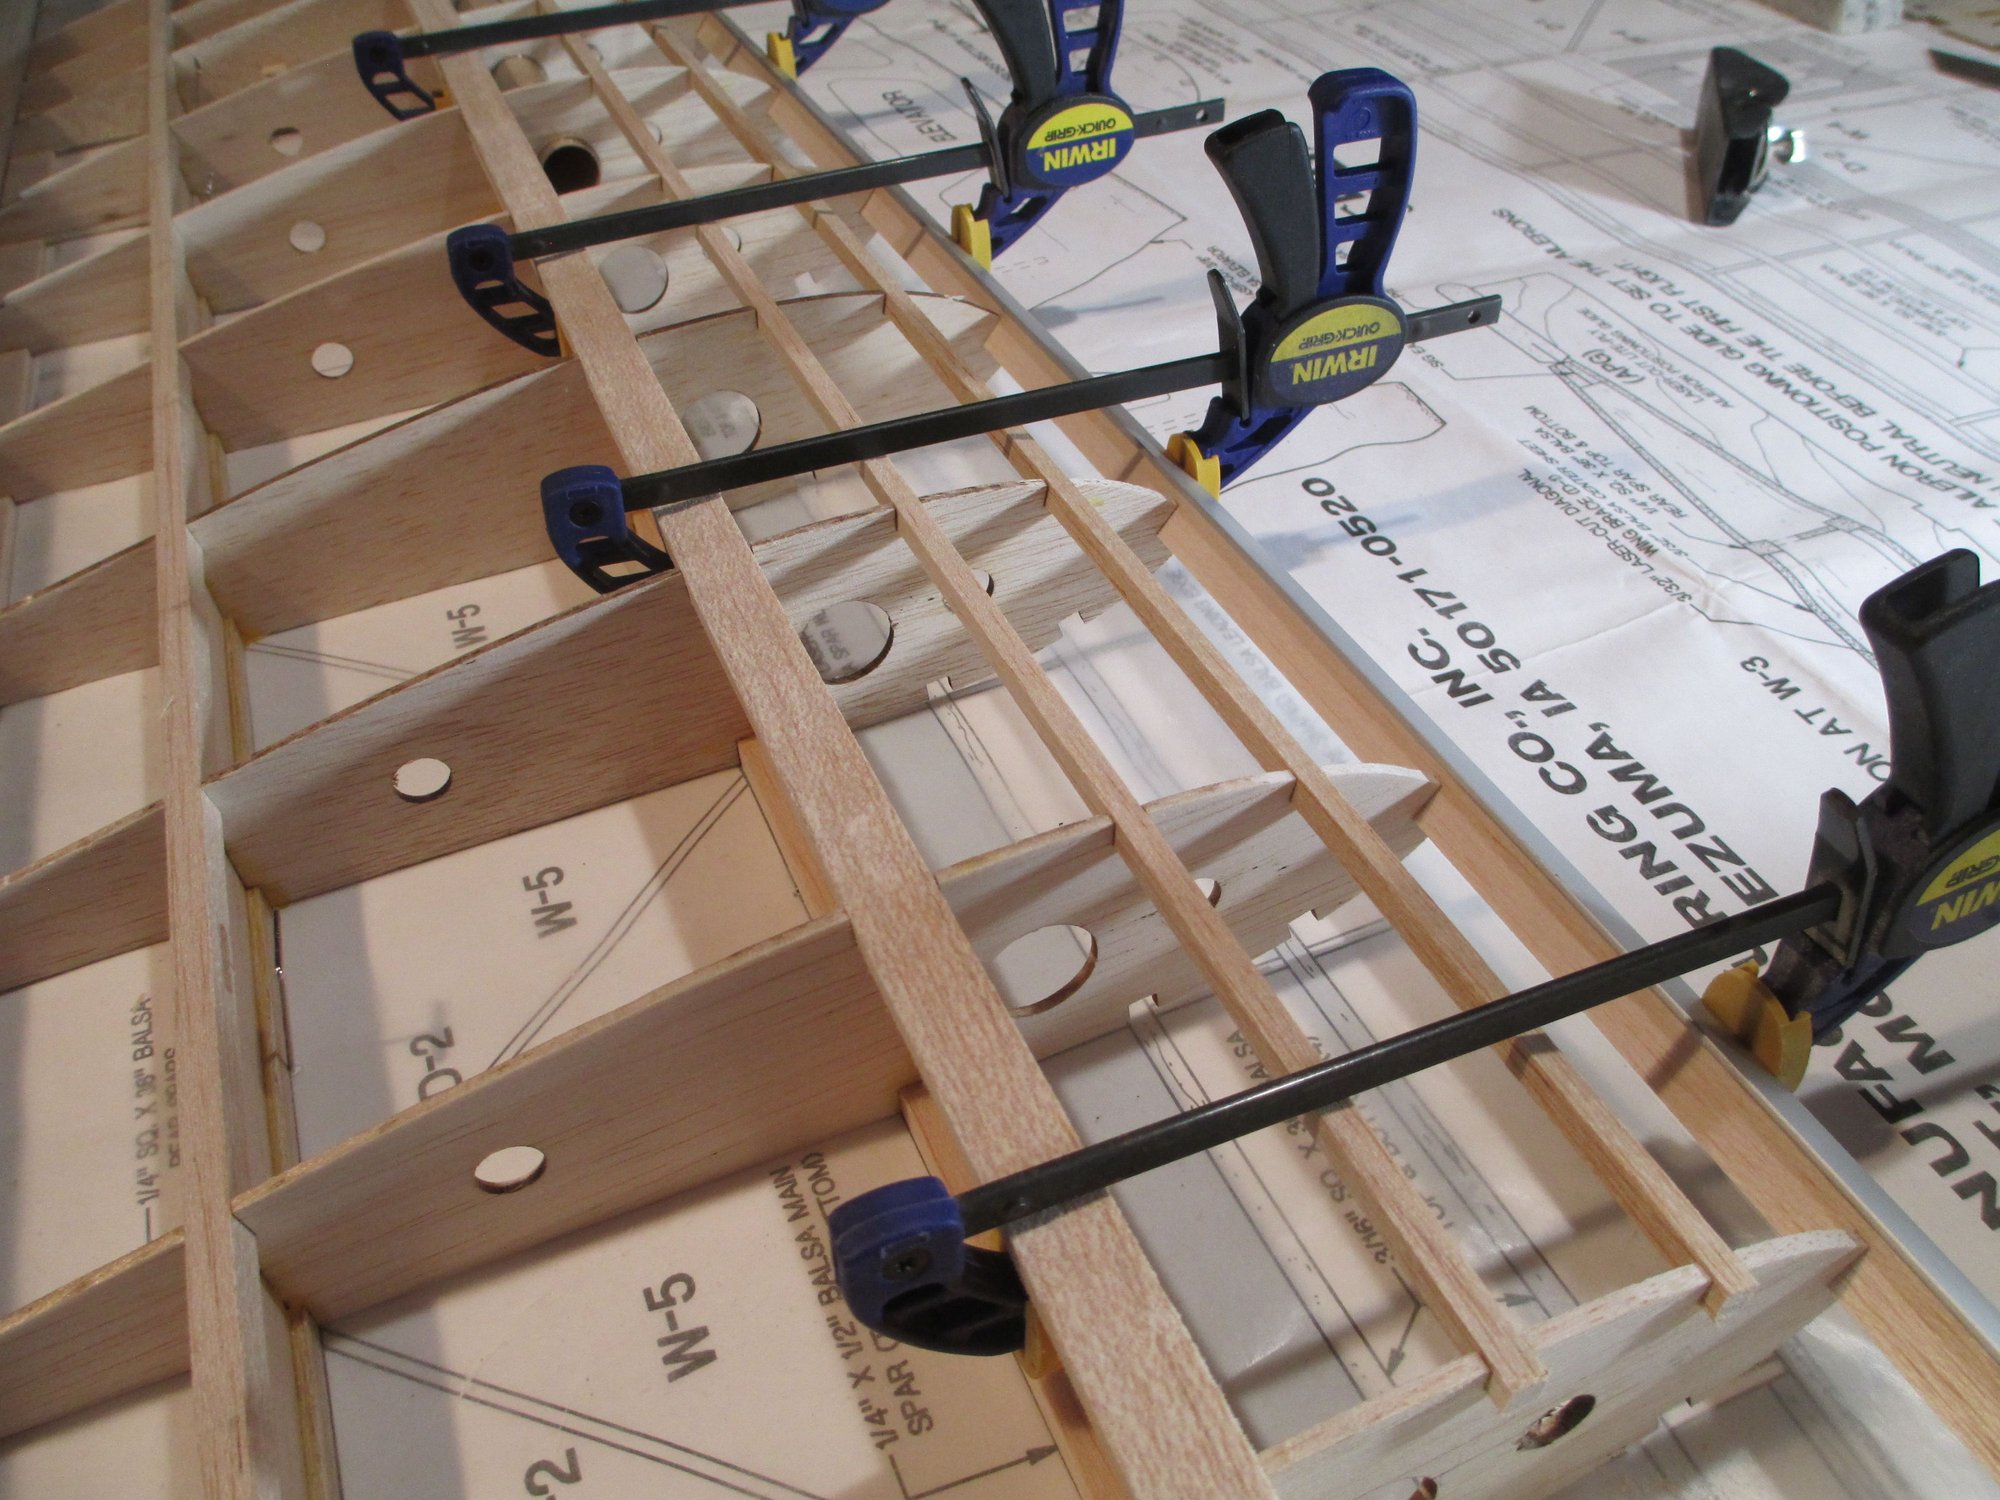
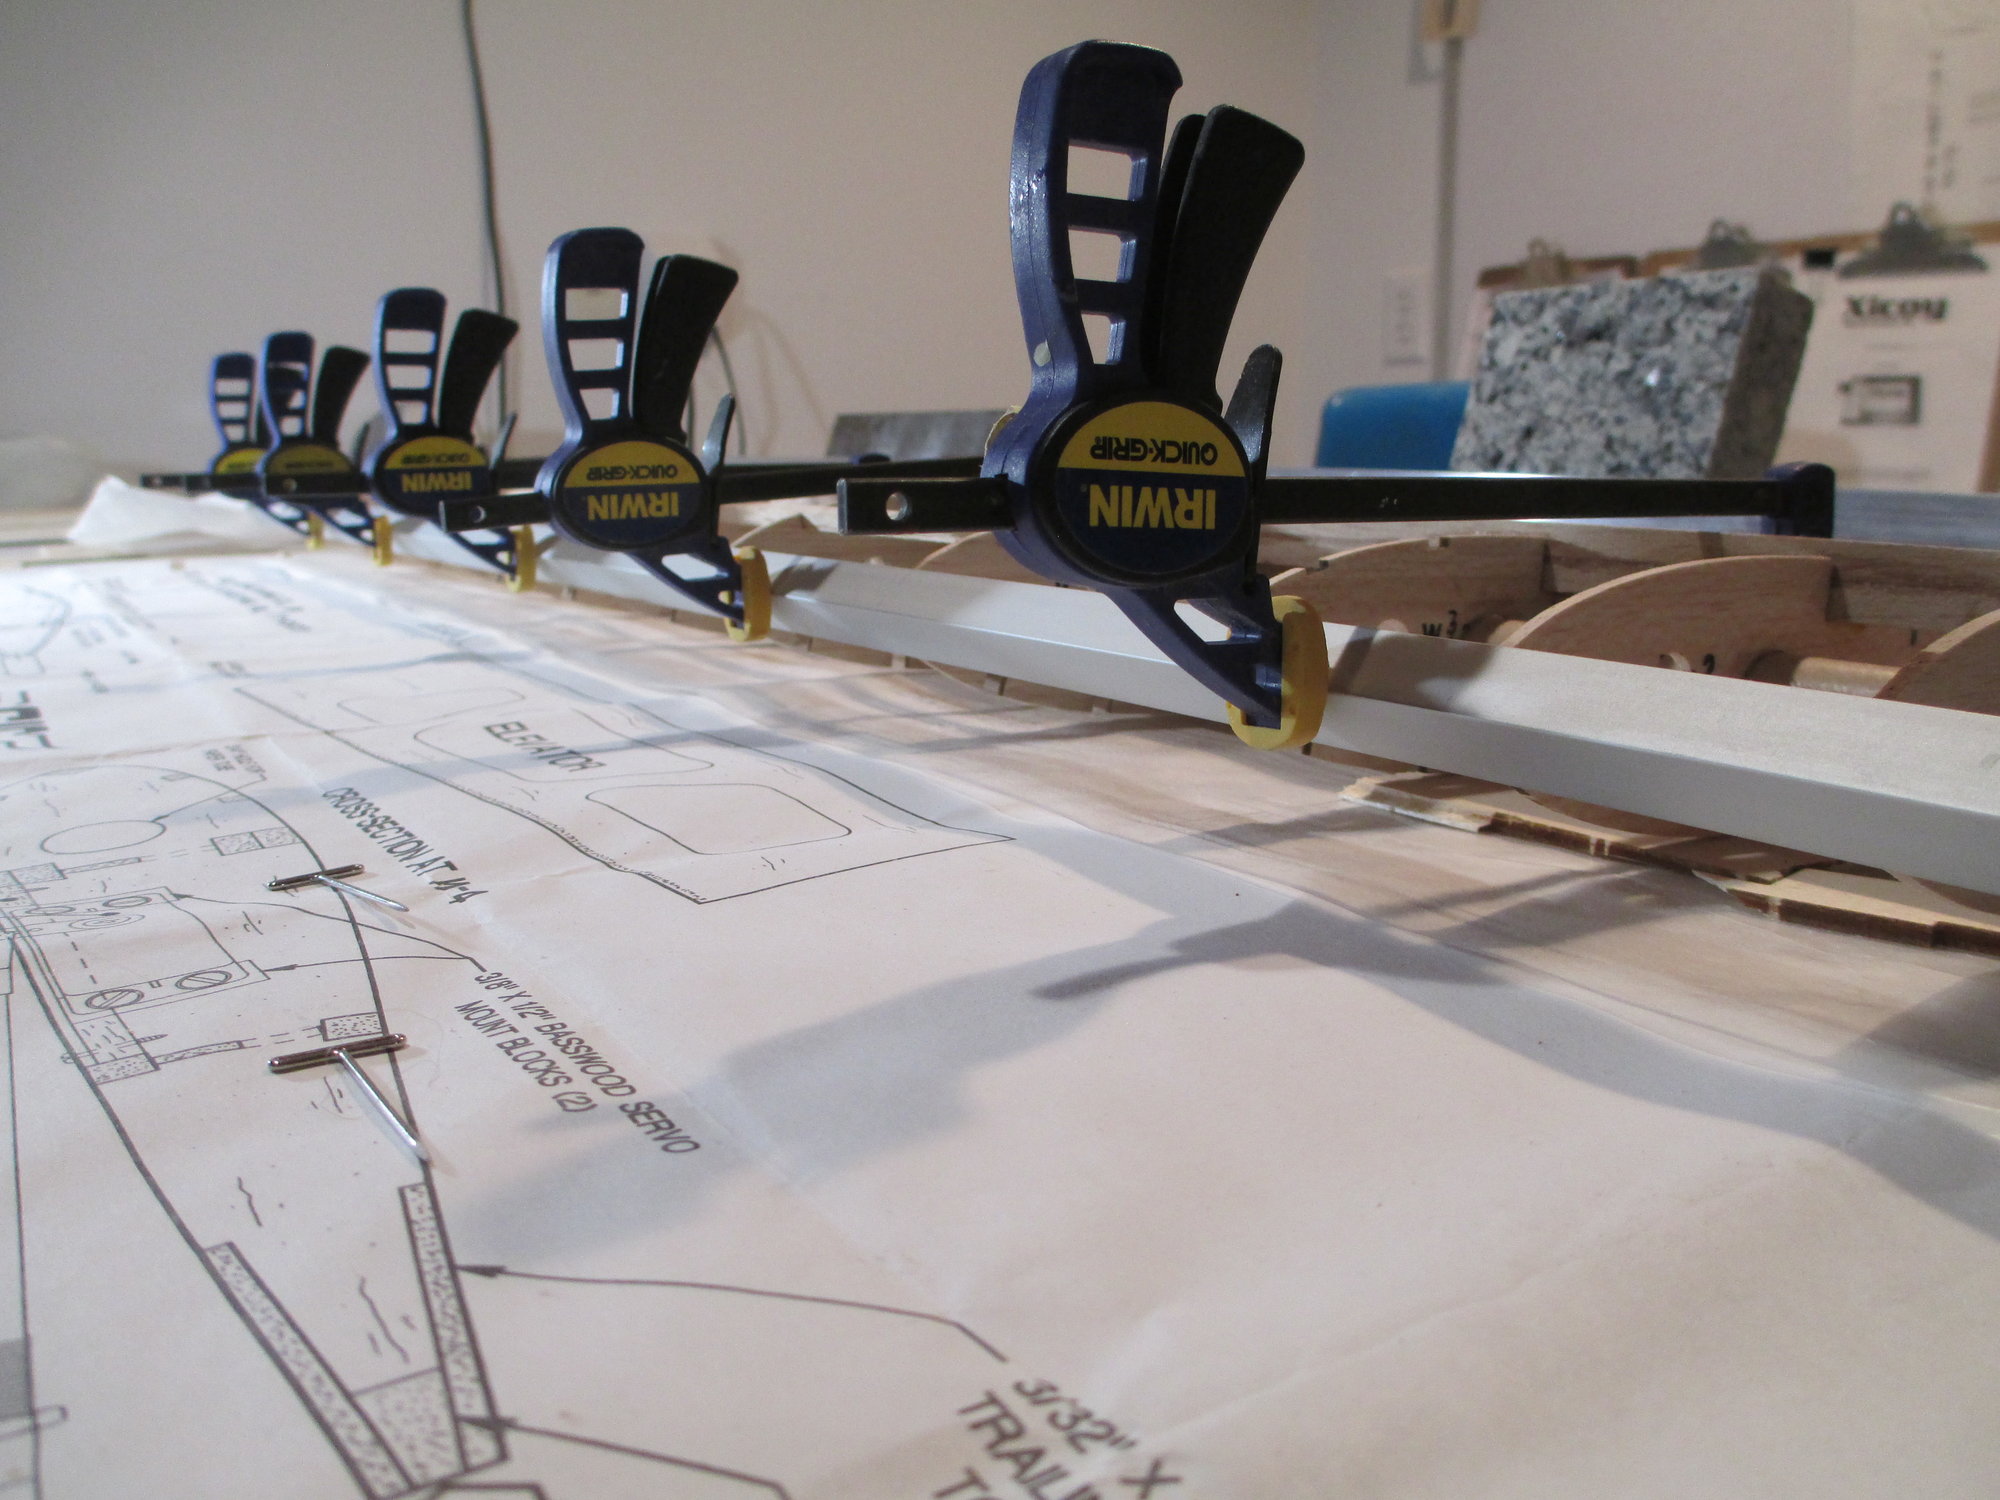
Installing the wing's LE is a snap if you have a length of angle aluminum and some clamps.
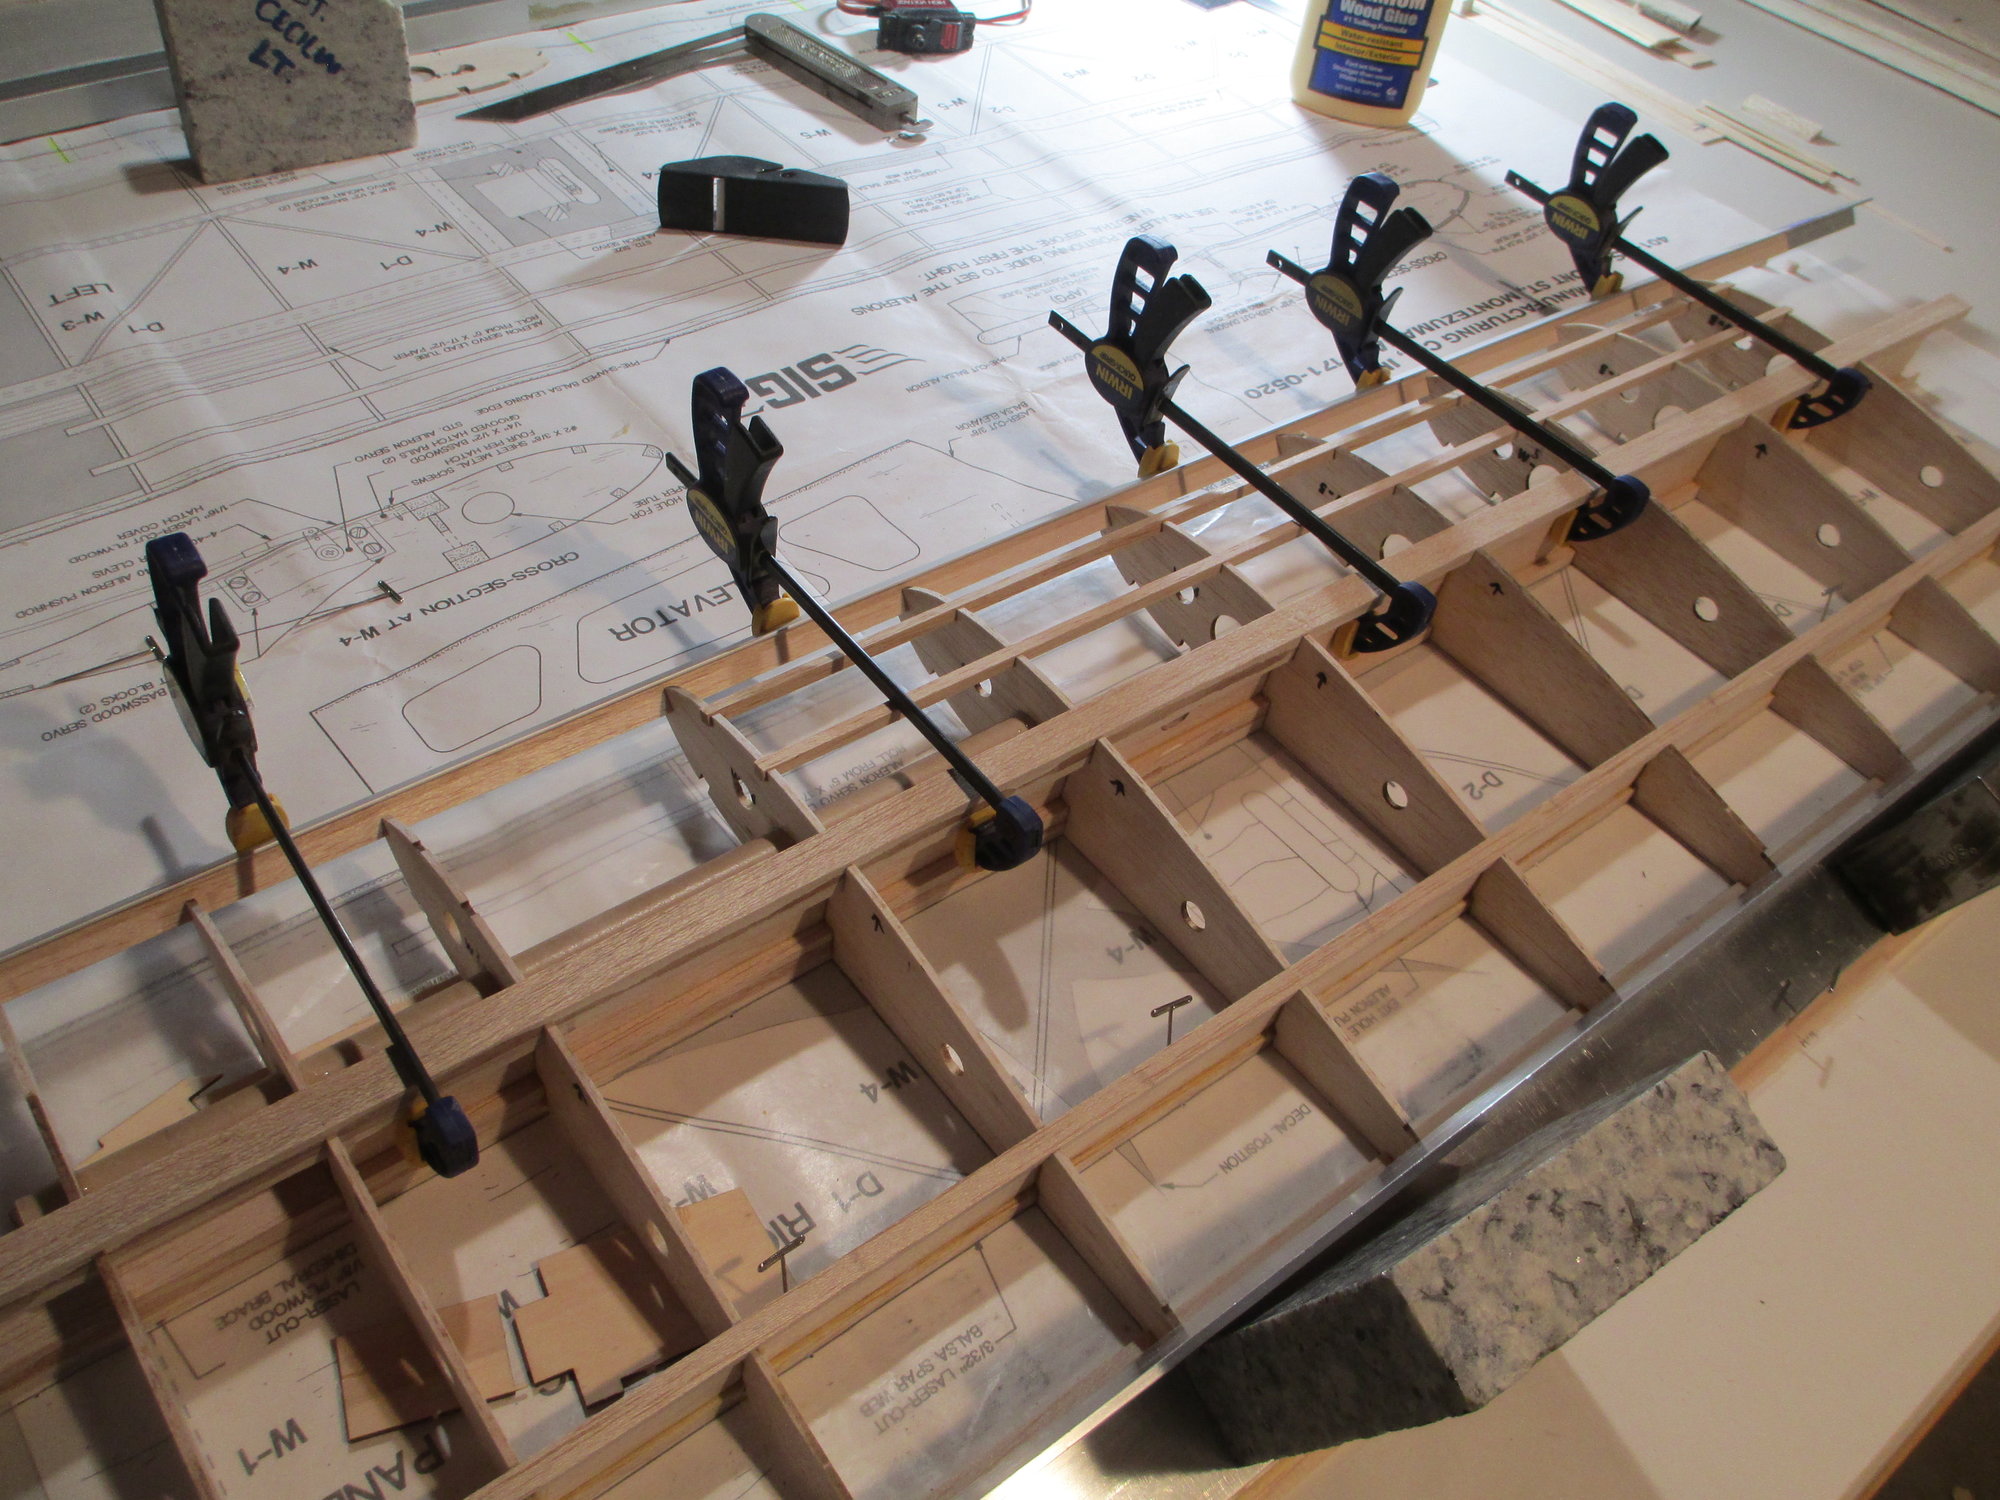
The angle aluminum keeps the LE straight and prevents the softer balsa from getting crushed while clamping.
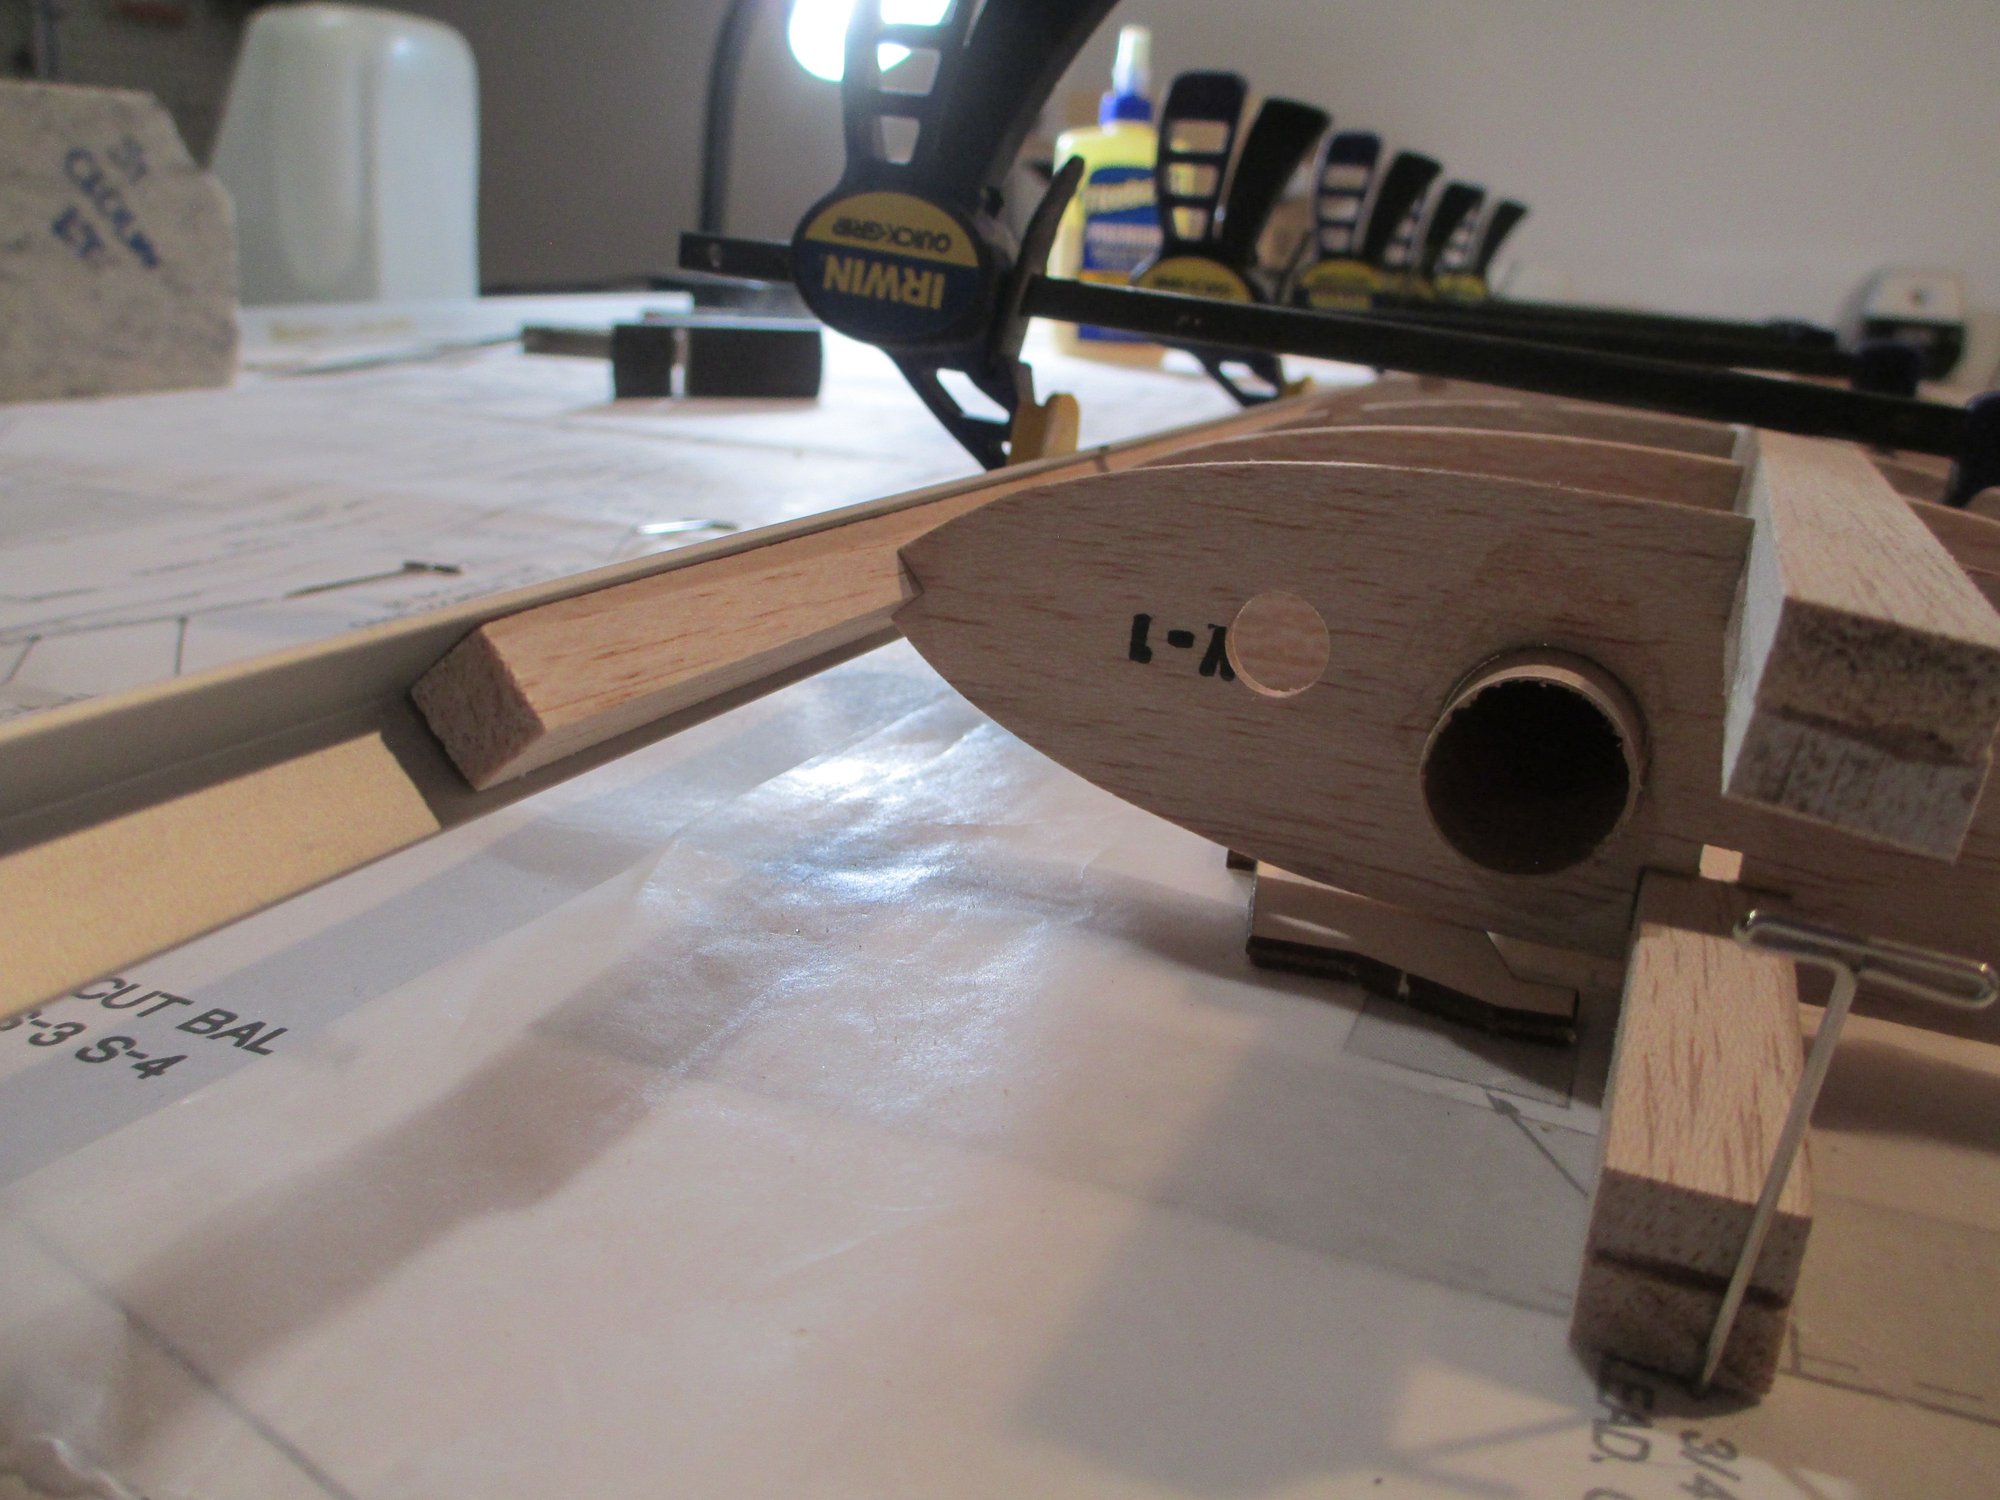
A close-up view.
Six hinge blocks which need to be shaped then glued into the TE.
Installing the wing's LE is a snap if you have a length of angle aluminum and some clamps.
The angle aluminum keeps the LE straight and prevents the softer balsa from getting crushed while clamping.
A close-up view.
The following users liked this post:
Wully (12-21-2021)